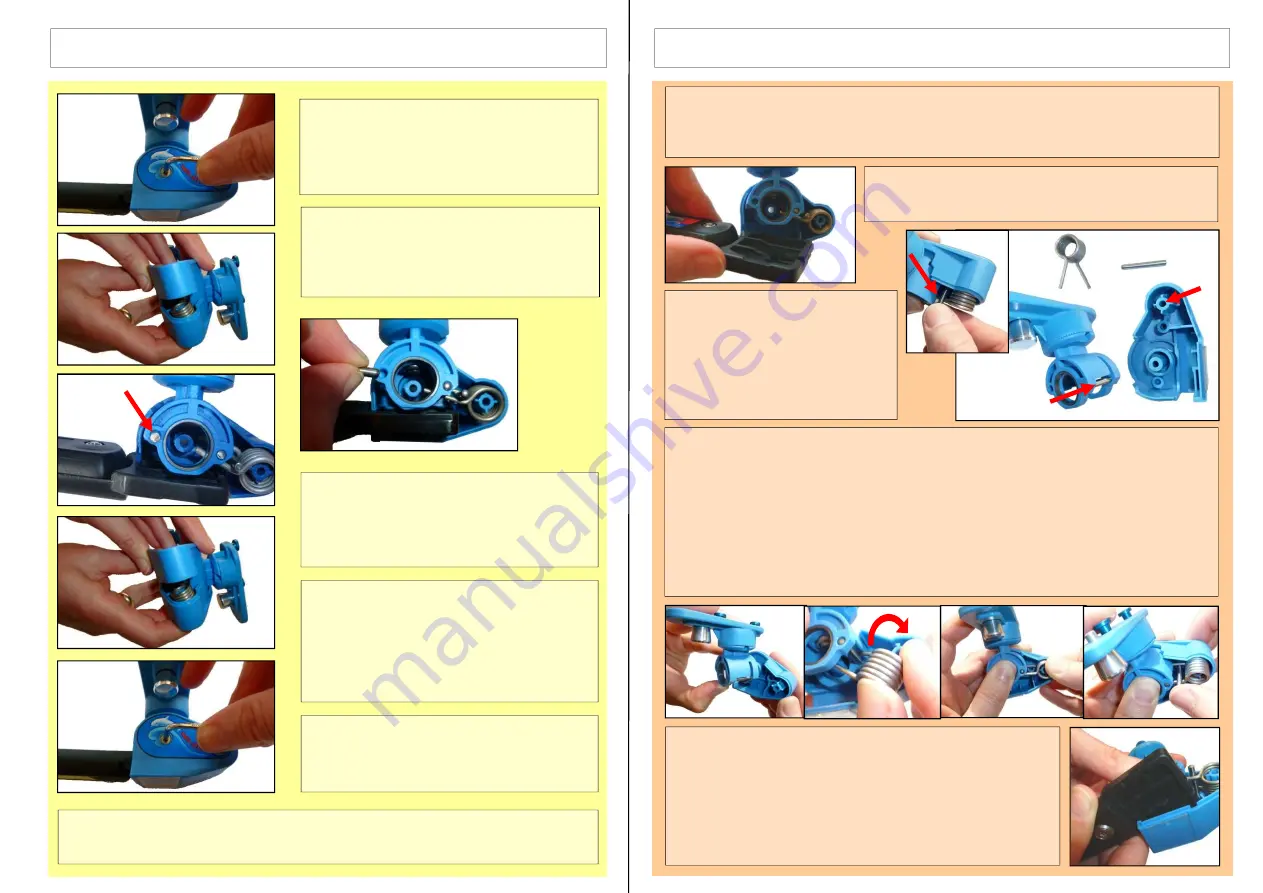
Locking the BETA Flex Brace
Inserting the stronger springs
1. Loosen both screws that hold the
two halves of the rotor casing
together (Torx-key T 10).
2. Turn the brace and pull off the
casing half
on the reverse side
.
3. Insert the locking pin as far as it
will go into the hole in the inner
part of the rotor.
4. Close the rotor casing again. In
doing so, the locking pin catches
in the hole provided on the inner
side of the rotor casing.
5. Reconnect the two halves of the
rotor casing with the two screws.
6. Repeat the process with the other rotor casing.
1.
Lubricate the new springs
with spindle grease on the inside and outside
.
2. Open the rotor casing according to points 1 and 2 in the instructions on the
left.
3. Remove the rotor casing from the brace base.
4. Remove the metal pin from
its position between the
arms of the spring. Then
remove the spring. This
loosens the inner part of the
rotor.
5. Insert the inner part of the rotor into the rotor case again and keep it fixed in
its position.
6. Insert the new spring so the lower spring arm is over metal pin 2, and the
upper spring arm is under metal pin 2.
7. Turn the spring into the correct position while keeping the tension and push it
onto the plastic dome of the rotor casing.
8. Insert metal pin 1 into the hole provided in the rotor casing between the
spring arms.
9. Replace the brace base in the rotor casing.
10. Close the rotor casing according to points 4 and 5 in
the instructions on the left.
11. Repeat the process with the other rotor casing.
1
2
3b
4
3a
5
3
4a
4b
se
5
6
7
8
9
Inner Part of
the Rotor
Metal Pin 2
Rotor Casing
Spring
Metal Pin 1
Upper
Arm
Lower
Arm
Dome


