background image


 54M Wireless MiniPCI Adapter User Guide 


- 12 - 

3.2.1 Add or Modify a Configuration Profile 

To add a new configuration profile, click 

New

 on the Profile Management tab. To modify a 

configuration profile, select the configuration from the Profile list and click 

Modify

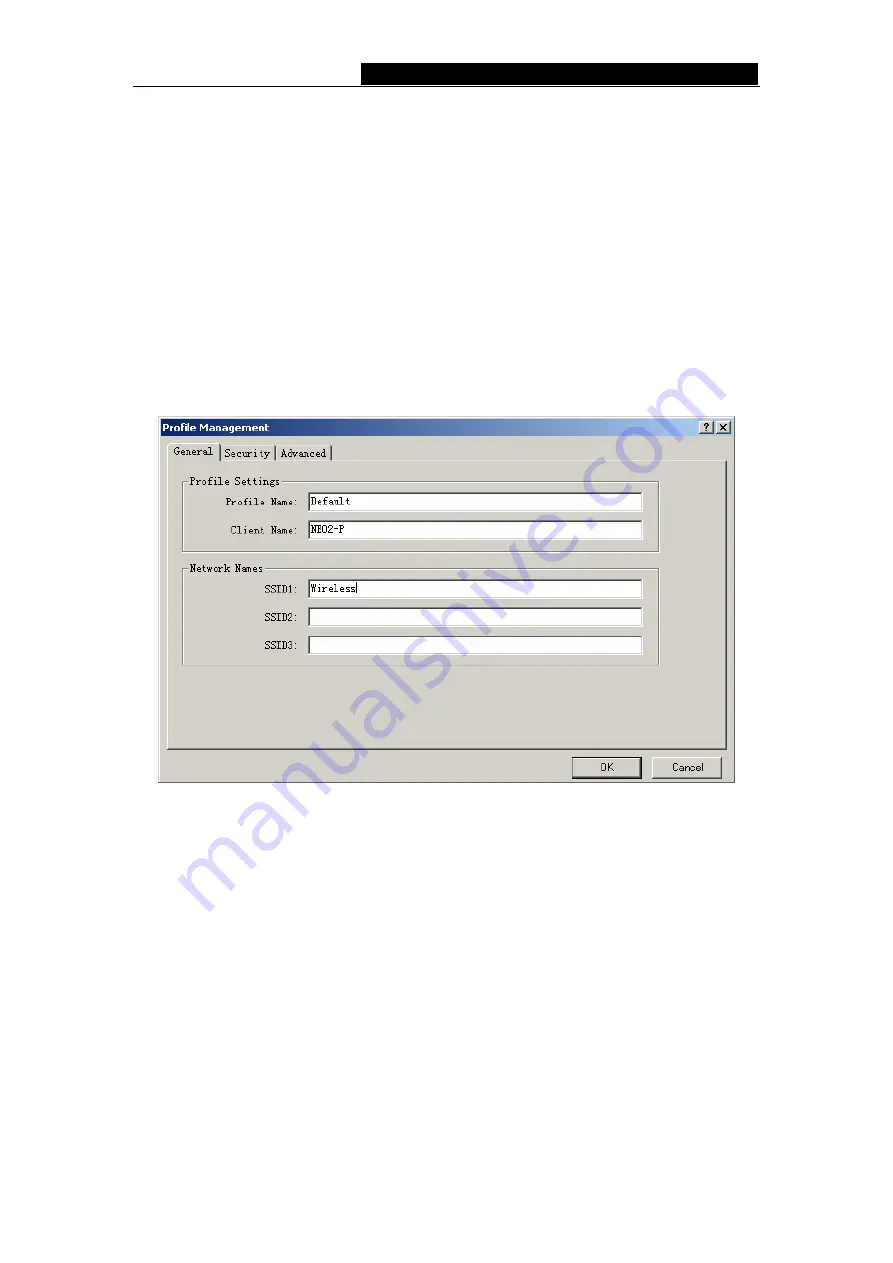
The Profile Management dialog box will display a screen similar to that shown in Figure 

3-4. 

1.  Edit the General tab 

¾


Profile Name -

 Identifies the configuration profile. This name must be unique. Profile 

names are not case-sensitive. 

¾


Client Name -

 Identifies the client machine. 

¾


Network Names (SSIDs) -

 The IEEE 802.11 wireless network name. This field has a 

maximum limit of 32 characters. 


Figure 3-4    General Tab of Profile Management 

2.  Edit the Security tab 

Edit the fields in the Security tab of Profile Management to configure the profile. To define 

the security mode, select the radio button of the desired security mode.   

¾


WPA -

 Wi-Fi Protected Access 

¾


WPA Passphrase -

 Wi-Fi Protected Access Passphrase 

¾


802.1x -

 Enables 802.1x security. 

¾


Shared Key (Static WEP) -

 Enables the use of shared keys that are defined on both 

the access point and the station. To define shared encryption keys, choose the 

Shared Key radio button and click 

Configure 

to fill in the Define Shared Keys 

window. 

None:

 No security (not recommended). 

Note

: If the access point that the wireless adapter is associating to has WEP set to 

Optional and the client has WEP enabled, make sure that Allow Association to Mixed 

Summary of Contents for NMP-3601

Page 1: ...IEEE802 11b g Wireless MiniPCI Card NMP 3602 NMP 3601 User s Manual V1 0...

Page 2: ...p to 152 bit WEP and WPA encryption for high security It adopts 2x to 3x eXtended RangeTM WLAN transmission technology so that transmission distance is 2 3 times of traditional 11g b solutions up to 8...

Page 3: ...ge Contents The following contents should be found in your box One 802 11B G Wireless miniPCI module Note If any of the listed contents are damaged or missing please contact the retailer from whom you...

Page 4: ...2 2 Software Installation 2 2 1 Overview The Adapter s Setup Wizard will guide you through the Installation procedure for Windows 2000 XP The Setup Wizard will install the Wireless Client Utility WCU...

Page 5: ...3 To continue click Next on the screen figure 2 2 Click Cancel to end the Installation Figure 2 2 Wireless Client Utility Installation Program 4 The Setup Wizard will ask you to choose a Setup type i...

Page 6: ...allation Click Back to return to the previous page or click Cancel to end the Installation Figure 2 3 Select the setup type 5 Figure 2 4 should appear Click Yes to continue the Installation or click N...

Page 7: ...own in figure 2 6 It is recommended that you keep the default value Click Next to continue the Installation Click Back to return to the previous page or click Cancel to end the Installation Figure 2 6...

Page 8: ...ested thoroughly and are able to work with the operating system Figure 2 8 Widows 2000 Warning Box Note In Windows XP the warning box is similar to that shown figure 2 8a Please select Continue Anyway...

Page 9: ...54M Wireless MiniPCI Adapter User Guide 8 Figure 2 9 Finish...

Page 10: ...SI is less than 5dB If the icon is yellow there is poor signal strength and the RSSI is between 5dB and 10dB If the icon is green there is good signal strength and the RSSI is between 10dB and 20dB If...

Page 11: ...ude Infrastructure access point Ad Hoc Configure the network type on the Advanced tab of Profile Management IP Address Displays the computer s IP address Current Channel Shows the currently connected...

Page 12: ...gement tab of the WCU Utility and the Profile Management screen will appear figure 3 3 The Profile Management screen provides tools to Add a profile Edit a profile Remove a profile Switch to another P...

Page 13: ...imum limit of 32 characters Figure 3 4 General Tab of Profile Management 2 Edit the Security tab Edit the fields in the Security tab of Profile Management to configure the profile To define the securi...

Page 14: ...tab of Profile Management Figure 3 6 Define Shared Keys 3 Edit the Advanced tab Power Save Mode Maximum Selects maximum mode to let the access point buffer incoming messages for the wireless adapter...

Page 15: ...he channel the wireless adapter uses The channels available depend on the regulatory domain If the adapter finds no other ad hoc adapters the channel that the adapter starts the ad hoc network with wi...

Page 16: ...he Profile Management tab click Import The Import Profile will then appear 2 Browse to the directory where the profile is located 3 Highlight the profile name 4 Click Open the imported profile will th...

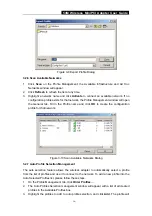
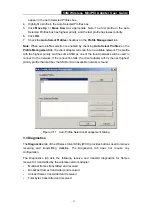
Page 17: ...file name and click OK to create the configuration profile for that network Figure 3 10 Scan Available Networks Dialog 3 2 7 Auto Profile Selection Management The auto selection feature allows the wir...

Page 18: ...y and the same SSID as one of the found networks will be used to connect to the network If the connection fails the client adapter will try the next highest priority profile that matches the SSID unti...

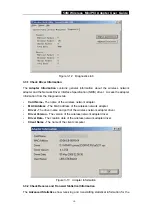
Page 19: ...me of the wireless network adapter MAC Address The MAC address of the wireless network adapter Driver The driver name and path of the wireless network adapter driver Driver Version The version of the...

Page 20: ...54M Wireless MiniPCI Adapter User Guide 19 following receive and transmit diagnostics for frames received by or transmitted to the wireless network adapter Figure 3 14 Advanced Statistics...

Page 21: ...user is encouraged to try to correct the interference by one of the following measures Reorient or relocate the receiving antenna Increase the separation between the equipment and receiver Connect the...

Page 22: ...ANT NOTE In the event that these conditions can not be met for example certain laptop configurations or co location with another transmitter then the FCC authorization is no longer considered valid an...

Reviews: