10
ENAMEL RATER MANUAL: V.10
2.3
ADJUSTING AND CONNECTING THE CAN STAND
In order to make use of the electrolyte level checking facilities of
the , it is important that the can stand is adjusted correctly
for the height of can to be tested. Referring to
Fig.2
proceed as
follows:-
i.
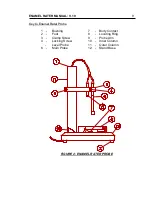
Raise outer column (item 11) and place can through the
can locating ring (item 8) onto the body contacts (item 7).
ii.
Lower the outer column.
Note
If at any time the outer column will not return to
its normal position resting on the stand base
(item 12) due to the cable fouling inside, then
raise the outer column and rotate clockwise for
several turns until the column moves freely
again.
iii.
Slacken clamp screw (item 3) using the 3mm hex wrench
supplied, and slide the probe arm (item 9) so that the
bottom of the level probe (item 5) is at the minimum
permissible electrolyte level and the outer column is firmly
against the stand base.
iv.
Tighten the clamp screw making sure the main probe
(item 6) is central in the can. Take care not to overtighten
the clamp screw as this will cause the outer column to
bind on the inner column.
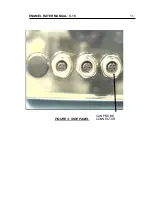
The can stand is now ready for use and should be connected to the
via the probe socket (refer to
Fig.3
). This connector is
polarised so it must be aligned before insertion. Always screw in
the locking ring and tighten finger-tight to ensure it is sealed against
electrolyte.

