- 6 -
01/2021
Copyright © 2021, Fast ČR, a.s.
EN
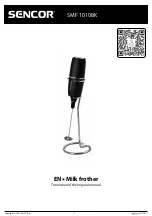
Milk frother
User's manual
■
Prior to using this appliance, please read the user's manual thoroughly, even in cases
where you have previously familiarised yourself with the operation of similar types
of appliances. Only use the appliance in the manner described in this user's manual.
Keep this user's manual in a safe place where it can be easily retrieved for future use.
■
We recommend saving the original cardboard box, packaging material, purchase
receipt and responsibility statement of the vendor or warranty card for at least the
duration of the legal liability for unsatisfactory performance or quality. In the event
of transportation, we recommend that you pack the appliance in the original box
from the manufacturer.
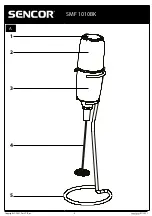
DESCRIPTION OF THE APPLIANCE
A1
On/Off button
A2
Battery compartment cover
A3
Motor unit with battery
compartment
A4
Stainless steel whisk
A5
Stand
BEFORE FIRST USE
■
Before first use, take the product and its accessories out of the packaging material
and remove all promotional labels and stickers. Check that neither the product nor
any of its parts is damaged. Wipe the product using a clean, dry cloth.
Battery Installation
■
Before first use or in the event of reduced performance, it is necessary to insert new
batteries.
■
Turn the battery compartment cover
A2
anticlockwise and pull it out upwards.
■
Place two new type AA/LR6 batteries (2× 1.5 V) into the battery compartment. When
inserting the batteries, heed correct polarity.
■
Put the battery compartment cover
A2
on to the motor unit
A3
. Ensure that the tabs
on the inner side of the battery compartment cover
A2
fit into the grooves on the
motor unit
A3
. Then turn the battery compartment cover
A2
clockwise until you
feel slight resistance.
Note:
When changing batteries, it is necessary to first remove the old batteries.
Assembly
■
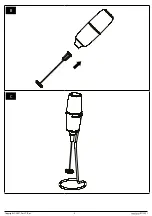
In order to use the milk frother, insert the stainless steel whisk
A4
into the hole in
the motor unit
A3
– see fig.
B
.
Operation
■
Before using it, check that the batteries are correctly inserted and that the milk
frother is correctly assembled.
1. Fill a tall glass / cup to 1/3 with the milk that you wish to froth.
2. Insert the milk frother into the glass / cup so that the whisk
A4
is submerged just
below the surface.
3. Press the On/Off button and the milk frother will start.
4. Carefully move the milk frother in circular motion just below the milk level.
5. Once bubbles start to form, slowly pull the milk frother upwards so that the whisk
A4
is submerged both in the milk and in the formed frothed layer.
6. When the milk is sufficiently frothed, press the On/Off button and wait for the whisk
A4
to come to a stop. Only then may you take it out of the frothed milk.
Tip:
To achieve a rich milky foam, it is recommended to use well cooled milk with a higher
fat content.
Note:
Always wait for the whisk
A4
to come to a complete stop before removing
it from the frothed milk. If you were to take it out sooner, milk would be
splashed around.
Tip:
If you wish to froth hot milk, use milk with a maximum temperature of 60 °C. If the milk
were to have a higher temperature, the result of the frothing may not be satisfactory.
Stand
■
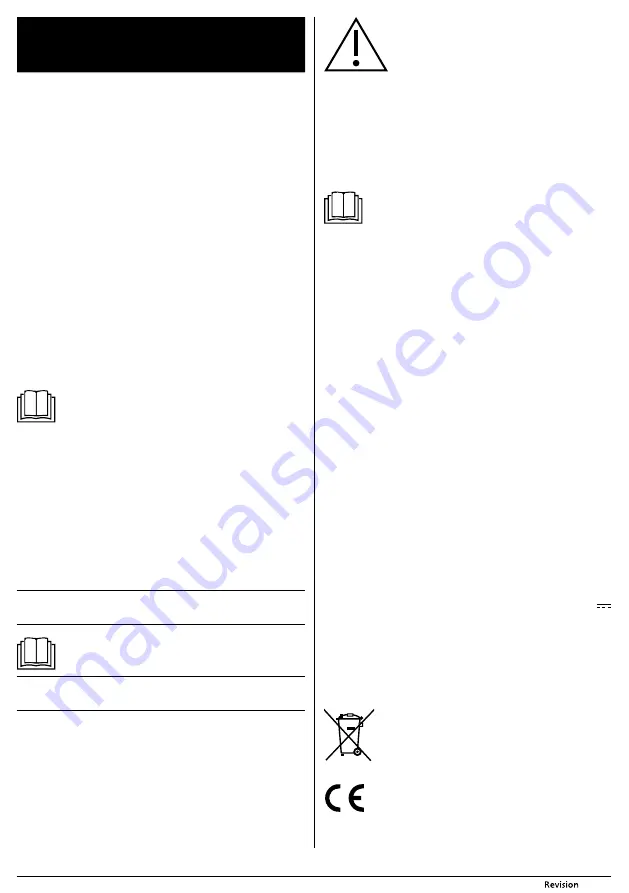
The milk frother is supplied with a practical stand
A5
into which the milk frother can
be conveniently placed so that it is ready for use in an appropriate place, e.g. next
to an espresso machine.
■
Carefully place the milk frother into the stand
A5
– see fig.
C
.
CLEANING AND MAINTENANCE
■
The milk frother must be cleaned after every use. Dried on milk residues may be
very hard to remove.
■
For cleaning any part of the product, do not use cleaning products with an abrasive
effect, solvents, etc. that could damage the surface of the appliance. No part of this
product is intended for washing in a dishwasher.
Warning:
Do not submerge the motor unit in water or in any other liquid.
This could result in irreparable damage to the product.
Cleaning the whisk
The whisk
A4
must be cleaned after every use.
1. In order to properly clean the whisk
A4
, fill the glass / cup about half way with water
and a small amount of dishwashing detergent, and insert the milk frother into the
water so that the whisk
A4
is submerged in the water.
2. Press the On/Off button and allow the milk frother to run until all the milk residues
on the whisk
A4
are removed. Press the On/Off button to turn off the milk frother.
3. Carefully take the whisk
A4
off the motor unit
A3
and rinse it under clean cold water.
Dry it using a clean wiping cloth or leave it to dry naturally. Insert the clean whisk
A4
into the motor unit
A3
and put it into the stand
A5
.
Note:
In the event that dried milk residues remain on the whisk
A4
, you can use
a brush with gentle bristles to remove them.
Cleaning the motor unit
■
To clean the motor unit
A3
, you can use a soft cloth lightly dipped in lukewarm
water. Prevent any water from entering into the motor unit
A3
.
Storage
■
When not using the milk frother for an extended period of time, take the batteries
out of it and clean it according to the instructions in chapter "
Cleaning and
maintenance
".
■
Put the milk frother into the stand. Store it in a dry and well-ventilated location.
RECIPES
Vienna coffee
■
Pour 125 ml of strong black coffee into a cup.
■
Froth up about 100 ml of milk and fill the cup up with milk froth up to its edge.
Sweeten to taste.
Marocchino
■
Warm up about one spoon of milk chocolate and pour out the inner sides of a glass
with this warm chocolate.
■
Pour one espresso into the glass. Froth up some milk and add 3 – 4 teaspoons of
milk froth into the glass.
■
Sprinkle the milk froth with cocoa.
Hot chocolate
■
Froth up some hot milk and add cocoa or a hot chocolate mix into it. Mix thoroughly.
■
You can add a liqueur to taste, e.g. Amaretto.
Ice chocolate
■
Add a little hot chocolate mixture or chocolate syrup into cold milk.
■
Froth up the milk with the chocolate mixture.
■
Add a scoop of vanilla ice cream and pour over with a small amount of chocolate
syrup.
Milkshake
■
Add some fine jam or fruit syrup into cold milk. Froth up the milk into a smooth
foam.
TECHNICAL SPECIFICATIONS
Voltage ............................................................................................................................... 2 × 1.5 V
Battery type ...........................................................................................................1.5 V; type AA (LR6)
Changes to text and technical parameters are reserved.
INSTRUCTIONS AND INFORMATION REGARDING THE
DISPOSAL OF USED PACKAGING MATERIALS
Dispose of used packaging material at a site designated for waste in your municipality.
DISPOSAL OF USED BATTERIES
Batteries contain environmentally damaging compounds and,
therefore, do not belong in standard communal waste. Hand over
used batteries for proper disposal at locations intended for their
collection.
This product meets all the basic requirements of EU directives related to
it.

