26
4.3 TCP/IP Protocol Configure
4.3.1 Virtual Server Mapping
Sometimes, the operator can expose the internal servers on the local
intranet to the public Internet. For this, you must create the Virtual Server
Mapping for these invisible internal servers.
Select the
“/General Config/ Virtual Server/”
,
and then the
General
Configuration - Virtual Server
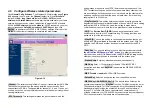
screen appears. Figure 4-3 show the
current virtual server entry table. (
Default Virtual Server Mapping pool is
empty
)
Figure 4-3
General Configuration - Virtual Server
1. Click
Add
.
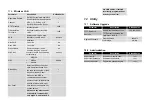
The Virtual Server Entry Edit page
Figure 4-4
appears.
2. To edit the Virtual Server Entry, specify all the entry fields to allow
Internet user to access the Internal servers.
Service Name
: Alias name of this internal server, such as FTP.
27
Access Interface
: Indicate the translation occurs on which interface
(Wireless interface / Ethernet interface), such as Ethernet.
Protocol
: Indicate which protocol (TCP/UDP) you want to translate
from outside to internal server, such as TCP.
Public Access Port number
: Indicate which socket port (1 ~ 65535)
you want to translate from outside to internal server, such as 21.
Virtual Server IP address
: Specify the private IP address of the
internal server, such as 192.168.1.100.
Virtual Server Port number
: Specify the socket port (1 ~ 65535) of the
internal server, such as 21.
3. Click
OK
. The Virtual Server Entry Table appears with the entries list.
4. To modify or delete a virtual server entry, click the select button beside
the entry index number and click
Modify
or
Delete
.
5. To add another entry to the Virtual Server Mapping Pool, repeat step 1
through step 3.
6. When you have included all the entries you need, click
FINISH .
Figure 4-4 Add
Virtual Server Entry


