background image

SLDY0014W  


3 / 4 

www.senslights.com


Email:

info@senslights.com


Operation


1)


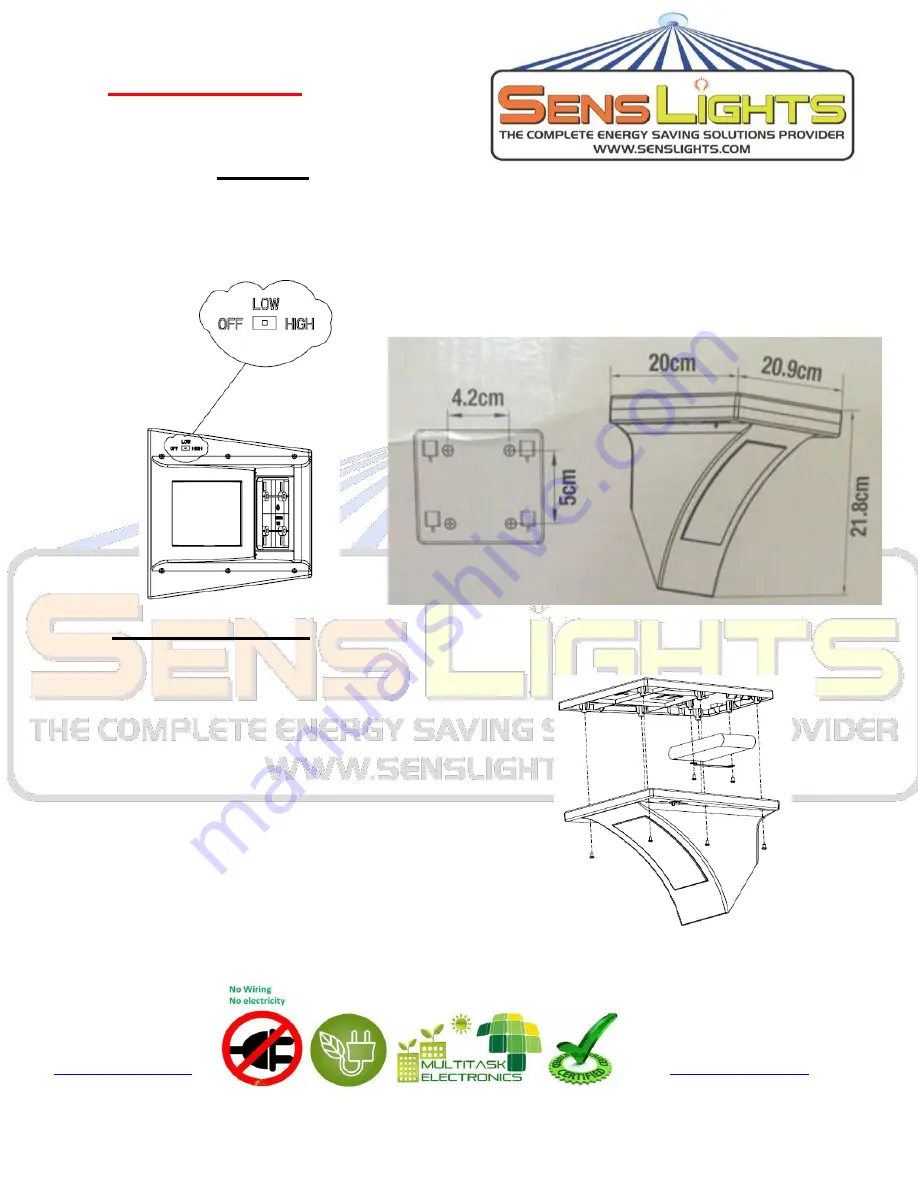
Turn the button to the “LOW/HIGH” position so that the batteries can fully charge before use. 

2)


After  the  initial  2-day  charging  period,  your  solar  lights  are  ready  for 

use.  Your  light  will  now function automatically. 


Replacing the Batteries


1)


Take off the 4 screws with screwdriver and replace the 

old Ni-Mh batteries. Make sure the new batteries are Ni- 

Mh rechargeable batteries. 

2)


Install  the  new  batteries  in  to  the  battery 

compartment,  ensuring  the  correct polarity is 

observed. 

3)


Reassemble the unit by reversing the above procedure. 

Summary of Contents for SLDY0014W

Page 1: ...l 3 5W high efficiency Polycrystalline PV module Battery 1PC Ni Mh 2000mAh batteries maintenance free Controller Intelligent controller light time intelligent control waterproof IP 44 guard level various protections over charge and over discharge protect function Lumen 200lm LED Source 12 pcs 0 2w LEDs high brightness LED LED Type φ 0 3w LED colors white Average Life hrs 35000 Average operation ti...

Page 2: ...solar panel and generally free from cover and shade When locating a suitable position for the unit remember that it detects an area of about 45 60 degrees vertically and about 90 120 degrees horizontally with a range of over 5 meters 2 The solar light must be left to charge for 2 sunny days before first time use so that best results are achieved Assembly Instructions Lamp installations 1 Choose th...

Page 3: ...riod your solar lights are ready for use Your light will now function automatically Replacing the Batteries 1 Take off the 4 screws with screwdriver and replace the old Ni Mh batteries Make sure the new batteries are Ni Mh rechargeable batteries 2 Install the new batteries in to the battery compartment ensuring the correct polarity is observed 3 Reassemble the unit by reversing the above procedure...

Page 4: ...in the shade during the day 3 Make sure the switch is in the auto position 4 Check that the batteries are installed correctly Maintenance Clean the solar module regularly with a damp towel to guarantee optimum performance of the solar panel Do not use any type of solvent for cleaning and be careful not to put too much pressure on the module while cleaning If you need any support please contact sup...

Reviews: