Neon Family
User Manual
Sensormetrix is a division of Sequoia Technology Group Ltd
Registered in England No. 4004881
VAT Registration No. GB614 5653 45
Sensormetrix
sales
+44 (0) 845 451 2021
Basingstoke Road
fax
+44 (0) 118 976 9020
Spencers Wood
sales@sensormetrix.co.uk
Reading
web
www.sensormetrix.co.uk
Berkshire RG7 1PW
Page 34 of 39
2.
Right click the networking icon in the bottom right of the display. The icon will either be
for a wireless
connection or
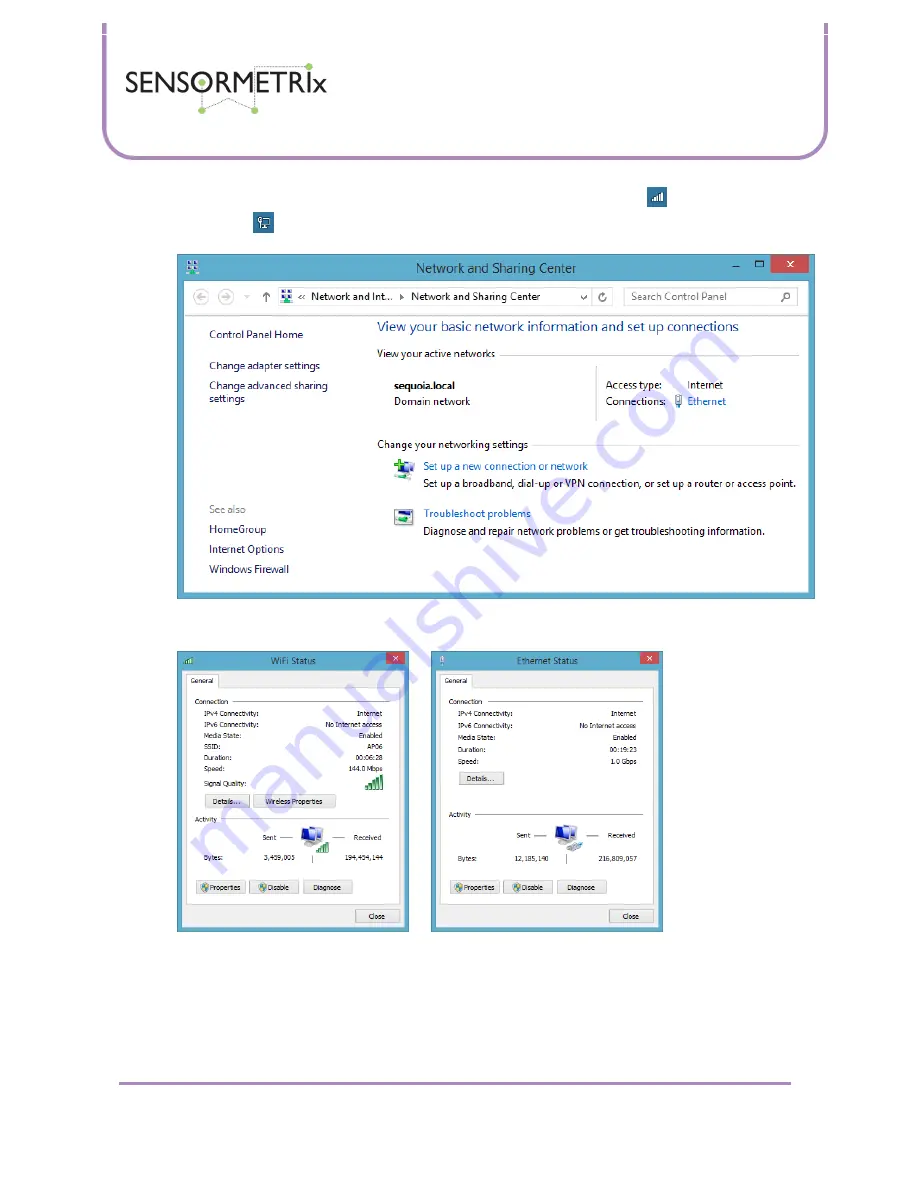
if the network connection is wired. Two options will appear. Select “Open Network and Sharing
Centrer” by left clicking on that option. The Network and Sharing Center window will open:
3.
Left click on “Ethernet” (wired connection) or WiFi (wireless connection) in the right hand section of the window
under the “View your active networks” heading. If the connection is WiFi, the access point name should be
displayed in brackets after WiFi. The WiFi or Ethernet Status box appears.
4.
Clicking the Details button will display the current network settings of the PC. These have probably been assigned
automatically by the DHCP server in the network. The DHCP Enabled setting in the connection details box will
verify this. The other important parameter to note is the currently assigned IPv4 address (which will have been
assigned by the DHCP server if it is enabled). In order to connect to a factory default settings Neon, the PC’s IP
address will have to be 192.168.1.xxx where xxx is a number between 1 and 255 (but not 4).


