FP400 initial calibration
Page 64
FP400 Product Guide
The default settings for intrusion detection are based on extensive field experience with other
fence protection systems. You can increase, or decrease, the number of fence cuts (Events)
required to trigger an alarm, and adjust the Event Threshold to increase, or decrease, the signal
strength at which a fence disturbance becomes an Event. You can also increase, or decrease, the
amount of time added to the Alarm Window each time the Event Count is incremented. The Event
Count and Alarm Window can be changed to meet a specification or site requirements. If your site
does not specify values for the Event Count and Alarm Window parameters, Senstar recommends
using the default values and changing the values if you encounter a problem with detection
sensitivity or nuisance alarms.
Setting the cut detection parameters
1.
Open a UCM magnitude response plot, and select the Zone number and Magnitude.
2.
Select the Record button to start the plot.
3.
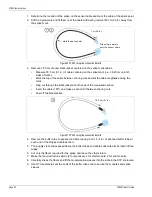
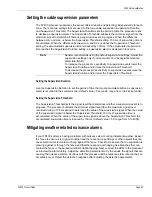
Beginning on the first fence panel, have the tester conduct cut simulations by striking the
fence with a medium size screwdriver.
4.
Strike the fence 4 times, waiting about 2 seconds between strikes.
5.
Proceed along the fence testing each panel with 4 strikes. Wait about 45 seconds between
panels for the alarm to reset. Conduct some of the tests in the middle of a fence panel and
some of the tests near the fence posts.
6.
When you reach the end of the zone stop the plot and review the recording.
7.
Verify that each series of 4 fence strikes caused an alarm. If any of the tests did not cause an
alarm, investigate the fence panel, repair if necessary, and then repeat the test on that panel.
8.
If the recorded responses were on the high side, you can raise the Event Threshold to help
prevent nuisance alarms. If the recorded responses were on the low side, verify that the RX
cable gain was calibrated and then you can lower the Event Threshold to help ensure
adequate detection. If you adjust any detection parameters, retest the zone.
Setting the climb detection parameters
For climb intrusion detection, the best method for setting up the detection parameters is to actually
climb on the protected fence. You do not have to climb over the fence as long as the climbing
activity is representative of an actual climb intrusion and exceeds the Event Duration time setting.
Conduct the initial climb testing at the processor’s default settings. The Alarm Window is set at 30
seconds, the Event Threshold is 25 and the Event Duration is set at 3 seconds. This means that
for an alarm to occur, the processor must record 3 seconds of climbing activity with a signal
magnitude above 25, within a 30 second period.
1.
Open a UCM magnitude response plot and select the Zone number and Magnitude.
2.
Select the Record button to start the plot.
3.
Beginning on the first fence panel, have the tester begin climbing on the fence. Monitor the
response plot to verify that the climbing activity is accumulating (Event Duration) and the
Event Count is increasing.
4.
Watch the signal magnitude as the climber moves on the fence. The resulting signal
magnitude must exceed the Event Threshold for the Event Duration, or reach the Event Count
setting.
5.
If the climbing activity does not result in a detection signal above the Event Threshold, lower
the Event Threshold and repeat the test.
Note
The Count parameter also applies to climb intrusions and will often
cause an alarm before the Event Duration can accumulate enough time
to cause an alarm.


