- 26 -
2)
Uncoil the control hose. Inspect the control hose for any cuts or damage which would prevent an airtight seal
between the control unit and the exposure device. Inspect the end fittings to assure that they are tightly connected
and are not damaged.
3)
Ensure the control hose connects securely to both the actuator fittings of the device and the control unit.
4)
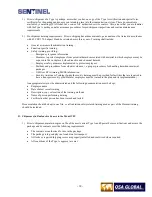
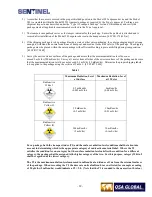
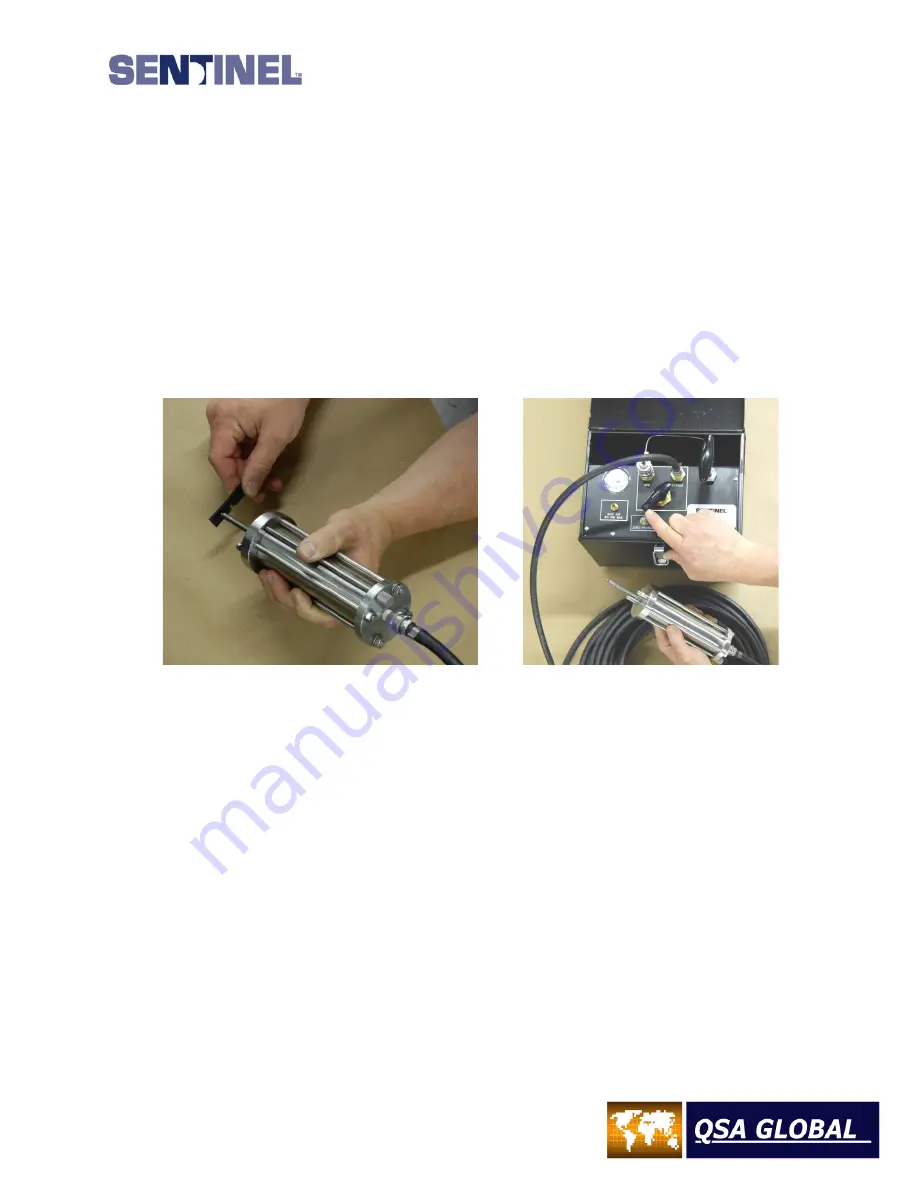
Attach the air hose between the pneumatic actuator and the air pump control. With the control unit in the “Off” or
“Vent” position, pressurize the control unit to 25-30 psi. This will expose the actuator rod and male connector out
of the pneumatic actuator body. The air pump control must be re-pressurized after turning the switch to the
“exposed” position to maintain a pressure of 25 psi. If the unit cannot be pressurized or maintain this pressurization
level for at least one minute, pressure is leaking from the system between the control unit and control hose to the
exposure device. This problem should be corrected for reliable exposures with the 989 device.
5)
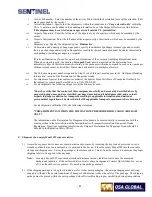
While the male connector is exposed outside of the actuator body, perform the NoGo gage tests as described in the
section C.4.IV of this section.
Figure 17 – ELE027 Actuator with Rod Exposed
Figure 18 – Model 86550 Pump Box Connected
to ELE027 Actuator Assembly
6)
After
completing the pressure test and no-go gage tests, turn the control knob to the “off” position. This will cause
the actuator rod to retract into the actuator body. Depress the “zero pressure” valve to completely exhaust the air
from the system. A reading of zero will register on the pressure gage.
E.
Fixture Kit Component Inspection
Inspect the components of the fixture kit to ensure there is no damage to the components which could prevent safe
attachment to the pipe/device or could fail during a radiographic exposure. Ensure the handle is securely attached to the
mounting bracket and with no loose screws. When attached to the base assembly and exposure device, again, ensure
mounting screws are fully threaded and securely attach the components together as a solid unit.
Expose the strapping on the ratchet strap and inspect for any signs or cuts, or damage in the strap material. Damage to
the strap and/or its solid attachment in the ratchet could lead to a failure during a radiographic exposure causing the
exposure device to fall after attachment to the pipe. Any damage to the ratchet strap that could affect its reliable
performance during radiographic exposures should be cause to remove the ratchet strap from use and replace for future
operations.
Ensure the rods and clamp are undamaged, the clamp can securely engage the rods and that these items can connect to
the base assembly as required for use during radiographic exposures. Damage to components that would prevent their
reliable performance during exposures is cause to remove the items from use and replace prior to future exposures.
Summary of Contents for 989
Page 1: ...MAN 037 October 2017 ...


