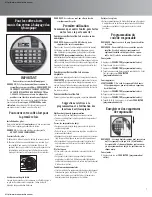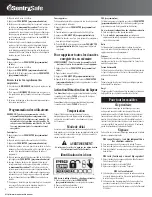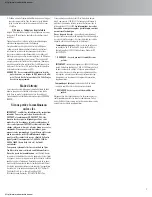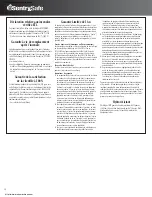
Programming users
NOTE: You must program a manager code before
programming a user. Six (6) users are allowed.
All zeros is an invalid code. A personal 4-8 digit
user code will be programmed and then the
fingerprints will be enrolled.
To add:
1.
Press
PROG/ENTER
.
2
.
Enter the 4-8 digit manager code.
3.
Press
PROG/ENTER
.
4.
Use the
<<
and
>>
keys to scroll between the lighted boxes.
An empty box means it is available for a code entry. A boxed
lighted
*
means it is being used.
5.
Enter your new user code consisting of 4-8 digits, and then
press
PROG/ENTER
.
6.
When the finger icon blinks, swipe your first finger in a
downward direction
over the fingerprint sensor. Three
accurate reads of the fingerprint are necessary for successful
enrollment. After each successful swipe a beep up will sound
and an asterisk will light. An unsuccessful swipe will result in
an
ERR
signal and a low pitch will sound.
7.
With successful enrollment of the first finger the asterisk
will clear. Swipe your second finger over the sensor. Three
accurate reads are required.
To delete:
This operation will delete both the personal code and
fingerprints of users.
1.
Press
PROG/ENTER
.
2.
Enter the 4-8 digit manager code.
3.
Press
PROG/ENTER
.
4.
Use the
<<
and
>>
keys to scroll to the programmed location
that you want to delete.
5.
Enter
0, 0, 0, 0,
then the
PROG/ENTER
to delete the
selected user.
To delete all programmed memory
WARNING: All manager codes, user codes and
fingerprints will be deleted.
1.
Press
PROG/ENTER
three times.
2.
Enter the 5-digit factory code.
3.
Press
PROG/ENTER
.
4.
Enter
0, 0, 0, 0,
then the
PROG/ENTER
key to delete all
codes and fingerprints.
Beeper on/off
To turn the Beeper
OFF,
press the
CLEAR
and
0
keys at the
same time for 1 second. Beeper will beep once when it turns off.
To turn the Beeper
ON,
press the
CLEAR
and
1
keys at the
same time for 1 second.
Time out
During usage and programming the fingerprint lock will
automatically time out and turn off if there is no input for
30 seconds.
Delay Mode
The lock automatically enters a two-minute delay mode after an
invalid code or fingerprint has been entered three consecutive
times. In this mode, the lock cannot be activated.
WARNING
Do not remove batteries or press any
button. Doing so restarts the 2 minute delay.
Icon identification
ERR
(Error)
indicates one of the following:
1.
You have pressed
PROG/ENTER
key out of sequence.
2.
You have entered an invalid code.
3.
Sensor did not read finger swipe.
PRG (
Program
)
L ights after pressing the
PROG/ENTER
key and stays lit while
programming a manager or user code.
*
(
Asterisk
) indicates one of the following:
1.
A number key has been pressed.
2.
In
Program
mode, it signals a programmed code location
or a successful fingerprint swipe.
Box
L ights during programming and indicates code locations. A box
with an asterisk inside indicates a location with a programmed
code.
Padlock
L ights after three consecutive invalid codes or fingerprint scans
are input and stays lit during the 2-minute delay mode.
Unlocked Lock
L ights when a valid code is entered or a programmed finger is
swiped. Indicates that the safe is unlocked and the door can be
opened.
Battery
Blinks when batteries are low, indicating that the batteries need
to be replaced soon.
Finger
Blinks during fingerprint enrollment and when a finger can be
swiped to unlock the safe.
For all models
Key override
If your electronic lock fails or you do not have any codes
available, you may use a key override to access this unit. Remove
the keypad by rotating the cover counterclockwise, then pull
toward you. Unlock the door by inserting the key provided into
the hole and turning clockwise. Open the door.
Do not lock
override key inside of unit.
Signals
Your electronic-lock safe communicates by means of several
audio/visual signals.
Red (Error) LED + three beeps indicates
one of the following:
1.
You have pressed Program key out of sequence
2.
You have entered an invalid code or passcode.
3.
You have let 5 seconds or more elapse between key entries.
Green (Proceed) LED + single beep occurs
1
.
After entering each digit of Factory or User Code, or Passcode
2.
After pressing Clear key
3.
After pressing Program key
Green LED only
1.
Comes ON after you enter a valid code/passcode and remains
lit during the 4-second period in which the safe can be
opened.
2.
Comes ON in the Program User Code mode after you enter
the Factory Code and remains lit until you have finished enter
ing a 5-digit User Code.
3.
Comes ON in the Program Passcode mode after you have
entered your User Code and remains ON until you have
entered a 5-digit passcode.
Yellow LED – Low Battery Indicator
Indicates “low battery” and will typically not turn OFF until new
alkaline batteries are installed.
Your electronic lock automatically performs a low battery test
during each lock use.
If a “low battery” condition is detected, the Yellow LED will come
ON and remain ON during each subsequent lock operation. (The
lock will continue to function in a Low Battery state, until battery
failure.) The Yellow LED will turn OFF only after three consecu
tive “Good Battery” readings or after the low batteries are
replaced. (Note: When the new batteries are installed, the Yellow
LED may come ON and stay ON during the first lock operation
before it returns to OFF.)
NOTE: When changing the batteries, you must use the
factory code to open. (See back cover.)
Passcode will have to be re-programmed.
4
http://www.monomachines.com
http://www.monomachines.com


