
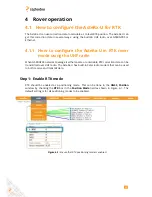
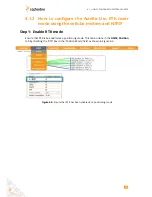

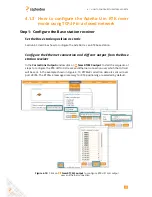
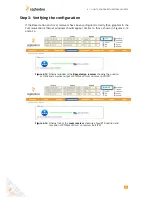
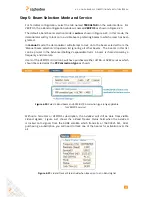
4.1. HOW TO CONFIGURE THE ASTERX-U FOR RTK
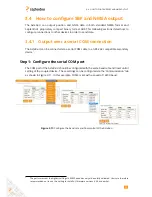
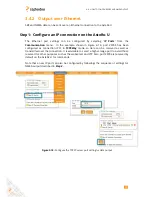
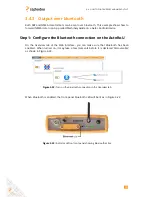
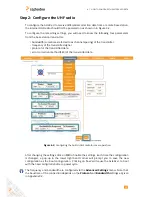
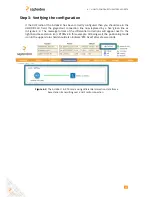
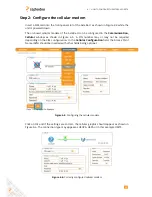
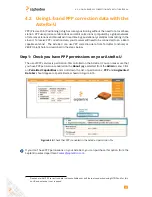
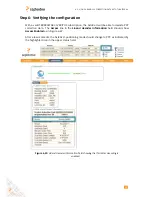
Step 2: Configure the UHF radio
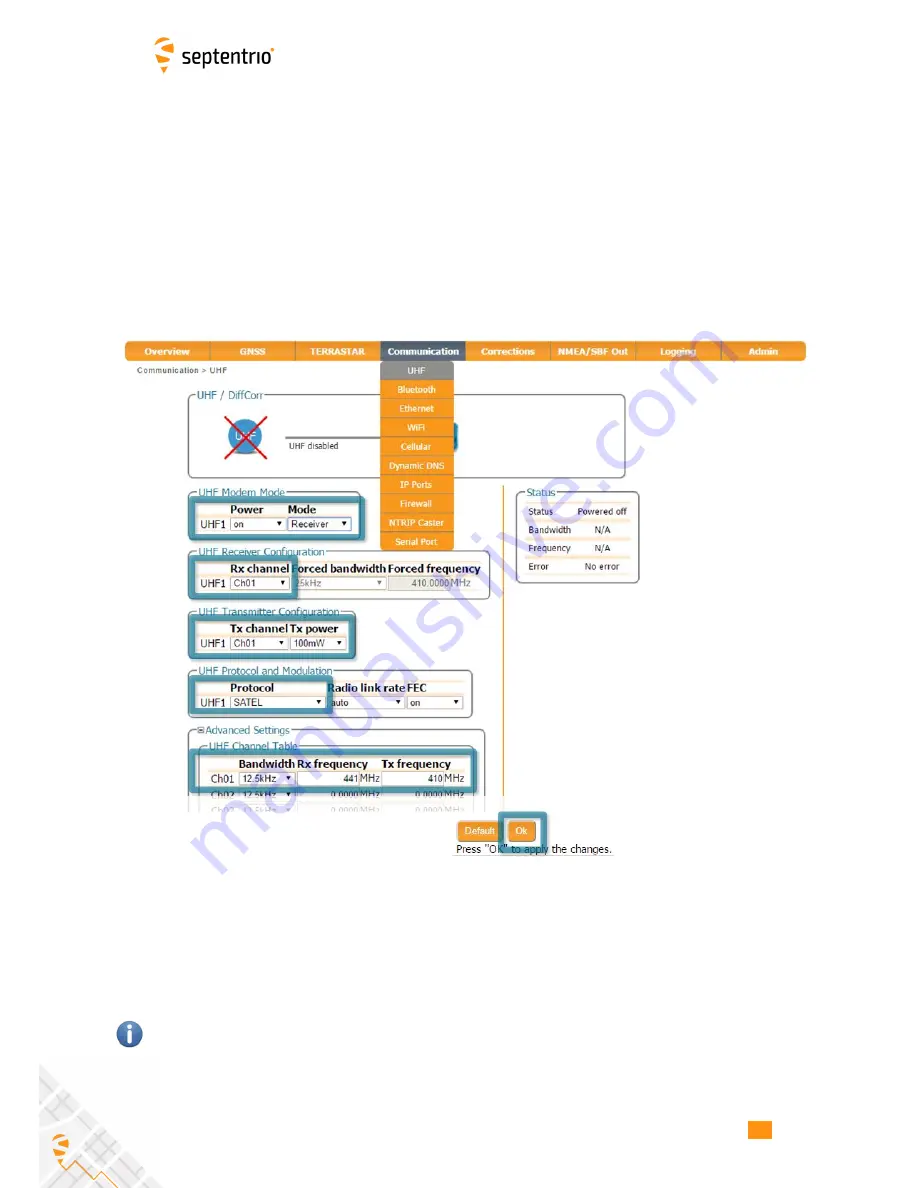
To configure the AsteRx-U to receive differential correction data from a remote base station,
the internal UHF radio should first be powered on as shown in in Figure 4-2.
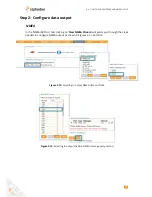
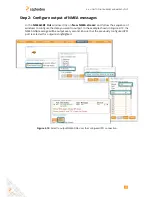
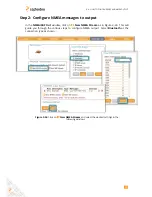
To configure the remaining settings, you will need to know the following four parameters
from the base station transmitter:
• bandwidth (sometimes referred to as channel spacing) of the transmitter
• frequency of the transmitted signal
• protocol of the transmitted data
• error correction method (FEC) of the transmitted data
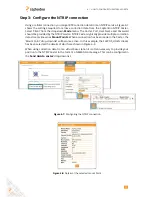
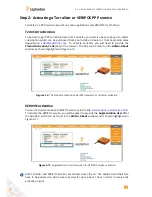
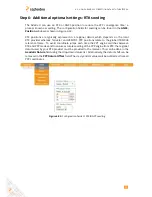
Figure 4-2:
Configuring the built-in UHF radio for rover operation
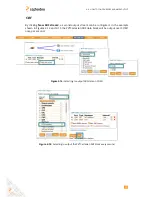
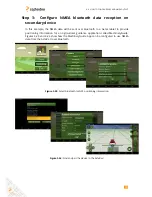
After changing the settings click on
OK
to finalise the settings. Each time the configuration
is changed, a pop-up in the lower right-hand corner will prompt you to save the new
configuration as the boot configuration. Clicking on ‘Save’ will cause the AsteRx-U to boot
with the new configuration after a power cycle.
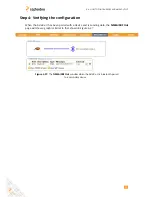
The frequency and bandwidth are configured via the
Advanced Settings
menu. Note that,
the baud rate of the connection depends on the
Protocol
and
Bandwidth
settings as given
in Appendix 9.2.
33
Summary of Contents for AsteRx-U
Page 1: ...AsteRx U User Manual ...


