l
F.8L Falco Construction Manual
23–9
Revision 4, March 1, 2002
❏
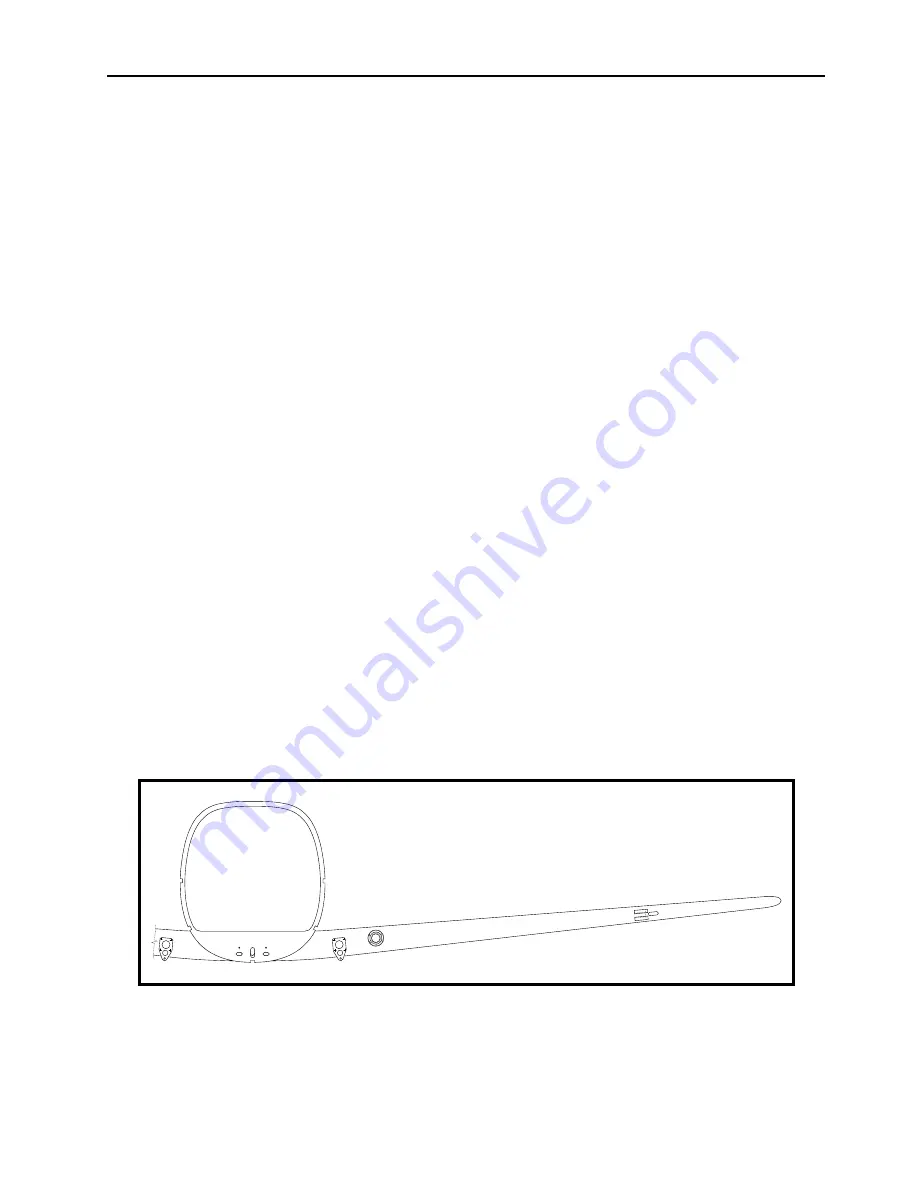
Place frame No. 4 on the forward face of the wing spar. The top of the inside of the
fuselage frame and the top of the main wing spar should line up. Line up the centerline of
the fuselage frame and the main wing spar.
❏
Trace the outline of the lower center longeron cutout on the forward face of the main
wing spar. Trace the outline of frame No. 4 on the forward face of the main wing spar.
Remove the fuselage frame from the spar.
❏
Compare the mark for the bottom center longeron to the trim lines shown in Section B-B,
Drawing No. 205. If everything is perfect, these dimensions should agree, and you can
mark the trim lines on the spar to match fuselage frame No. 4. The bottom of the wing
spar must be sanded to contour so that it will fit on top of the bottom center longeron and
the dimensions in Section B-B will give you the correct angle to the bottom of the spar.
❏
Sand the bottom of the spar at the center of the airplane to the required contour. (The
resulting cross-sectional area will be equal to or greater than the cross-sectional area at
wing Sta. 1, so don’t worry about this.)
❏
From Sta. 1 to Sta. 14, sand the top and bottom of the spar as shown by the trim lines and
to the contour shown on the wing rib drawings—use templates made from these drawings.
It is not essential to profile the spar exactly to the final shape, but it is a good idea to do
most of the planing and sanding now. The final sanding will be done after the ribs are
glued on.
❏
Sand the bottom of the spar inboard of Sta. 1. The contour transitions smoothly from the
shape at Sta. 1 to the shape at the center of the spar. Keep the curves as smooth as
possible. Don’t get too worried about this—when the bottom of the fuselage and wing are
skinned, you will be adding a few shims to this area.
❏
Mask off all gluing surfaces and varnish all surfaces on the front face of the main wing spar
which will become internal surfaces when fuselage frame No. 4 is glued in place.
❏
Mask off all gluing surfaces and varnish all internal surfaces of fuselage frame No. 4.
Figure 10
❏
Glue frame No. 4 to the main wing spar. Make sure that the frame is correctly positioned
on the main wing spar. This is an important glue joint, so you should exercise great care
in using the proper gluing technique.
Summary of Contents for F.8L Falco
Page 1: ...F 8L Falco Construction Manual...
Page 7: ...l F 8L Falco Construction Manual Revision 4 March 1 2002...
Page 21: ...l F 8L Falco Construction Manual 1 8 Revision 4 March 1 2002...
Page 29: ...l F 8L Falco Construction Manual 2 8 Revision 4 March 1 2002...
Page 43: ...l F 8L Falco Construction Manual 5 4 Revision 4 March 1 2002...
Page 65: ...l F 8L Falco Construction Manual 9 6 Revision 4 March 1 2002...
Page 81: ...l F 8L Falco Construction Manual 10 16 Revision 4 March 1 2002...
Page 109: ...l F 8L Falco Construction Manual 15 4 Revision 4 March 1 2002...
Page 133: ...l F 8L Falco Construction Manual 17 10 Revision 4 March 1 2002...
Page 145: ...l F 8L Falco Construction Manual 18 12 Revision 4 March 1 2002...
Page 173: ...l F 8L Falco Construction Manual 21 10 Revision 4 March 1 2002...
Page 229: ...l F 8L Falco Construction Manual 23 40 Revision 4 March 1 2002...
Page 387: ...l F 8L Falco Construction Manual 28 26 Revision 4 March 1 2002...
Page 393: ...l F 8L Falco Construction Manual A 6 Revision 4 March 1 2002...


