l
F.8L Falco Construction Manual
26–8
Revision 4, March 1, 2002
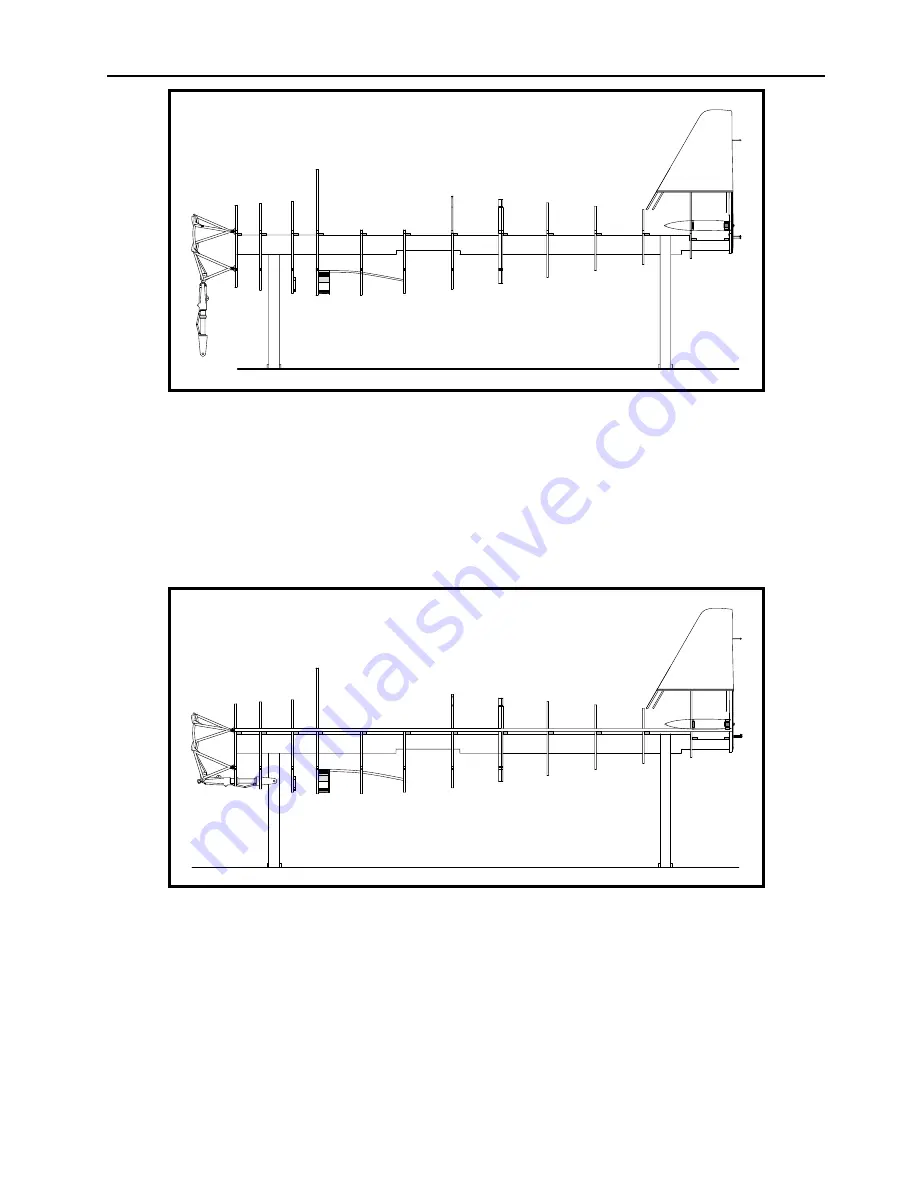
Figure 14
❏
Install fuselage frame No. 1 on the jig with its “one by two” brace. See Figure 14.
❏
Install a nylon fishing line through the hole in frame No. 1 at the aircraft centerline and
W.L. 0. Run this line through the tail section. Secure this alignment string on each end
and pull tight.
❏
Use a water level to check that this alignment string is level.
Figure 15
❏
Clamp the upper side longerons in position. See Figure 15. Until you are absolutely
certain that everything is in the exact position, there is no need to do the final sanding for
the longeron fit in the longeron cutouts. Align the frame so that the nose gear is located
in the center of the nose gear bay.
Summary of Contents for F.8L Falco
Page 1: ...F 8L Falco Construction Manual...
Page 7: ...l F 8L Falco Construction Manual Revision 4 March 1 2002...
Page 21: ...l F 8L Falco Construction Manual 1 8 Revision 4 March 1 2002...
Page 29: ...l F 8L Falco Construction Manual 2 8 Revision 4 March 1 2002...
Page 43: ...l F 8L Falco Construction Manual 5 4 Revision 4 March 1 2002...
Page 65: ...l F 8L Falco Construction Manual 9 6 Revision 4 March 1 2002...
Page 81: ...l F 8L Falco Construction Manual 10 16 Revision 4 March 1 2002...
Page 109: ...l F 8L Falco Construction Manual 15 4 Revision 4 March 1 2002...
Page 133: ...l F 8L Falco Construction Manual 17 10 Revision 4 March 1 2002...
Page 145: ...l F 8L Falco Construction Manual 18 12 Revision 4 March 1 2002...
Page 173: ...l F 8L Falco Construction Manual 21 10 Revision 4 March 1 2002...
Page 229: ...l F 8L Falco Construction Manual 23 40 Revision 4 March 1 2002...
Page 387: ...l F 8L Falco Construction Manual 28 26 Revision 4 March 1 2002...
Page 393: ...l F 8L Falco Construction Manual A 6 Revision 4 March 1 2002...


