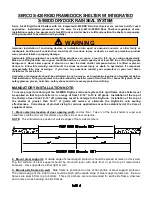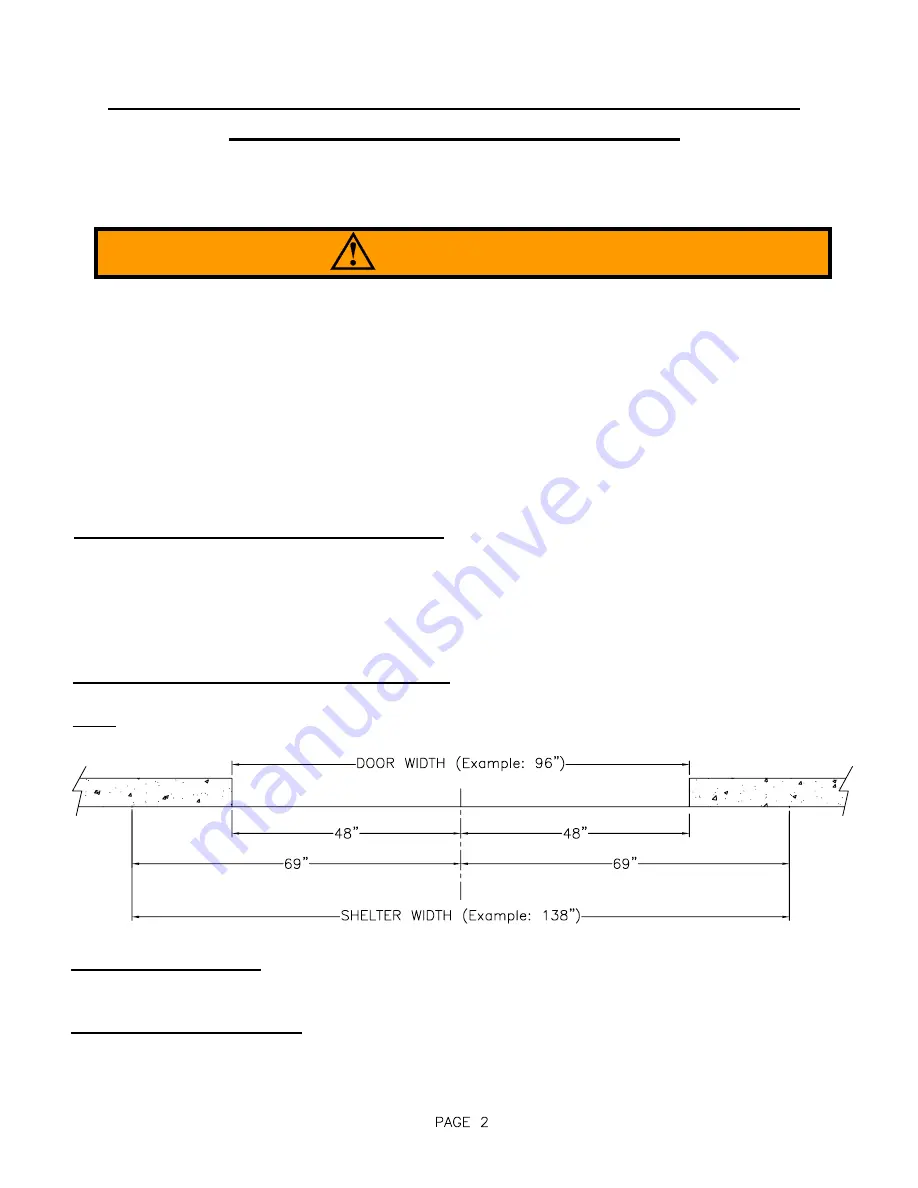
1. Mark centerline location
of door opening width
on dock floor. Take ½ of the truck shelter or wiper seal
head frame width and mark this distance on either side of door centerline.
NOTE:
This will determine position of outside edges of foam side members.
Serco S-420 Rigid Dock Shelters with the integrated S-900DD® Rain Seal System are custom built for each
application. Installation procedures are the same for all S-420/ S-900DD Dock Shelters regardless of size.
Installation requires two people and a forklift truck or similar device to lift and position the shelter components.
Lifting equipment to be determined by installer.
Improper installation of anchoring devices or installation into aged or unsound concrete or other faulty or
inadequate building wall construction could result in serious injury or death, as well as premature product
wear, product failure or property damage.
Inadequate lifting equipment or unsafe lifting practices can cause a load to fall, tip or swing unexpectedly.
Make sure lifting devices are in good condition and have a rated capacity of at least 500 lbs. at the lifting angle
being used. Never allow anyone to stand on or near the dock shelter component when it is lifted or placed.
Failure to follow this warning could result in serious personal injury or death to bystanders if component
unexpectedly falls, tips or swings. If you have any questions contact your supervisor or your local Serco
distributor for assistance.
Assembly of components should be performed in such a way so as to maintain cleanliness of equipment before
final installation. Lifting equipment to be determined by installer (man lift and forklift or boom lift typical). Wear
safety glasses, gloves, hard hats, safety shoes and all necessary protective clothing.
WARNING
MANDATORY INSTALLATION NOTE:
To insure proper functioning of the S-900DD DryDock rain seal system, this rigid frame dock shelter must
be applied so that top of shelter is in a range of from 14’-10” to 15’-2 off grade. Installation of the top of
the shelter at less than 14’-10” off grade may result in damage to the DryDock. Installation of the top of
the shelter at greater than 15’-2” of grade will reduce or eliminate the DryDock’s rain sealing
effectiveness. Correctness of product sizing for various applications must be established at the time of
equipment order.
SERCO S-420 RIGID FRAME DOCK SHELTER W/ INTEGRATED
S-900DD DRYDOCK RAIN SEAL SYSTEM
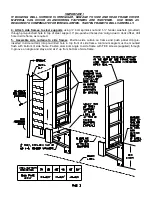
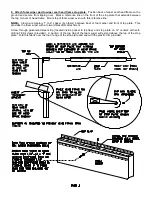
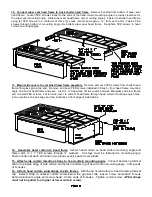
2. Mount steel supports
. Outside edge of steel support protector should be placed at mark on dock wall.
Top flat surface of steel support should be mounted level with dock floor or at the top of raised dock
bumpers. Use supports as either right or left.
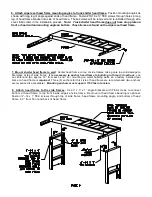
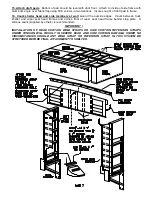
3. Mount side frames to wall
. Side frame is positioned on top of flat portion of steel support protector.
The outside edge of the side frame should be flush with outside edge of steel support protectors. Be sure
frames are plumb from top to bottom. Three (3) anchors are recommended for each side frame. Unscrew
and remove cross banding on side frames.


