background image

www.SereneLifeHome.com

6

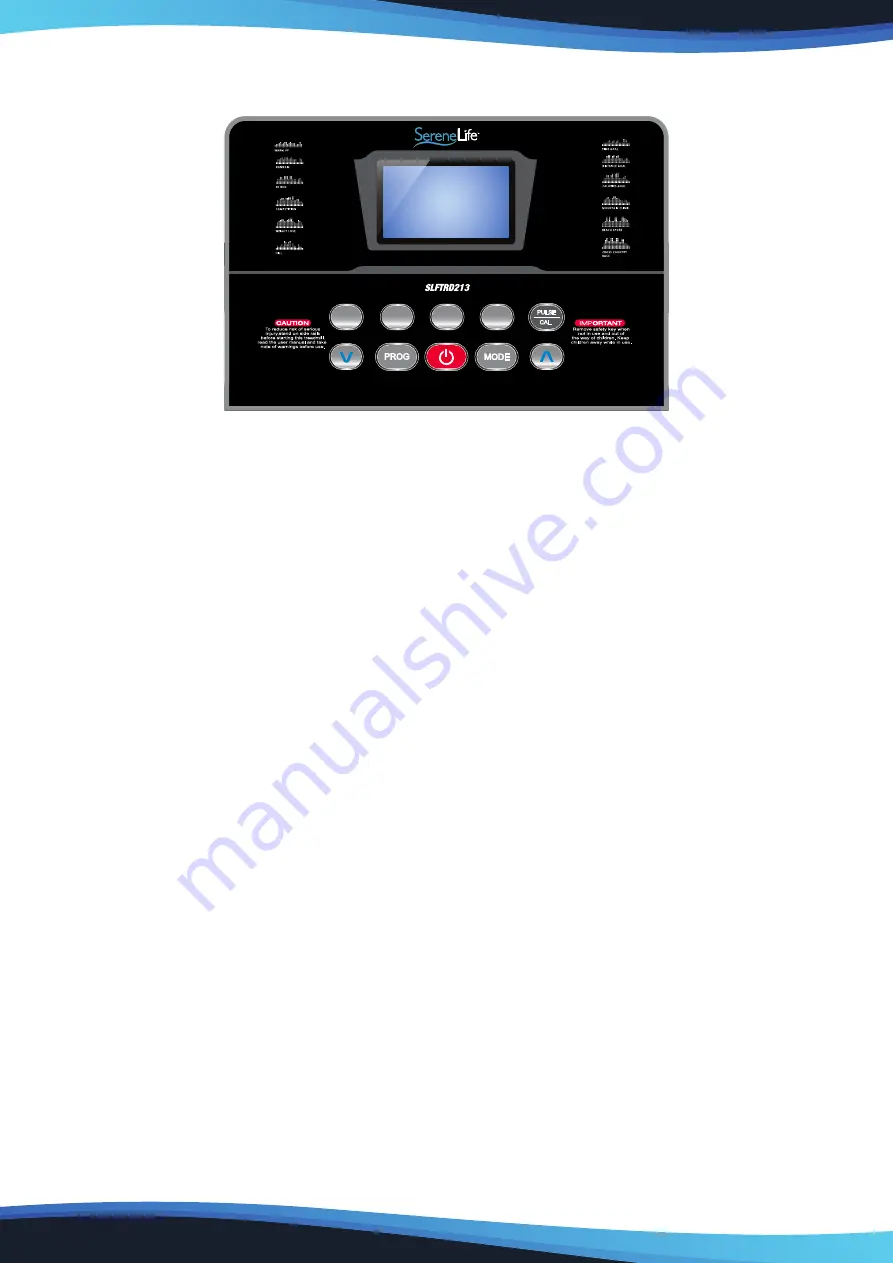
OPERATING THE COMPUTER

NOTE:


Always stand on the side rails when you start the treadmill, never start the treadmill while you 

are standing on the running belt.

QUICK START:

Press the START button on the computer to start exercise, the LCD window will countdown 3 seconds with 
the LCD showing "3-2-1" before the running belt starts moving. The running belt starts moving with an 
initial speed of 0.6 MPH. Always allow the treadmill to reach a speed of 0.6MPH before stepping on to the 
running belt. You may press the SPEED 

 or SPEED 

 button on the computer console or handlebar to 

increase or decrease the running speed during exercise. The split window of SPEED will display your current 
running speed. The speed range is from the minimum 0.6 MPH to the maximum 6.5 MPH. You may also 
press one of the QUICK SPEED buttons (2 / 3 / 4 / 5 ) on the computer console and the split window of 
SPEED will display the speed that you have pressed and the running speed will change to 2 MPH, 3 MPH ,
4 MPH or 5MPH respectively. The split window of TIME will display your elapsed workout time in minutes 
and seconds. The split window of DISTANCE will display the accumulative distance travelled during workout. 
The split window of CALORIES will display the total accumulated calories burned during workout. The split 
window of PULSE will display your current heart rate in beats per minute (BPM). To activate, grip the hand 
pulse sensors on both handlebars during exercise and the pulse will display after 4-5 seconds. For a more 
accurate reading, grip pulse sensors with both hands.

During training, you may press the STOP button on the computer console to stop the treadmill running at 
any time, or pull out the safety tether key to stop the treadmill running.

FUNCTION BUTTONS:
START:

 Press the START button to start training on different training mode.

STOP: 

Press the STOP button to stop training on different training mode.

PROG (PROGRAM): 

Press the PROG button to select the pre-set training program (P01-P12) mode before

training.

MODE:

 Press the MODE button to select different functions (time, distance, or calories) for setting exercise 

goals in manual program mode before training.

10

3

7

5

2

3

4

5

PULSE

CAL

MODE

PROG

P7

P9

P11

P10

P12

P8

P1

P3

P5

P2

P4

P6

Summary of Contents for SLFTRD213

Page 1: ...Folding Treadmill Electric Motorized Running Machine SLFTRD213 12 Pre set Program Digital Smart Treadmill with 4 Selectable Incline Levels...

Page 2: ...d or plug or if it is not working properly If it has been dropped or damaged or been exposed to water return the appliance to a service center for examination and repair Do not attempt any maintenance...

Page 3: ...ust be plugged into a nominal 220 240 volt 50 Hz outlet which has been grounded Keep hands clear of all moving parts Never place hands or feet under the treadmill while in use Do not use the treadmill...

Page 4: ...ort Tubes in place while the other person tightens the bolts Lift both Right and Left Handlebar Support Tubes up and align bolt holes Screw M5X10 2 PCS Hexagon Socket Oval Head Bolt M8x40 2 PCS Hexago...

Page 5: ...e while the other person connects the cables Connect the Control Pad signal cable A from the right handlebar to the signal cable B on right support tube Install the Handlebar Bracket onto the Right an...

Page 6: ...y The split window of TIME will display your elapsed workout time in minutes and seconds The split window of DISTANCE will display the accumulative distance travelled during workout The split window o...

Page 7: ...the computer console or handlebar DISTANCE Displays the accumulative distance travelled during workout Press the START button on the computer to begin exercising the LCD window will countdown 3 second...

Page 8: ...w of CALORIES begin blinking Press the SPEED or SPEED button on the computer console to change the setting The pre set target calorie range is from 10 to 995 calories Once you pre set target calories...

Page 9: ...t Once the device is paired you can start using the application in different categories Quick Run Map Mode Target Mode Please understand that we are not able to offer you a complete operation guide of...

Page 10: ...remove the Lock Pin Adjust the Incline Adjuster to the desired position and insert the Lock Pin into the holes on the main frame and Incline Adjuster to lock the Incline Adjuster in place NOTE Make s...

Page 11: ...should start to correct itself If the running belt is shifting to the right then turn the right adjustment bolt 1 4 turn clockwise and the belt should start to correct itself Keep turning the adjustme...

Page 12: ...tch is off and the power cord is un plugged from wall outlet TROUBLESHOOTING GUIDE This product can expose you to a chemical or group of chemicals which may include Di 2 ethylhexyl phthalate DEHP whic...

Page 13: ...ts resting state at the end of each exercise session A proper cool down slowly lowers your heart rate and allows blood to return to the heart HEAD ROLLS Rotate your head to the right for one count you...

Page 14: ...lowly bend forward from your waist letting your back and shoulders relax as you stretch toward your toes Reach as far as you can and hold for 15 counts HAMSTRING STRETCHES Extend your right leg Rest t...

Page 15: ...nnect via Your Favorite Device Works with Smartphones Tablets Laptops etc Free to Download via Your Smartphone Multifunctional Sports App Connect to the Treadmill via Smart BTM Wireless BT App Provide...

Page 16: ...Questions Issues We are here to help Phone 1 718 535 1800 Email support pyleusa com...

Reviews: