9
Serious Magic
DV Rack Field Guide
Improve Quality While Recording
•
Use Zebra to Improve Lighting and Exposure
•
Analyze Your Clip Quality with DVR Clip Alerts
•
Check Your Audio Signal for Consistency
•
Use the DVR to Review Clips
•
Use Split Screen to Check for Consistency Between Clips
Ok, you are ready to roll! Click the DVR
Record
button if you’re recording only to
your hard drive or press the record control on your camera if you are also record-
ing to tape. (See DVR Slave to Cam to control recording from your camera.) Use
the Zebra patterns to identify any overly bright or dark areas in your picture. As
you record, keep an eye on your signal in the DVR for any Clip Alerts.
Use Zebra to Improve Lighting and Exposure
1.
Click the
Field Monitor
Zebra 1
button to display a zebra stripe pattern over
the brightest areas of your video.
2.
In the Field Monitor, evaluate your picture and look for areas that are too
bright. For example, “hot spots” on foreheads, reflective surfaces, etc.
• If you see the zebra pattern, your video may be too bright in these areas.
Close your camera iris down to reduce the amount of light in your video
or adjust the scene lighting.
• If you don’t see a zebra pattern, either you don’t have any areas that are
too bright or your thresholds are set too low. By default, Zebra 1 identifies
areas that have a level of 100 IRE or higher.
3.
If you wish to change your brightness threshold or identify areas that may
be too dark, change your Zebra settings. To learn more, click here.
4.
Click the
Zebra 1
button again to turn it off.
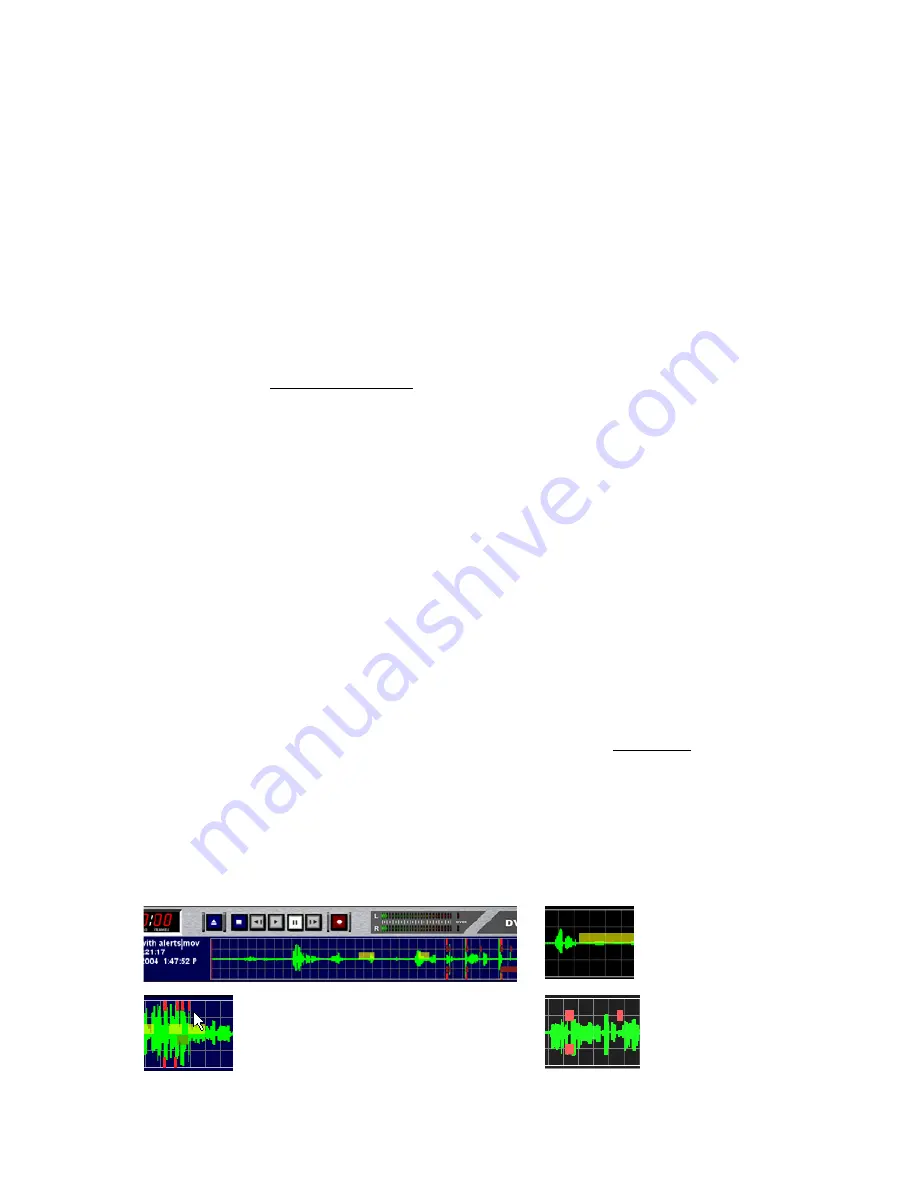
Analyze Your Clip Quality with DVR Clip Alerts
DV Rack provides you with problem alerts while you are still on location.
Decrease the number of fixes required in post-production by evaluating your sig-
nal for Clip Alerts.
Video
Clipping Alerts
display as
yellow bars.
Audio Clipping Alerts dis-
play as bright red bars at
the top (left channel) and
bottom (right channel) of
the signal.
Audio Pop Alerts
display as dark
red boxes within
the signal.


