background image

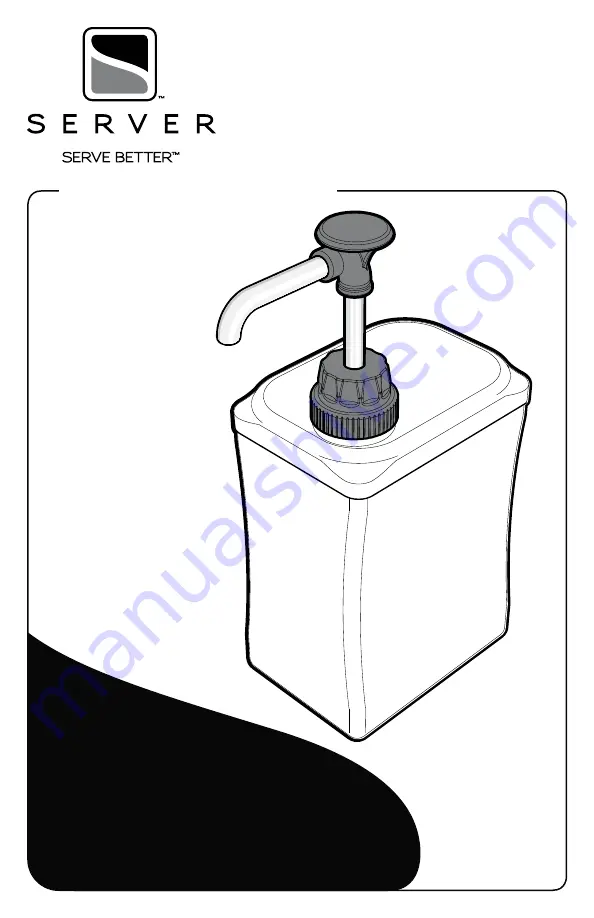
Smart Dispenser


BP-1

MODEL: BP-1

88574

...for purchasing our Smart Dispenser.  
This quality, NSF listed pump is a smart  
alternative to disposable pumps. 

SERVE UP FRESH, CONSISTENT PORTIONS

Thank You

Used with  
SIG cartons  
up to 48 oz.

Summary of Contents for BP-1 88574

Page 1: ...nser BP 1 MODEL BP 1 88574 for purchasing our Smart Dispenser This quality NSF listed pump is a smart alternative to disposable pumps SERVE UP FRESH CONSISTENT PORTIONS Thank You Used with SIG cartons up to 48 oz ...

Page 2: ...P 83005 SEAL LOCKING COLLAR 88409 STOP COLLAR PISTON 88202 PINCH VALVE BP 1 88016 CAP Plastic 38mm 88525 CYLINDER ASSEMBLY BP 1 Silver 8 3 8 88581 SHELL ASSEMBLY 88166 SPRING PUMP DELIVERS 1 OZ PORTIONS To reduce portion add GAGING COLLAR S 88313 Small collar 1 8 oz reduction 88204 Medium collar 1 4 oz reduction 88205 Large collar 1 2 oz reduction 87028 CAP Smart Dispenser is a trade name of SIG C...

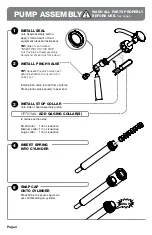
Page 3: ...to product carton INSERT PUMP 3 WASH ALL PARTS PROPERLY BEFORE USE See page 6 INSERT SPRING INTO PUMP 1 Remove spring from inside base in packaging Insert cylinder into lid Screw threaded cap Insert spring into cylinder Insert pump head assembly into cylinder Screw locking collar to lid ...

Page 4: ...lve into bottom of piston Press pinch valve securely to seal end 2 SNAP INSTALL SEAL onto head assembly piston Apply small amount of food equipment lubricant inside seal TIP Side of seal marked INSERT PISTON THIS SIDE must face top of head assembly Flared end of seal must face down 1 INSTALL STOP COLLAR onto side of head assembly piston 3 OPTIONAL ADD GAGING COLLAR S to reduce portion size Small c...

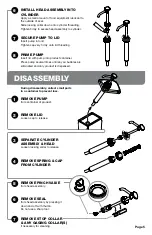
Page 5: ...dispensed 8 SECURE PUMP TO LID Insert pump into lid Tighten cap very firmly onto lid threading 7 DISASSEMBLY REMOVE SEAL from head assembly by pressing it down and off with thumb Do not use a sharp tool 6 REMOVE SPRING CAP FROM CYLINDER 4 REMOVE PINCH VALVE from head assembly 5 REMOVE PUMP from container of product 1 REMOVE LID Loosen cap to release 2 During disassembly collect small parts in a con...

Page 6: ...e PUMP CLEANING RINSE fully with clear water 3 SANITIZE all parts according to local sanitization requirements All parts in contact with food must be sanitized 4 AIR DRY all parts fully 5 Use dishwashing soap hot water and nylon brush YES DISASSEMBLE CLEAN all washable parts with soap and hot water See DISASSEMBLY on page 5 2 FLUSH RINSE all pump surfaces with hot water Place lower end of pump int...

Page 7: ...y 110 F 43 C and pump until all tap water is expelled 4 SANITIZE Mix one 1 oz 30 mL packet of KAY 5 Sanitizer Cleaner EPA REG No 5389 15 with 2 5 gallons 9 5 L of tap water approximately room temperature Place lower end of pump into this sanitizing mixture and repeatedly operate pump until 1 quart 95 L sanitizing mixture is pumped through pump 3 SAFETY According to food and safety regulations most...

Page 8: ...equest a Return Authorization Number Merchandise must be sent to Server Products with this number Service is extremely prompt Typically units are repaired and ship out within 48 hours of receipt Merchandise being returned for credit must be in new and unused condition and not more than 90 days old and will be subject to a 20 restocking charge Ensure carton seal is not clogging pump TROUBLESHOOTING...

Reviews: