background image

SlimLine


DRY FOOD DISPENSER 

MODEL: DFD 

CAPACITY:
 1.4 Liter   
 2 

Liter

...for purchasing our SlimLine™ Dry Food 
Dispenser. This flavor station lets you dispense 
precise portions of candies, toppings and mix-in 
ingredients. Additional dispensers neatly mount  
side-by-side: (4) flavors every 13 inches.

ACCURATE, ADJUSTABLE PORTIONS IN LESS SPACE

Thank You


Summary of Contents for SlimLine DFD

Page 1: ...or purchasing our SlimLine Dry Food Dispenser This flavor station lets you dispense precise portions of candies toppings and mix in ingredients Additional dispensers neatly mount side by side 4 flavors every 13 inches ACCURATE ADJUSTABLE PORTIONS IN LESS SPACE Thank You ...

Page 2: ...ays indicate portion dispensed by volume Slide all four trays of desired serving size into cylinder Insert four triangular tabs on friction pad into matching slots in cylinder Slide cylinder friction pad first into the opening of dispenser body INSTALL WALL BRACKET ATTACH FRICTION PAD INSTALL CYLINDER 1 PLACE PORTION TRAYS 2 3 4 or PORTION COLOR 0 50 fl oz White 0 75 fl oz Blue 1 0 fl oz Green 1 5 fl o...

Page 3: ...E ONTO BODY CYLINDER INSTALL PIVOT PIN ADD ADAPTER CUP to the bottom opening of the unit FILL UNIT WITH INGREDIENT YOU WANT TO DISPENSE PUT THE LID ON TOP OF THE UNIT SWING HANDLE UPWARD to load the tray SWING HANDLE DOWNWARD to dispense the portion 5 6 7 8 9 10 READY Use pull tab on right side of handle to help position TIP For cylinder to advance and serve a portion the handle must travel its fu...

Page 4: ...e pull tab on right side to assist REMOVE HANDLE 5 REMOVE FRICTION PAD 7 REMOVE PORTION TRAYS 8 NEXT CLEAN REMOVE CYLINDER Slide the cylinder out of the unit 6 Rotate pin to the unlock position and take it out Lift handle upward to the position just before it would click This makes the handle easier to remove ...

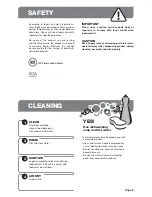
Page 5: ...ION Keep fingers clear of all moving parts to prevent operator injury when dispensing product during cleaning assembly and disassembly CLEANING CLEAN After disassembling clean all washable parts with soap and hot water RINSE fully with clear water 1 SANITIZE all parts according to local sanitization requirements All parts in contact with food must be sanitized AIR DRY all parts fully 2 3 4 Use dish...

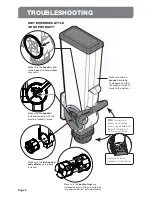
Page 6: ...se and that the product is free to move to the bottom Make sure the handle is installed correctly with the pivot pin locked in place Make sure the friction pad and cylinder are properly installed Make sure the portion trays are installed correctly The curved tab on tray end should rest outside cylinder Angled tabs inside handle must tap bottom Make sure the handle is tight to the body positioned a...

Page 7: ...sending any item to Server Products for service repair or return contact Server Products customer service to request a Return Authorization Number Merchandise must be sent to Server Products with this number Service is extremely prompt Typically units are repaired and ship out within 48 hours of receipt Merchandise being returned for credit must be in new and unused condition and not more than 90 ...

Page 8: ... USA Manual 01921 RevC 042418 Model 89264 or 88750 Single uses Bracket 88766 Model 89265 or 88760 Double uses Bracket 88767 Model 89266 or 88770 Triple uses Bracket 88768 Model 89267 or 88780 Quad uses Bracket 88769 BRACKETS LID 88751 BODY 2 LITER 88752 BODY 1 4 LITER 88736 HANDLE 88754 ADAPTER CUP 88764 CYLINDER 88753 PIVOT PIN ASSEMBLY 88776 FRICTION PAD 88761 PORTION TRAYS 4 PACK COLOR PORTION ...

Reviews: