SerVision
MVG400 Installation Guide
Connecting the MVG400 to a Power Source
30
Connecting the MVG400 to a Power Source
The
Power
connector of the MVG400 can be connected either to the vehicle battery or to a standard electrical
outlet. Once it is connected, it starts up automatically. During the start-up process, the LEDs on the front of the unit
flash at various intervals. When the start-up process is completed successfully, the
Power
LED should display as a
solid color and blink momentarily every second. (Depending on the configuration settings, it should either be solid
orange and then blink green or solid green and then blink orange.)
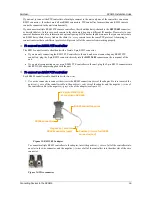
Figure 27: Power LED
NOTE:
When the start-up process is completed, if the
Power
LED does not flash – if it displays as a solid
green or orange all the time – the start-up process was not successful. In this case, disconnect the unit
from the power supply and then reconnect it.
Typically, the MVG400 unit is configured in an office setting and then installed in the vehicle. The power-supply
and power-connector cables are used to connect the unit to a standard electric outlet for configuration. After
configuration, the cables are disconnected from the unit, so that it can be connected to the vehicle battery.
NOTE:
It is recommended that only a vehicle installation specialist connect the unit to the battery.
Connecting the Wire Connector to the Unit
Demo units and small orders are supplied without a wire connector in the
Power
connector on the rear panel of the
unit, as in figure 29. In large orders, the units are supplied with wire-connectors connected to the
Power
connectors
on the units, as in figure 30 (because only a limited number of power-connector cables are supplied with large
orders, and every unit requires a wire connector).
Figure 28: Wire connector
Power LED


