14
Install your wall mount on a solid wall perpendicular to the floor. When attaching to other building materials,
please contact your nearest dealer.
If installed on a ceiling or slanted wall, it may fall and result in severe personal injury.
We recommend that you use included or compatable Séura mounting hardware.
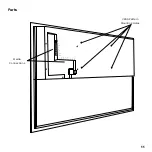
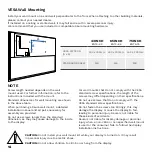
VESA Wall Mounting
A
B
43 INCH
ENT4-43
65 INCH
ENT4-65
75 INCH
ENT4-75
VESA PATTERN
(A x B)
300 x 300mm 400 x 200mm 400 x 200mm
STANDARD SCREW
M6
M6
M8
NOTE
Screw length needed depends on the wall
mount used. For further information, refer to the
instructions included with the mount.
Standard dimensions for wall mounting are shown
in the above table.
When purchasing a Séura wall mount, a detailed
installation manual and all parts necessary for
assembly are provided.
Do not use screws longer than the standard
dimension, as they may cause damage to the inside
to the display.
For wall mounts that do not comply with the VESA
standard screw specifications, the length of the
screws may differ depending on their specifications.
Do not use screws that do not comply with the
VESA standard screw specifications.
Do not fasten the screws too strongly, this may
damage the display or cause the display to fall,
leading to personal injury. Séura is not liable for
these kinds of accidents.
Séura is not liable for display damage or personal
injury when a non-VESA or non specified wall mount
is used or the consumer fails to follow the display
installation instructions.
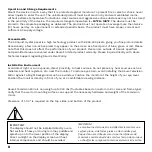
CAUTION:
Do not install your wall mount kit while your display is turned on. It may result
in personal injury due to electric shock.
CAUTION:
Do not allow children to climb on or hang from the display.


