10
Installation
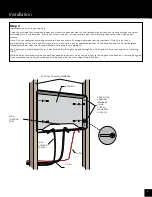
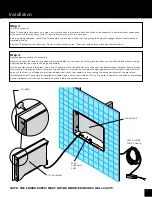
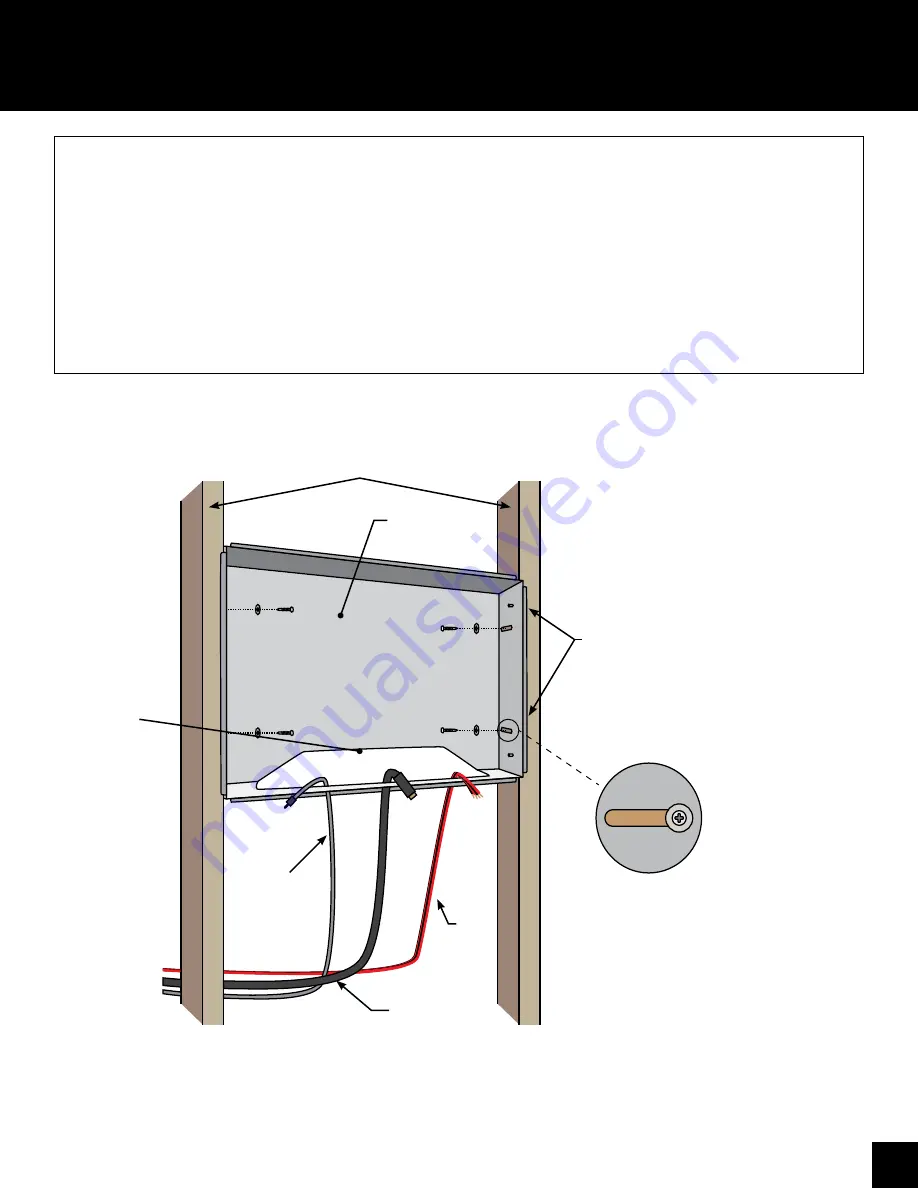
BACK BOX
VERTICAL FRAMING MEMBERS
SCREW INTO
FRAMING
MEMBERS
USING
SCREW-
MOUNTING
SLOTS (4)
PASS-
THROUGH
PORT
LOW-
VOLTAGE
POWER
AUDIO
VIDEO
Step 2
Install back box into rough opening.
Using the provided four screws and washers, mount the back box tight to the finished wall surface by screwing through the screw-
mounting slots in the back box. Ensure the front of the box is flush with the wall, and mounting tabs rest on the finished wall
surface.
Note: Do not overtighten mounting hardware. Back box should fit snuggly between framing members. If the fit is poor and
overtightening occurs, the back box may deform, resulting in a poorly sealed installation. If the back box doesn't fit well between
framing members, shim the framing members for a square and stable fit.
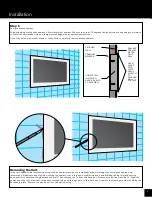
Feed power and other desired A/V and electrical cords through the pass-through port from inside the wall cavity prior to installing
the TV.
While keeping cord ends outside the back box pass-through port, finish the wall tight to the edges of the back box, removing any gap.
Once complete, the final wall surface should be flush with the front edge of the back box.


