Instruction Manual for Spirit & Spirit Tab-Tension Series In-Ceiling Electric
Preparation Instructions
Take out all the parts from the packaging and verify that all the parts have been included, then
follow the steps below to install the screen.
Note 1.1: When installing the projection screen it is important to choose the correct fasteners
for the ceiling type. Choosing the wrong fasteners can lead to severe injuries or screen damage.
1. Choose a proper location on the ceiling to install the projection screen. Be sure that no load-bearing
supports will be cut or compromised during the installation.
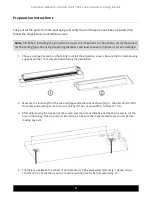
2. Measure the total length of the case w/ flanges attached (A) as shown (Fig. 1). Subtract 20mm (3/4”)
from that value (A) to get the hole cut-out length. The cut-out width is 140mm (5 1/2”).
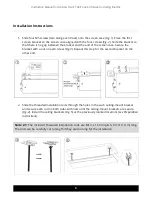
3. After determining the location of the screen and the cut-out dimensions (Fig. 2), proceed to cut the
hole in the ceiling. This step cannot be undone, so be sure the measurements are correct before
making any cuts.
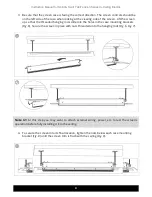
4. The distance between the center of each bracket is A (the measurement from Fig. 1 above) minus
116mm (4 1/2”). Mark the location of each mounting hole for both brackets (Fig. 3).
2


