background image


Instruction Manual for Spirit & Spirit Tab-Tension Series In-Ceiling Electric 


Summary of Contents for SE1610 Series

Page 1: ...Series In Ceiling Electric MODELS SE43 SE169 SE1610 ST43 ST169 ST1610 Thank you for purchasing a Severtson projection screen Before use please read the instructions carefully After installation store...

Page 2: ...Instruction Manual for Spirit Spirit Tab Tension Series In Ceiling Electric Overview Parts Included 1...

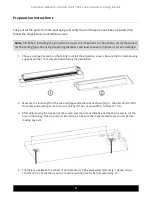
Page 3: ...install the projection screen Be sure that no load bearing supports will be cut or compromised during the installation 2 Measure the total length of the case w flanges attached A as shown Fig 1 Subtr...

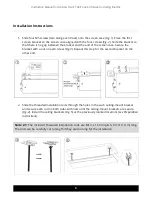
Page 4: ...the bracket with a nut on each screw Fig 3 Repeat this step for the second bracket on the other end 2 Slide the threaded installation rods through the holes in the each ceiling mount bracket and secu...

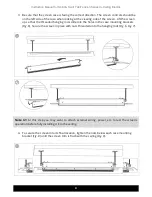
Page 5: ...t the threaded hanging rods slide into the holes in the case mounting brackets Fig 6 Secure the screen in place with nuts threaded onto the hanging rods Fig 6 Fig 7 Note 3 1 At this step you may want...

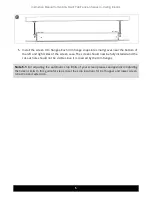
Page 6: ...nd right sides of the screen case The screen should now be fully installed and the cut out hole should not be visible since it is covered by the trim flanges Note 5 1 For adjusting the automatic stop...

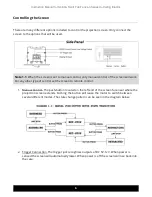
Page 7: ...ill work For any other type of control set the screen to remote control 1 Manual Control The push button located on the left end of the screen face near where the projection screen extends Pushing the...

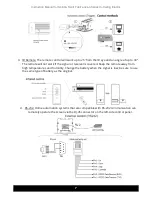
Page 8: ...e will not work if the signal or receiver is covered Keep the remote away from high temperatures and humidity Change the battery when the signal is low be sure to use the same type of battery as the o...

Page 9: ...Instruction Manual for Spirit Spirit Tab Tension Series In Ceiling Electric 8...

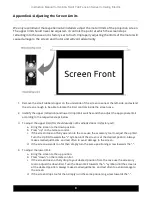
Page 10: ...s below 3 To adjust the upper limit this should usually not be adjusted since it is factory set a Bring the screen to the down position b Press up on the remote control c If the screen does not fully...

Page 11: ...Tension This section is only for applicable models tab tensioned models beginning with ST The tension of the screen may need to be adjusted occasionally if the screen begins to appear wavy 1 Use a fl...

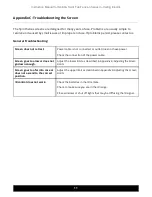
Page 12: ...wer cable is not connected or outlet does not have power Check the connection of the power cable Screen goes too low or does not go down enough Adjust the lower limit as described in Appendix A Adjust...

Page 13: ...wires may result in shorts or fires 7 Fluorescent lights may cause interference with infrared signal 8 Be careful not to scratch or damage the screen surface while handling it 9 Do not write or draw...

Reviews: