background image

- 40 -

Troubleshooting

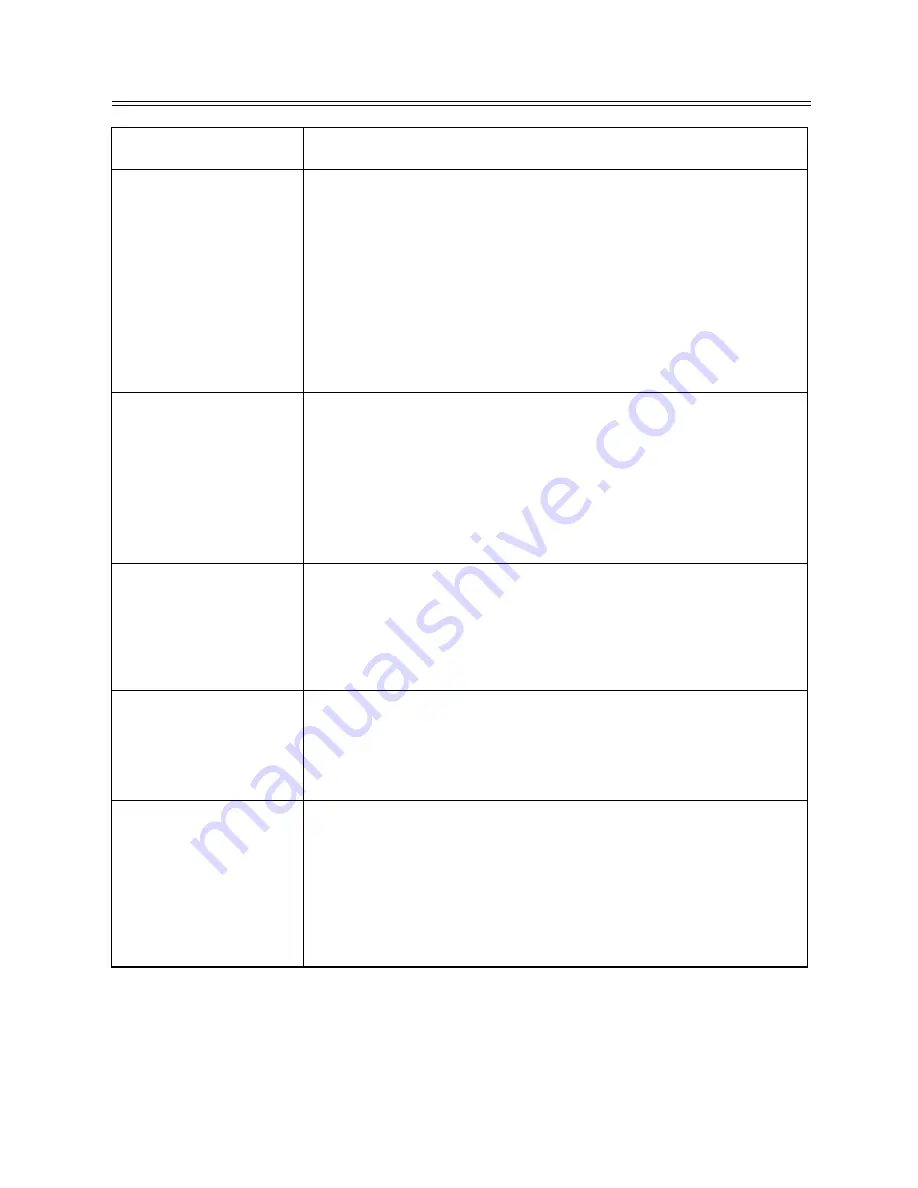
SYMPTOM

CHECK ITEM

The player cannot

play.

Make sure a disc is loaded.

Make sure the disc is loaded with label side up.

Disc should be clean, not dirty or warped.

Player’s region code should be the same as the region

code of the DVD disc.

Make sure water condensation has not occurred. If it
has, remove the disc and keep the player power on

until the moisture evaporates.

There is no sound.

Make sure system connection is correct.

Make sure the player is not under muting mode.

Press the MUTE button to turn on the speaker.

Make sure the volume is adjusted to the lowest.

Adjust the volume upward.

Is your disc dirty or warped? Clean or replace it.

There is no picture

or

picture

is

unsteady.

Position

of

the

picture

is

incorrect.

Make sure the video type of the AV signal source is

PAL.

Make sure system connection is correct.

Is your disc dirty or warped? Clean or replace it.

Cannot continue to

play and

plays

a

section repeatedly.

Make sure the player is not in A-B repeat status.

Press A-B button to cancel A-B repeat status.

Is your disc dirty or warped? Clean or replace it.

The remote control

does not work.

Make sure there are no obstructions between the

remote control and the player.

Make sure the remote control is pointing at the player.

Make sure batteries are inserted correctly (check

polarity).

Replace weak batteries.

Other Notes:

Static or other external interference may cause the player to work

abnormally. If this occurs, unplug the power-supply cord from the outlet and plug it in

again to reset the player. If the problems persist, then please disconnect the power

and consult a qualified technician.

Summary of Contents for Kitchen Center 2

Page 1: ...1 KITCHEN CENTER 2 SV150210 User s Manual...

Page 2: ...Source Connecting To TV Signal Input Source Connecting To Antenna Connecting To the Power Adapter Connecting to DVB T Antenna DVD Play Operation DVD Playback Functions DVD System Setup DVD Setup LCD...

Page 3: ...The manufacturer should not hold responsibility for the damage caused by any substitutions and modifications of the product without authorization from the manufacturer or authorized unit WARNING The a...

Page 4: ...the power cord from being walked on or pinched particularly at plugs convenience receptacles and the point where they exit from the apparatus 9 Only use attachments accessories specified by the manuf...

Page 5: ...If this equipment does cause harmful interference to radio or television reception which can be determined by turning the equipment off and on the user is encouraged to try to correct the interference...

Page 6: ...TV Radio External Audio Video Input Mode DVB T High Quality Property Video Screen Supports normal screen 4 3 and wide screen 16 9 aspect ratios AV Input External Audio Video input can be connected to...

Page 7: ...c maker specifies the operation of some DVD discs Please refer to the instruction manual with the disc Care of Discs Do not touch the playing surface of the disc Do not stick paper or labels on the di...

Page 8: ...TOP Button Press to stop playback under DVD mode 6 Button Under DVD mode press once to go to beginning of the current track chapter Press twice to go to the previous track chapter 7 Button Press to go...

Page 9: ...r radio mode Press to adjust the value downward when setting the time on the display panel 16 CH Button Press to select items in the setup menu Press to select channels or radio stations forward under...

Page 10: ...ft Right AUDIO Input Jack Connection for audio input 6 VIDEO Input Jack Connection for video input 7 Direct Current 12V Input Jack Display Panel Drawing 1 FM radio status indicator 2 AM radio status i...

Page 11: ...rol works best at a distance less than 7m and at an angle of up to 60 to the front of the unit No obstacles may stand in the way between remote control and infrared sensor The battery normally lasts f...

Page 12: ...rol Drawing 1 POWER Button Press to access to or exit the STANDBY mode 2 SUBTITLE Button Press to select a subtitle language or turn subtitle off when a DVD disc with multi subtitles is playing 3 DVD...

Page 13: ...equency forward Press for about 1 5 seconds to search radio stations forward automatically In DVD mode press to activate fast forward playback 13 PLAY Button Press to start playback in DVD mode 14 STO...

Page 14: ...26 SLOW Button Press to activate slow playback in DVD mode 27 LCD ON OFF Button Press to turn On Off the LCD screen display 28 LCD SETUP Button Press once to enter the PICTURE setup menu Then press t...

Page 15: ...ed Please make all the connections before installing the unit Connecting To External AV Signal Source Connections should be made as follows Connect the L R audio cables according to the marks on the r...

Page 16: ...as possible after connection When connecting the supplied AM loop antenna connect two black cords to AM and ground jacks as shown below If the FM reception is poor use a 75 coaxial cable not supplied...

Page 17: ...two prong end of the power cord to the grounded electrical socket 3 When not using the unit turn off the power of the unit first and then unplug the power supply to prevent malfunctions Connecting to...

Page 18: ...ter the root menu during DVD disc playback and use the direction buttons to highlight an item you would like to select Press the OK button to select it Title Chapter Normally there are several titles...

Page 19: ...ke a PICTURE CD when they develop your film Normal Playback Load a JPEG disc in Use the direction button and OK button to select a submenu with pictures and then use the direction button to select the...

Page 20: ...dio Press the AUDIO button to select the desired sound effect Keep pressing for about 2 seconds to remove display from the screen Subtitle During playback press the SUBTITLE button to select a subtitl...

Page 21: ...sc from the location where it was stopped This function will not operate if the disc is removed from the DVD Player Press the STOP button twice 2x Playback of the disc will stop When the PLAY button i...

Page 22: ...peat To repeat a Title Chapter or Track press the REPEAT EXIT button on the remote control Continually pressing the REPEAT EXIT button will display a menu as follows Repeat Chapter Title All You can t...

Page 23: ...election will be highlighted Press the OK button for confirmation Press the left direction button to enter the other setup menu s General Setup TV Display Select Normal PS or Normal LB when a 4 3 TV i...

Page 24: ...e settings Note For preference setting the unit must be in the stop mode LCD Setup Under DVD mode press the LCD SETUP button on the remote control or the TV LCD SETUP button on the front panel once th...

Page 25: ...or the TV LCD SETUP button on the front panel once to enter PICTURE setup menu and screen display as shown Use the buttons to select the item you want to set Brightness Contrast and Colour Use the but...

Page 26: ...select channels When the button is used to turn the function OFF it will play the channels in sequence when selecting under normal playback status Swap Use the buttons to select SWAP press the number...

Page 27: ...m you want to set Use the buttons to enter the item and to select Press the SET button again to exit from the setup menu Alarm Use the direction buttons to select ON or OFF This function allows you to...

Page 28: ...own below Use the buttons to select the item you want to set Brightness Contrast and Colour Use the buttons to adjust the items between 0 and 20 Use the buttons to select the Language press the button...

Page 29: ...he memorized stations Use the buttons to adjust the channel number for your preference and then press the SET button again the station will be memorized with the coded station number Press the SET but...

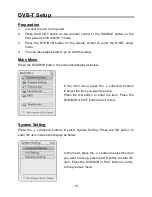
Page 30: ...DVD DVB button the screen will display as below System Setting Press the direction buttons to select System Setting Press the OK button to enter the item screen will display as below In the main menu...

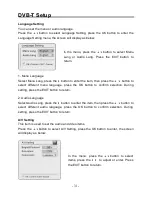
Page 31: ...button to return 2 Audio Language Select Audio Lang press the button to enter the item then press the button to select different audio language press the OK button to confirm selection During setting...

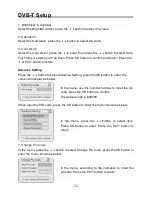
Page 32: ...n to select Advance Setting press the OK button to enter the screen will display as below When input the PIN code press the OK button to enter the menu shown as below 1 Change Pin Code In the menu pre...

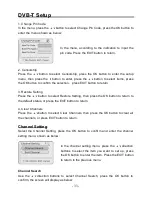
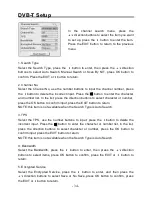
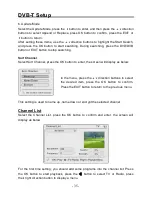
Page 33: ...the EXIT button to return 4 Clear Channels Press the button to select Clear Channels then press the OK button to clear all the channels or press EXIT button to return Channel Setting Select the Chann...

Page 34: ...input press the button to delete the incorrect input Press the button to enter the character or number list in the list press the direction buttons to select character or number press the OK button t...

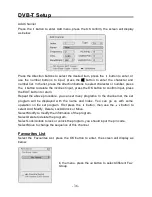
Page 35: ...lect Sort Channel press the OK button to enter the screen will display as below This setting is used to name up name down or encrypt the selected channel Channel List Select the Channel List press the...

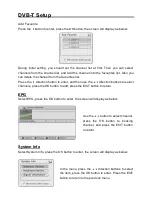
Page 36: ...return Repeat the above procedure you can set many programs In the channel list the set program will be displayed with the name and Index You can go on with some operation on the set program First pr...

Page 37: ...utton to enter and then use the direction buttons to select channels press the OK button to add press the EXIT button to return EPG Select EPG press the OK button to enter the screen will display as b...

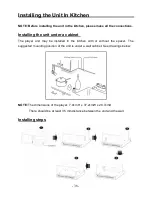
Page 38: ...nit under a cabinet The player unit may be installed in the kitchen with or without the spacer The suggested mounting position of the unit is under a wall cabinet See drawings below NOTE The dimension...

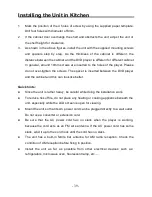
Page 39: ...yer and the cabinet and this can look like better Quick hints Since the unit is rather heavy be careful while doing the installation work To reduce risk of fire do not place any heating or cooking app...

Page 40: ...on of the picture is incorrect Make sure the video type of the AV signal source is PAL Make sure system connection is correct Is your disc dirty or warped Clean or replace it Cannot continue to play a...

Page 41: ...o Frequency Range FM 87 5 108MHz Power AC100V 240V 50 60Hz Power Consumption 30W Dimensions 7 9cm H x 37 2cmW x 28 7cmD Weight About 3 1 kg DESIGN AND SPECIFICATIONS ARE SUBJECT TO CHANGE WITHOUT NOTI...

Page 42: ...ct THE WARRANTY DOES NOT COVER transport costs nor charges relating to an intervention at the address of the purchaser Scratches splinters or marks in the packaging of the device or its accessories wh...

Reviews: