background image

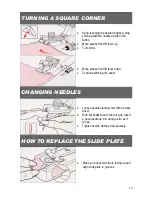
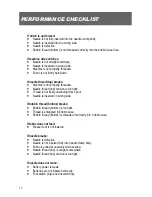
TURNING A SQUARE CORNER 
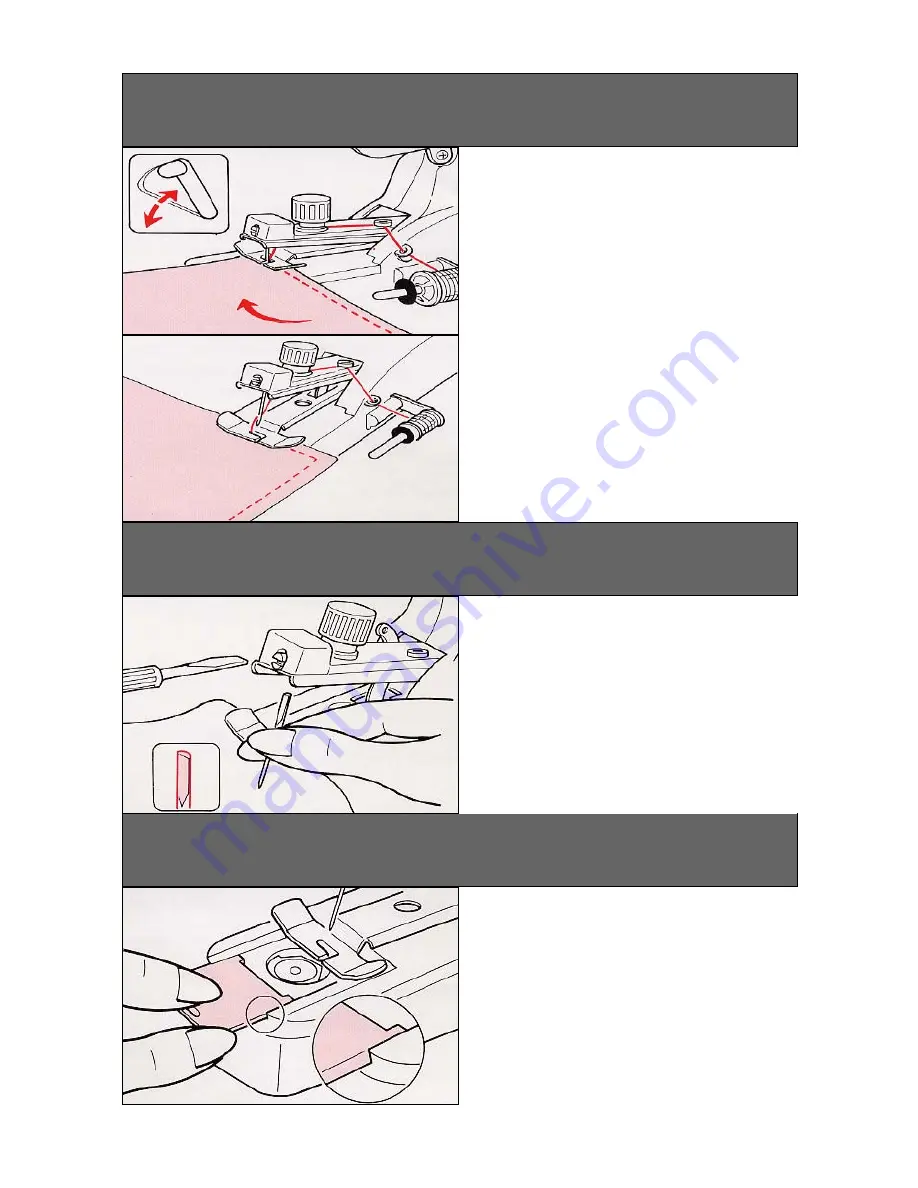
CHANGING NEEDLES 

HOW TO REPLACE THE SLIDE PLATE  

x

Make sure dove tail side is facing up and 
align slide plate to grooves.

x

Loosen needle clamp screw with a screw-
driver 

x

With flat shank face to the left side, insert 
a new needle up into clamp as far as it 

will go. 

x

Tighten needle clamp screw securely.

x

Upon reaching the desired position, stop 
stitching with the needle tip still in the 

fabric. 

x

Move presser foot lift lever up. 

x

Turn fabric.

x

Move presser foot lift lever down. 

x

Continue stitching the seam.

14

Summary of Contents for SuperLockstitch SP-403

Page 1: ...Model SP 403 Owners Manual Innovative Products to Make Your Life Easier Portable Sewing Machine x Sews Durable LockStitch x Handheld or Table Top Operation x Operates on 4AA batteries not included...

Page 2: ...asic mending jobs quickly and with a quality stitch This machine was specifically designed to be lightweight for easy portability We are confident you will enjoy the time you spend using our product T...

Page 3: ...CHANGING NEEDLES 14 HOW TO REPLACE THE SLIDE PLATE 14 PERFORMANCE CHECKLIST 15 CONTENTS IMPORTANT SAFETY INSTRUCTIONS WHEN USING THIS MACHINE THE FOLLOWING BASIC SAFETY PRECAUTIONS SHOULD ALWAYS BE FO...

Page 4: ...3 Thread Tension Dial 13 Hand Wheel 4 Needle Arm 14 Battery Access 4 AA Batteries not included 5 Needle Clamp Screw 15 AC Adaptor Socket 6 Presser Foot Rating Input 120V 60Hz 7 Slide Plate Output 6 V...

Page 5: ...e Holder 20 Bobbin Winder Thread Guidepost 25 Bobbin Case 21 Presser Foot Lift Lever 26 Bobbin 1 Bobbin x4 1 in Machine 5 Thread Spool On Machine 2 Needle Threader 6 Foot Switch 3 Needle x2 1 in Machi...

Page 6: ...w arrows Guide thread through guidepost 3 x Open the bobbin winder cover and in sert a bobbin x Align the small bobbin hole on pin of bobbin winder x Follow arrows Manually wind thread clockwise aroun...

Page 7: ...ightly x Position and place threaded bobbin case as per graphics shown on slide plate re cess x Slide the bobbin case forward into the bobbin case holder as arrow shown x Pull thread 2 3 inches to the...

Page 8: ...and wheel counter clockwise x Fully open slide plate make sure bobbin case holder is parallel to presser foot edge by rotating hand wheel slightly x Shake machine head to throw the bobbin case out fro...

Page 9: ...read to Guidepost 1 and draw it to left under pretension stud 2 x Draw thread between two tension discs and then pull to right as shown x Follow arrows guide thread into take up lever eyelet 3 and the...

Page 10: ...n hand wheel counterclockwise to lower needle then raise to highest position x Gently pull needle thread top until bobbin thread bottom comes up and forms a loop x Use a pin to pull up bobbin thread l...

Page 11: ...ore sewing on your fabrics A balanced stitch x A perfect well balanced stitch will have needle thread top and bobbin thread bottom locked between two layers of fabric with no loops on top or bottom an...

Page 12: ...p to raise presser foot x Place fabric under presser foot x Draw both the needle thread top and the bobbin thread bottom 2 3 in to the left x Move presser foot lift lever down to lower presser foot x...

Page 13: ...foot lift lever up to raise presser foot x Place fabric under the presser foot x Draw both the needle thread top and the bobbin thread bottom 2 3 in to the right x Move presser foot lift lever down t...

Page 14: ...p to raise presser foot x Place fabric under presser foot x Draw both the needle thread top and the bobbin thread bottom 2 3 in to the left x Move presser foot lift lever down to lower presser foot x...

Page 15: ...seam by backstitching again Method 2 Tying Off x When the seam is completed use nee dle threader to pull needle thread top to underside of fabric x Tie a square knot with both threads un derside of th...

Page 16: ...screw with a screw driver x With flat shank face to the left side insert a new needle up into clamp as far as it will go x Tighten needle clamp screw securely x Upon reaching the desired position stop...

Page 17: ...read top tension is too tight x Thread is not freely unwinding from spool x Needle is inserted on wrong side If bobbin thread bottom breaks x Bobbin thread bottom is too tight x Thread is entangled in...

Page 18: ...screw with a screw driver x With flat shank face to the left side insert a new needle up into clamp as far as it will go x Tighten needle clamp screw securely x Upon reaching the desired position stop...

Page 19: ...erformance of any obligation under this warranty may be obtained by returning warranted product with purchase receipt freight prepaid to TOP INNOVATIONS INC Warranty Service Department 400 NW Platte V...

Page 20: ...Notes 19...

Page 21: ...Notes 20...

Page 22: ...Top Innovations Inc 400 NW Platte Valley Drive Riverside MO 64150 800 711 6617 816 584 9700 Fax 816 584 9066 www topinnovations com Printed in China...

Reviews: