11
4 SePem 100/150 loggers
1. First prepare the
Master
for programming the loggers (see
Section 5.5.3, in particular Section 5.5.3.3).
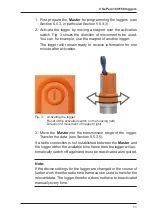
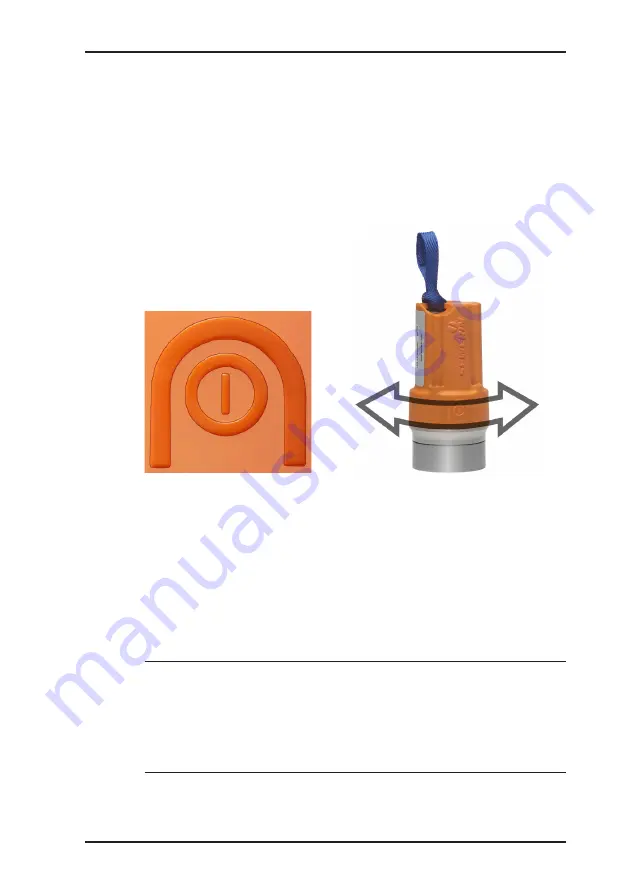
2. Activate the logger by moving a magnet over the activation
switch. Fig. 3 shows the direction of movement to be used.
You can, for example, use the magnet of another logger.
The logger will remain ready to receive information for one
minute after activation.
Fig. 3: Activating the logger:
Relief of the activation switch on the housing (left)
Direction of movement of magnet (right)
3. Move the
Master
into the transmission range of the logger.
Transfer the data (see Section 5.5.3.5).
If a radio connection is not established between the
Master
and
the logger within the available time frame then the logger will au-
tomatically switch off again and must be reactivated as required.
Note:
If the device settings for the logger are changed in the course of
further work then the radio time frame can be used to transfer the
relevant data. The logger, therefore, does not have to be activated
manually every time.


