19
GiottoSpot 400 rel.1.01
Control Microcomputer
GB
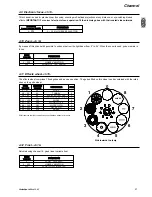
3.4 Direction of Tilt movement
This function allows to decide the direction in which the Giotto's moving head tilts, indispensable when several
fixtures are installed in order that fixtures installed opposite each other move in the same direction when they
receive a command.To modify Tilt movement, proceed as follows
1.
Connect Giotto Spot to the power supply, wait till it has completed reset operations and “DMX signal”
appears on the display.
2.
Use the UP/DOWN keys to find the “Tmove” menu
3.
Press ENTER to confirm. The message on the display will start to flash.
4.
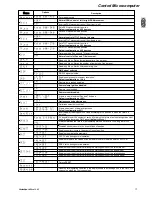
Use the UP/DOWN keys to select which of the two available options is required (see table pag.15).5.
Press ENTER to confirm.
3.41 Limiting Tilt movement
The Giotto fixture has a Tilt movement range of 270° (3/4 of a revolution). If the entire excursion doesn't have to be
used, two parameters allow to limit the starting angle (TP_min) and ending angle (TP_max). The only limit is the
minimum difference between starting (MIN) and ending (MAX), which is 4°.
To limit the Tilt movement, proceed as follows:
1.
Connect Giotto Spot to the power supply, wait till it has completed reset operations and “DMX signal”
appears on the display.
2.
Use the UP/DOWN keys to find the “TP_min” menu if the starting angle is to be modified. If the
ending angle is to be changed, find the “TP_max” menu.
3.
Press ENTER to confirm. The message on the display will start to flash.
4.
Use the UP/DOWN keys to select the new starting (or ending) angle.
5.
Press ENTER to confirm.
3.5 Pan/Tilt inversion
This function also allows to optimize the movement of the Giotto's moving head in relation to the operator's
position, in order to simplify all positioning procedure.
When SWAP is enabled (ON), this means that the lighting console sends the data regarding Pan to the Tilt controls
and vice versa.
To invert PAN and TILT movement, proceed as follows:
1.
Connect Giotto Spot to the power supply, wait till it has completed reset operations and “DMX signal”
appears on the display.
2.
Use the UP/DOWN keys to find the “SWAP” menu.
3.
Press ENTER to confirm. The message on the display will start to flash.
4.
Use the UP/DOWN keys to select which of the two available options is required (see table pag.15)
5.
Press ENTER to confirm.
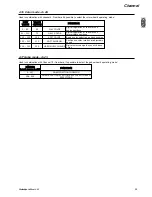
3.6 Lamp elapsed time meter
The Giotto microcomputer stores various data, including that relative to the number of hours the lamp is lit (elapsed
time). This is necessary to know in advance when it's almost time for relamping: lamp life is approximately 750
hours.
To see how many hours a lamp has been used, proceed as follows:
1.
Connect Giotto Spot to the power supply, wait till it has completed reset operations and “DMX signal”
appears on the display.
2.
Use the UP/DOWN keys to find the “Lmp_H” menu. The total number of hours the lamp has been lit
will be displayed automatically.
3.61 Resetting the lamp elapsed time meterAd
Each time a new lamp is fitted, it's possible to reset the meter indicating the elapsed time in order to have the real
elapsed time for the lamp about to be fitted.
To reset the elapsed time meter, proceed as follows:
1.
Connect Giotto Spot to the power supply, wait till it has completed reset operations and “DMX signal”
appears on the display.
2.
Use the UP/DOWN keys to find the ““Lmp_H” menu.
3.
Press ENTER to confirm. The message on the display will start to flash.
4.
The DOWN key can be used to reset the meter.
5.
On the contrary, pressing the UP key restores the previous value.
6.
Press ENTER to confirm the changes.
Lmp_H
Lmp_H
Swap=OFF
TPmax=000
TPmin=000
Tmove=NORM


