PAGE 9
PAGE 8
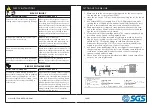
CONNECTING THE AIR SUPPLY
Pour 2-3 drops of airline oil into the air inlet. This should be done regard-
less of whether or not a lubricated air supply is to be used.
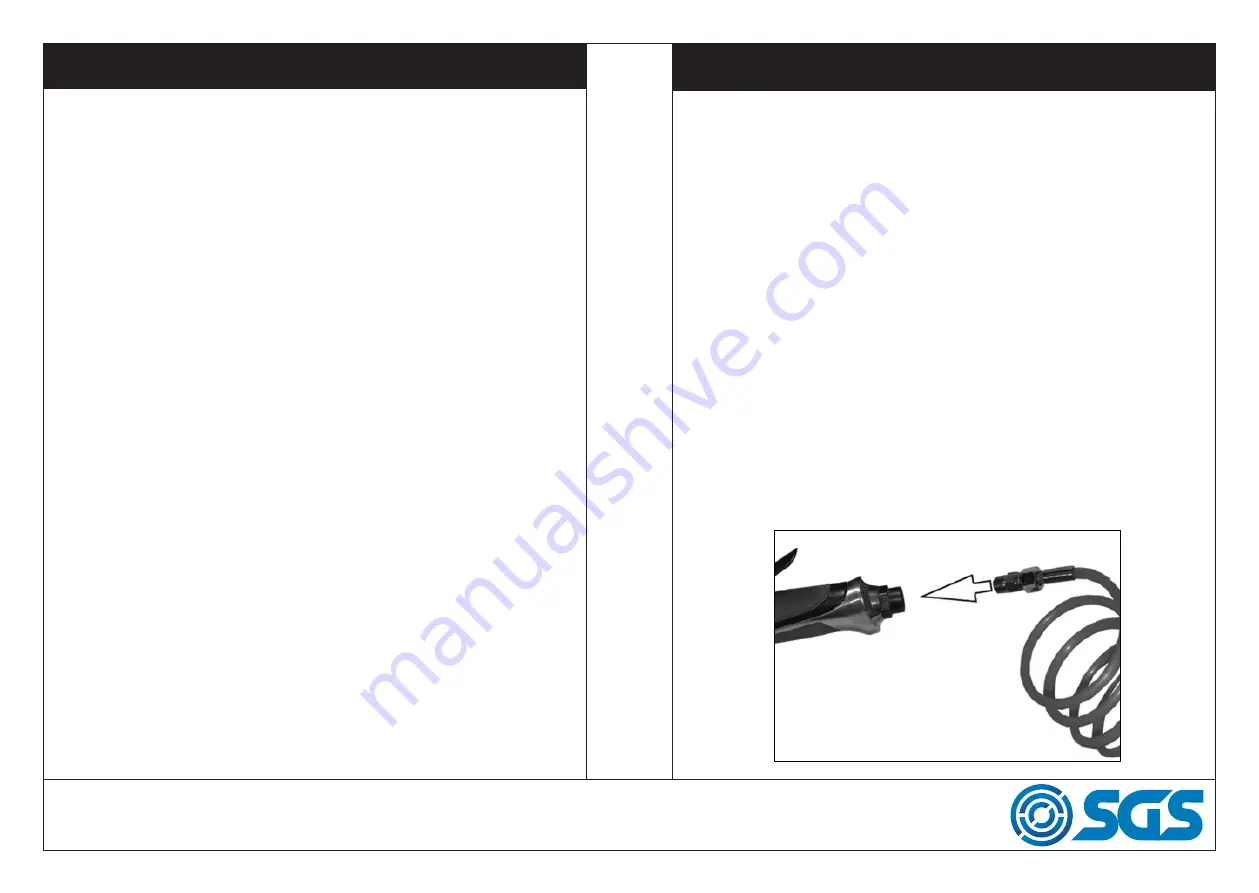
Connect a suitable hose to the tool as shown using the airline connector
supplied with the tool.
If required, connect an in-line mini oiler to the tool.
A mini oiler helps to prolong the life of the air tool. Remove the oil fill
screw from the side of the mini oiler and fill with air-line oil
WARNING:
COMPRESSED AIR CAN BE DANGEROUS. ENSURE THAT
YOU ARE FAMILIAR WITH ALL PRECAUTIONS RELATING TO THE USE
OF AIR COMPRESSORS AND COMPRESSED AIR SUPPLY.
If a mini-oiler is not being used, run a few drops of oil through the tool
before use. It can be entered through the inlet strainer or via the hose at
the nearest connection to the air supply.
Connect the other end of the hose to the compressor.
Turn on the air supply and check for air leaks. Rectify any found before
proceeding. PTFE tape may be useful for sealing threaded connections.
Your air tool is now ready for use.
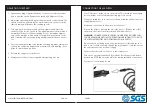
1. Squeeze the trigger against the body of the tool to start the sander
and control the speed. Evaluate the speed and adjust as follows.
2. Adjust the operating speed by twisting the speed control shown. The
speed of rotation is shown by the arrow embossed on the tool body
(anti-clockwise will increase the sanding speed.)
3. To begin work, rest the disc pad on the workpiece and start the
sander. Let the tool do the work. The actual weight of the machine is
normally sufficient for efficient sanding. Do not put additional pres-
sure on the machine, which would only slow down the speed of the
pad, reducing efficiency and placing an additional burden on the mo-
tor.
4. Pass the sander back and forth in wide, overlapping areas, taking care
to keep the sander moving around at all times. Avoid dwelling in one
place for more than a moment.
5. Release the trigger to stop the tool.
6. Always ensure the tool has stopped before putting it down.
ADJUSTING THE SPEED
WWW.SGS-ENGINEERING.COM


