U80II User’s Manual
- 11 -
horizontal printing and the paper near end sensor is at the bottom of the paper compartment.
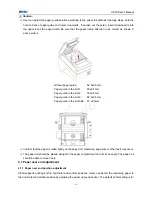
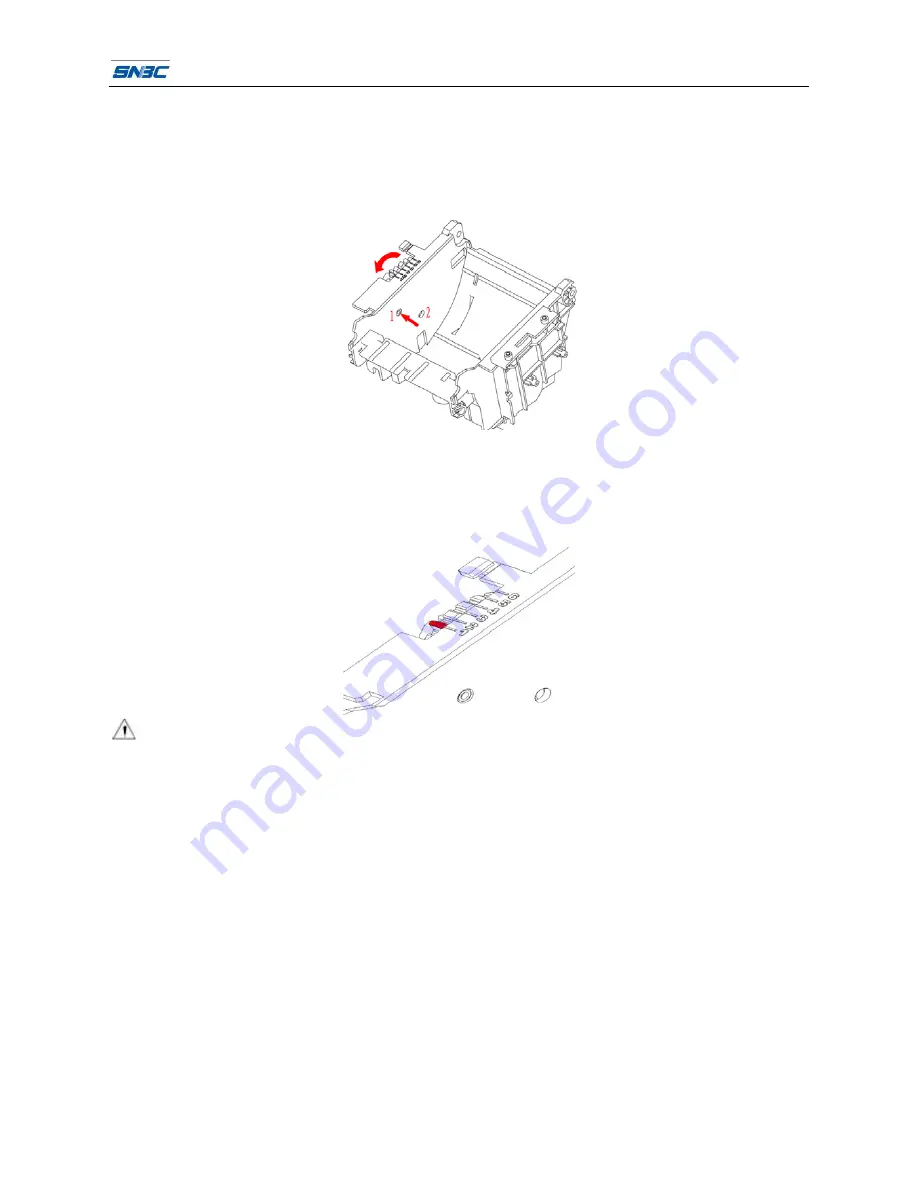
To change the paper near end sensor position from horizontal to vertical: First, press the plastic release
button in position 1 along the direction of the arrow. Then rotate thumbwheel in the direction shown. The
paper near end sensor will start to rotate. When the release button rotates to position 2, the change from
horizontal to vertical is complete.
4.7.2 Remaining paper amount adjustment of Paper near end sensor
Remaining paper amount can be adjusted by adjusting the position of paper near end sensor Paper near
end sensor has six levels, the red mark (actual color on printer is white) shows the current level and it can
be adjusted to a different position by moving the click-wheel.
Notes:
The standard configuration of the printer is without the function of paper near end.
4.8 Power on printer and print self-test page
4.8.1 Power on printer
Confirm that the printer is connected to power.
4.8.2 Print self-test page
1) Confirm that the printer is connected to power and paper roll is loaded.
2) Confirm that the printer is switched off.
3) Press down the FEED button while turning on the printer power. The configuration page. At the end of
the configuration page the followings text will appear: “Press and Release FEED to continue
SELF-TEST printing” and “Press and Hold FEED to configure the printer” The printer is holding and
waiting for the input while the PAPER LED is flashing.
4) Press down the FEED button momentarily, the printer will print a character test page which is a part of
the self-test.

