background image

M1B1 ShareVgo Smart Folding Exercise Bike 


14


Maintenance and Storage 

Summary of Contents for SXB1000

Page 1: ...FCC ID 2AR8P HONGYUAN203 Last Modified Dec 1 2018 Owner s Manual Smart Folding Exercise Bike with Backrest and Pulse Model SXB1000 Item M1B1 Email support sharevgo com ...

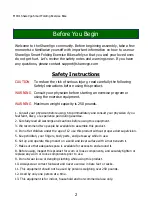
Page 2: ...cian if you feel faint dizzy or experience pain during exercise 2 Carefully read all warnings and cautions before using this equipment 3 We recommend two people be available to assemble this product 4 Do not let children under the age of 12 use this product without proper adult supervision 5 Keep children your fingers body parts and pets away while in use 6 Set up and operate this product on a sol...

Page 3: ...h the instructions may cause harmful interference to radio communications However there is no guarantee that interference will not occur in a particular installation If this equipment does cause harmful interference to radio or television reception which can be determined by turning the equipment off and on the user is encouraged to try to correct the interference by one or more of the following m...

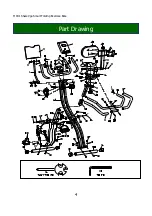
Page 4: ...M1B1 ShareVgo Smart Folding Exercise Bike 4 Part Drawing ...

Page 5: ...M5 12 Φ10 2 48 Backrest Pad 1 14 Rear Main Frame 1 49 End Cap J40 20 17 3 15 Bolt M5 16 1 50 Backrest Post 1 16 Washer d5 1 51 Bolt M8 30 S6 4 17 Sensor Wire 1 52 Sensor 1 18 Tension Knob 1 53 Plug Φ12 11 Φ3 2 19 Bolt M8 35 18 S6 1 54 Wrench S13 14 15 1 20 Tablet Holder 1 55 Wrench S6 1 21 Bolt M8 16 S6 2 56 End Cap 2 22 Washer d8 Φ25 2 2 57 Bolt M8 10 S6 2 23 Spindle 1 58L R Shroud L R 2 24 Bushi...

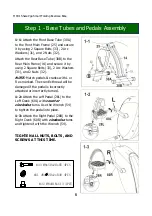
Page 6: ...Arc Washers 31 and 2 Nuts 32 NOTE Match pedals cranks with L or R as marked The crank s thread will be damaged if the pedal is incorrectly attached or incorrectly turned 1 2 Attach the Left Pedal 28L to the Left Crank 60L with counter clockwise turns Use the Wrench 54 to tighten the pedal into place 1 3 Attach the Right Pedal 28R to the Right Crank 60R with clockwise turns and tighten it with the ...

Page 7: ...2 Detach the Saddle Base Tube 44 from the Saddle Trench 42 by unscrewing and releasing the Knob 40 NOTE DO NOT lose Washer 41 2 3 Remove the pre installed 3 Nuts 43 and 3 Washers 37 from the Saddle 47 2 4 Attach the Saddle 47 to the Saddle Base Tube 44 with 3 Nuts 43 and 3 Washers 37 2 5 Re attach the Saddle 47 and the Saddle Base Tube 44 to the Saddle Trench 42 by tightening the Knob 40 with the ...

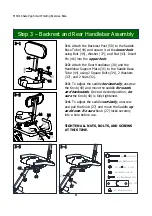
Page 8: ...ng Bolt 45 Washer 37 and Nut 43 Insert Pin 46 into the upper hole 3 2 Attach the Rear Handlebar 38 and the Handlebar Support Plate 35 to the Saddle Base Tube 44 using 2 Square Bolts 34 2 Washers 37 and 2 Nuts 32 3 3 To adjust the saddle horizontally unscrew the Knob 40 and move the saddle forwards and backwards Once at desired position be sure the Knob 40 is fully tightened 3 4 To adjust the saddl...

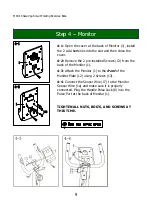
Page 9: ... cover 4 2 Remove the 2 pre installed Screws 13 from the back of the Monitor 1 4 3 Attach the Monitor 1 to the front of the Monitor Plate 12 using 2 Screws 13 4 4 Connect the Sensor Wire 17 to the Monitor Sensor Wire 1a and make sure it is properly connected Plug the Handle Pulse Jack 6 into the Pulse Port at the back of Monitor 1 TIGHTEN ALL NUTS BOLTS AND SCREWS AT THIS TIME ...

Page 10: ...her 37 and Nut 43 Then attach the Post 2 to Main Frame 14 using 2 Bolts 57 and 2 Washers 37 5 2 Attach the Water Bottle Holder 62 to the Main Frame 14 using 2 Bolts 63 NOTE The Water Bottle Holder is designed to be installed at the left side of the back of Tension knob with an angle of about 15 degree for easy accessibility TIGHTEN ALL NUTS BOLTS AND SCREWS AT THIS TIME ...

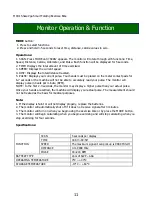
Page 11: ... beats per minute BPM NOTE In the first 2 3 seconds the monitor may display a higher pulse than your actual pulse Once your hands are settled the machine will display your actual pulse The measurement should not be treated as the basis for medical purposes Note 1 If the display is faint or will not display properly replace the batteries 2 The monitor will automatically shut off if it does not rece...

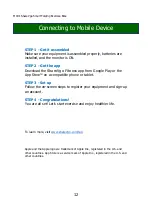
Page 12: ...gle Play or the App StoreTM on a compatible phone or tablet STEP 3 Set up Follow the on screen steps to register your equipment and sign up an account STEP 4 Congratulations You are all set Let s start exercise and enjoy healthier life To learn more visit www sharevgo com faq Apple and the Apple logo are trademark of Apple Inc registered in the U S and other countries App Store is a service mark o...

Page 13: ...e with the instructions may cause harmful interference to radio communications However there is no guarantee that interference will not occur in a particular installation If this equipment does cause harmful interference to radio or television reception which can be determined by turning the equipment off and on the user is encouraged to try to correct the interference by one or more of the follow...

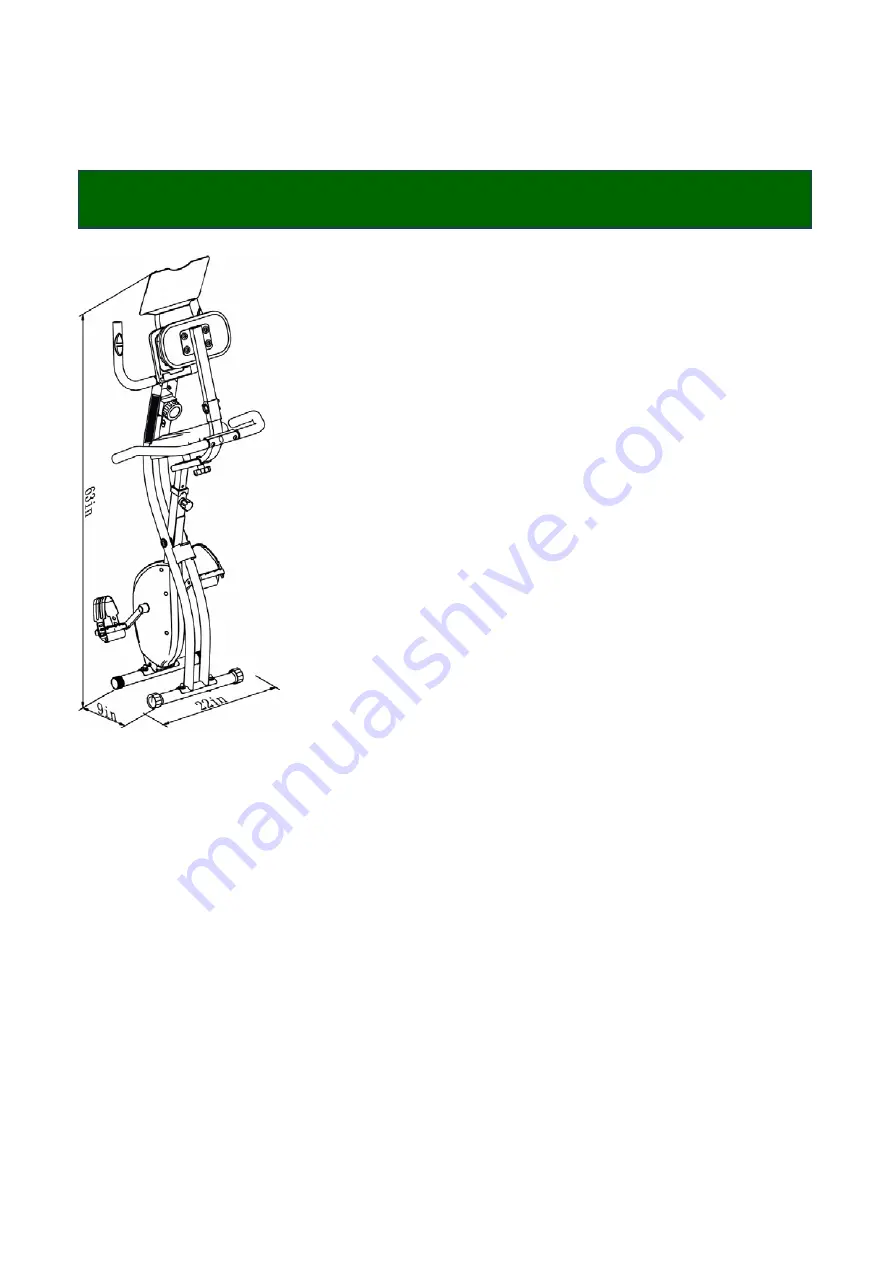
Page 14: ...M1B1 ShareVgo Smart Folding Exercise Bike 14 Maintenance and Storage ...

Page 15: ...ts and make sure all nuts bolts and screws are completely tightened before each use To clean wipe this equipment with a damp cloth DO NOT use abrasive cleaners or solvents Store your equipment at a stable position in clean and dry environment away from children ...

Page 16: ... OR FAILURE OF ANY WARRANTY OR OTHERWISE FOR ANY INDIRECT INCIDENTAL SPECIAL CONSEQUENTIAL OR EXEMPLARY DAMAGES THAT MAY BE INCURRED BY YOU IN CONNECTION WITH YOUR ShareVgo Smart Exercise Bike OR THESE TERMS INCLUDING ANY LOSS OF DATA WHETHER OR NOT SHAREVGO OR ITS REPRESENTATIVES HAVE BEEN ADVISED OF OR SHOULD HAVE BEEN AWARE OF THE POSSIBILITY OF ANY SUCH LOSSES ARISING YOU EXPRESSLY UNDERSTAND ...

Reviews: