!
!
BotBoundary® strips
BotBoundary® strips
PREP YOUR HOME
STEP 5
PLUG IN THE BASE
STEP 3
Find a
permanent
location for the base. Place it
with its back against a wall, in an area with a good
Wi-Fi signal.
Remove any objects
that are closer
than 3 ft. from either side of the base, or closer
than 5 ft. from the front. For best results, set up
base on
bare floor
.
SET UP THE BASE
STEP 2
5 ft.
3 ft.
3 ft.
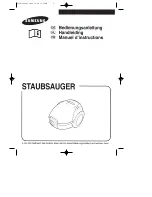
PREP THE ROBOT
STEP 1
• Remove protective film from robot and base.
•
Attach the side brushes to the posts on the bottom
of the robot. The side brushes are located in the
red packaging.
•
Turn on the power by pressing the button on the
side of the robot to the (I) ON position.
• Plug the base power cord into an electrical outlet.
• Turn the power switch on the back of the base to
the (I) ON position.
The
green
power indicator light on the base will
illuminate when the base has power.
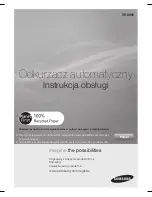
To charge, place robot with its BACK side against base.
• Turn power switches on BOTH robot and base to
(I) ON position.
• When charging begins, robot will beep and BLUE
charging indicator light on base will PULSE.
When robot is fully charged, light will turn
SOLID blue.
CHARGE THE ROBOT
STEP 4
Clean
Dock
!
SWITCH
First
Charge
6
h
SETUP
OPTIMIZING YOUR HOME FOR CLEANING
INDICATOR
Side Brushes
As your robot learns your home, you may need to make some small adjustments to optimize performance.
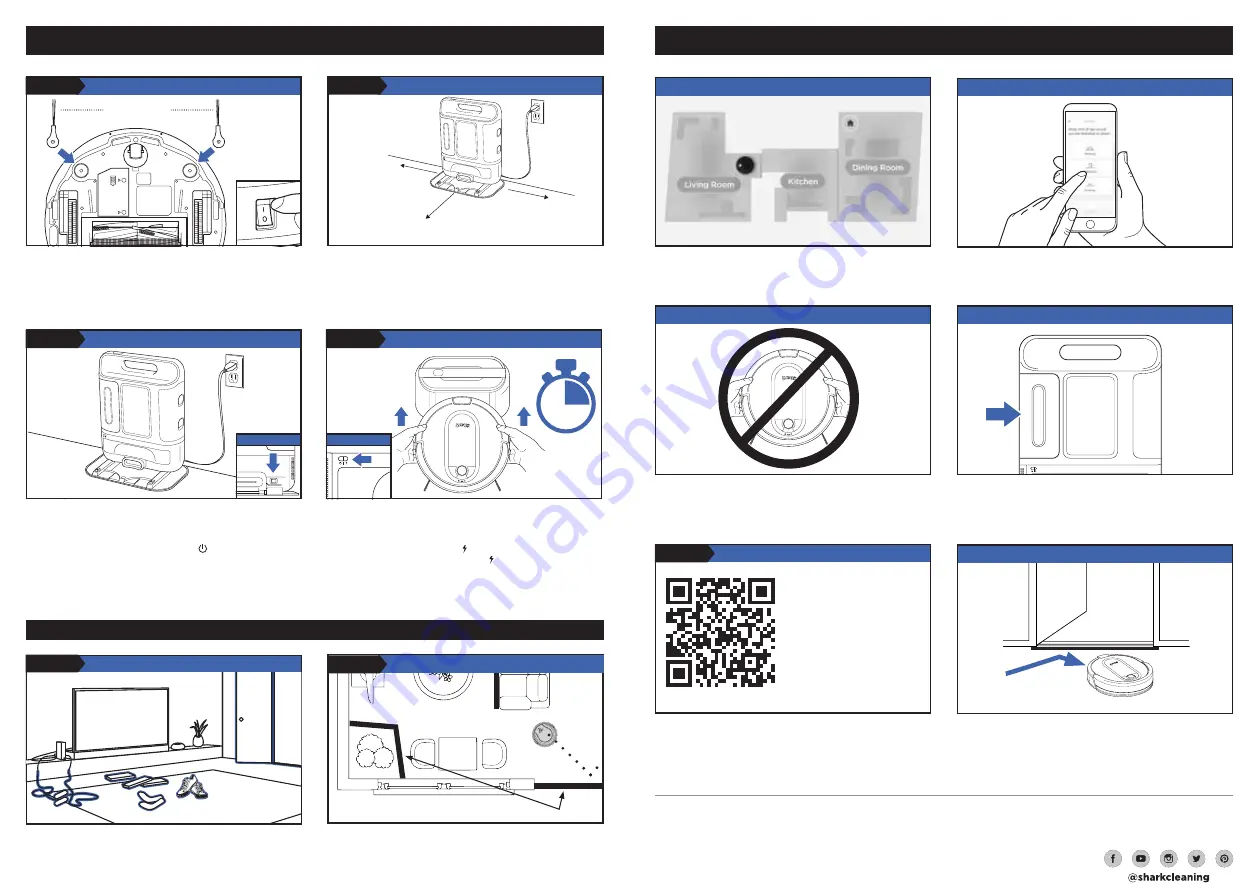
AVOID MOVING THE ROBOT OR BASE
CHECK BASE FILL LEVEL
Clean
Dock
!
WHAT TO EXPECT
While your robot is cleaning,
do not pick it
up
and move it, or move the charging base—this will
impact the robot’s ability to map your home.
Use the BotBoundary strip included in the box to keep
your robot out of the areas you would like it to avoid:
• Near power cords or phone chargers
• In front of thresholds higher than an inch
During the first few weeks, your robot will empty
more often than usual. Check the fill level regularly.
Home environments vary, and the bin may fill up
quicker in some homes.
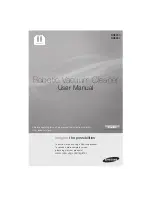
INTERACTIVE MAP
SCHEDULING
It will take your robot multiple runs to generate
your interactive map, so run it frequently to get the
best map.
For a constant state of clean®, set up a cleaning
schedule in the app.
© 2021 SharkNinja Operating LLC. BOTBOUNDARY, CONSTANT STATE OF CLEAN, SHARK, SHARK IQ ROBOT, and SHARK
IQ ROBOT SELF-EMPTY are registered trademarks of SharkNinja Operating LLC. SHARKCLEAN is a trademark of SharkNinja
Operating LLC. APPLE, the Apple logo, and iPhone are trademarks of Apple Inc., registered in the U.S. and other countries.
APP STORE is a service mark of Apple Inc., registered in the U.S. and other countries. GOOGLE, GOOGLE ASSISTANT,
GOOGLE PLAY, the Google Play logo, and Android are trademarks of GOOGLE LLC.
RV1000AE_QSG_E_NSM_REV_Mv6
Search “SharkClean” in
the app store. Some of
the exclusive features in
the app:
• Build an interactive
map of your home.
• Select specific rooms
to clean from the
interactive map.
• Control your robot
from anywhere.
DOWNLOAD THE SHARKCLEAN™ APP
STEP 7
NOTE:
Every time the robot returns to the base, it will make a loud noise as it empties debris. This is normal
and no cause for concern.
Clear cords and remove small objects like toys,
clothing, or drapes from floors. Open interior doors
in rooms you want your robot to clean. For best
results, run your robot in well-lit conditions.
SET UP FOR SUCCESS
STEP 6
DOORWAYS AND THRESHOLDS
Your robot can easily climb over most thresholds,
but if one is higher than an inch, block it off with a
BotBoundary® strip.