background image

11

1-877-646-5288

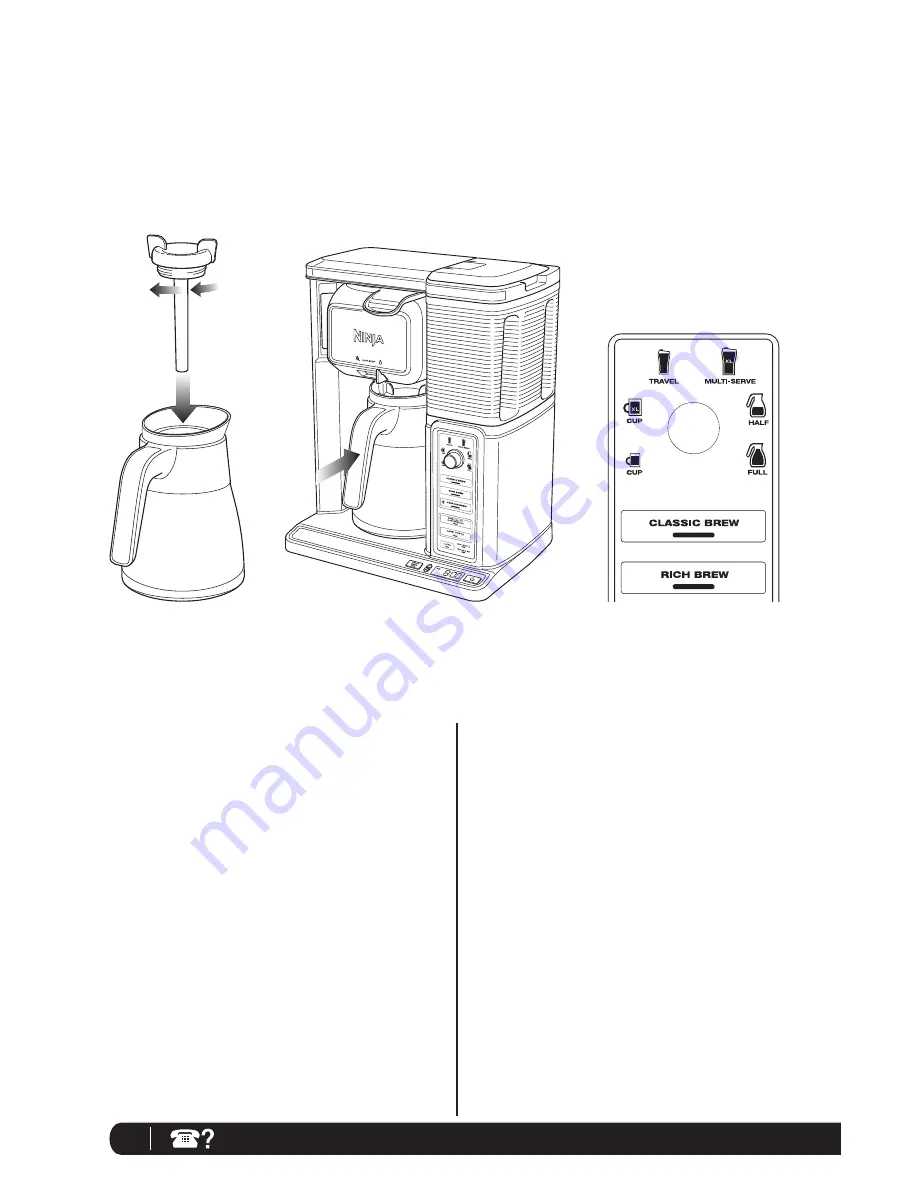
Fig. 11

Fig. 12

Fig. 13

Assembly - cont.

  Twist the brew-through lid clockwise onto the thermal 

carafe to lock into place. 

(Fig. 11)

6

  Center the carafe below the brew basket.

 (Fig. 12) 

 NOTE

: Do not use any coffee for the first two brew 

cycles in order to clean the brewer.

7

  Plug the brewer into an electrical outlet.

8

  Once all parts are securely in place, press the Power 

button.

9

  With the unit powered on, make sure the Drip Stop 

toggle is set to the open position. Select the full carafe 
size and Classic brew setting to initiate brewing.  

(Fig. 13)

10

  When the brew is complete, discard the water in the 

carafe. Repeat, beginning with step 2.

11

  You are now ready to use your Ninja Coffee Bar

®

.

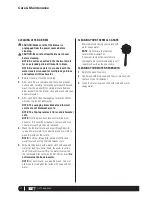
Summary of Contents for CF097W

Page 1: ...CF097W OWNER S GUIDE ninjakitchen com 1 877 646 5288 ...

Page 2: ...tions General Precautions 1 DO NOT allow young children to operate the appliance or use as a toy Close supervision is necessary when any appliance is used near children 2 To reduce the risk of electric shock this appliance has a polarized plug one blade is wider than the other As a safety feature this plug will fit into a polarized outlet only one way If the plug does not fit fully into the outlet...

Page 3: ... can result in a steam burn Thermal Carafe 18 The carafe is designed for use with this appliance It must never be used on a stove top 19 DO NOT place carafe in microwave 20 DO NOT use a carafe that has a loose or weakened handle 21 DO NOT clean carafe with abrasive cleansers steel wool pads or other abrasive material 22 DO NOT place on or near a hot gas or electrical burner or in a heated oven 23 ...

Page 4: ...3 1 877 646 5288 ...

Page 5: ...ou Get In Your Cup 12 Would You Like A Hotter Coffee 12 Pre Heating 12 Filling The Brew Basket With Coffee 13 Drip Stop 14 Brewing Coffee 14 Classic and Rich Brew 14 Over Ice Brew 15 Signature Brews Specialty and Cafe Forte Brew 15 Frothing Your Milk 16 Care Maintenance 17 Cleaning After A Brew 17 Cleaning Descaling Your Brewing System 18 Troubleshooting Guide 19 Replacement Parts 21 Warranty Regi...

Page 6: ...grated Frother i Drip Stop Toggle j Brew through Carafe Lid k Thermal Carafe l Multi Serve Cup Platform m Double Sided Scoop Carafe Side and Single Serve Side n Power Cord Wrap not shown o Frother Whisk p Showerhead q Water Tank Shelf a b c h e d f g i j k l m CAUTION DO NOT reach across top of brewer to froth during brewing Steam is released from vent on top of brewer and can result in a steam bu...

Page 7: ...on b Rich Brew Button c Over Ice Brew Button 3 Ninja Signature Brews a Specialty Brew Button b Cafe Forte Brew Button 4 Intelligent Clean Cycle Indicator Button 5 Drip Stop Indicator 6 Pre Heat Indicator Secondary User Interface 7 Delay Brew Button 8 Clock Hour and Minute Buttons 9 Programmable Digital Clock 10 Power Button 1c 1d 1b 2a 2b 3a 2c 3b 4 1e 1a 1f 5 6 7 8 9 10 ...

Page 8: ...o iQ The Ninja Coffee Bar knows how much water to use for each size and brew type 50 oz Thermal Carafe LED Control Panel with Programmable Digital Clock 24 Hour Programmable Delay Brew Button Set it to automatically brew the following morning Drip Stop Stops the flow of coffee from the brew basket allowing you to pour a cup mid brew switch toggle to the closed position to prevent dripping once the...

Page 9: ...ove the vessel while the appliance is running without the Drip Stop in the closed position Return the vessel quickly and open the Drip Stop to continue the brew CAUTION DO NOT place the thermal carafe in the dishwasher CAUTION Never open the brew basket when the coffeemaker is in use CAUTION Please ensure that you are using at least a 12 oz cup for the Cup size 14 oz cup for the XL Cup size 16 oz ...

Page 10: ...he clock is flashing press the H hour or M minute button to set the time that you would like the delay brew to begin The AM or PM indicator will illuminate on the left side of the display as you are setting the desired time Setting the Clock Delay Brew Fig 3 Fig 4 Fig 2 Fig 1 3 Once the proper time has been set select the size of the vessel that you would like to brew 4 Select the Brew Type that y...

Page 11: ...ngling the reservoir into the holder and pushing in towards the brewer to lock into place Fig 7 Do not fill water reservoir with any other liquids such as brewed coffee carbonated beverages etc as other liquids may damage your brewer 3 Slide brew basket out Fig 8 and lift both the permanent filter and Removable Filter Holder from the brew basket to remove Fig 9 To reinsert set the permanent filter...

Page 12: ...cles in order to clean the brewer 7 Plug the brewer into an electrical outlet 8 Once all parts are securely in place press the Power button 9 With the unit powered on make sure the Drip Stop toggle is set to the open position Select the full carafe size and Classic brew setting to initiate brewing Fig 13 10 When the brew is complete discard the water in the carafe Repeat beginning with step 2 11 Y...

Page 13: ...om the coffee Just like your cold mug cold milk lowers the temperature of your coffee The Ninja double wall cup is designed to retain initial coffee temp better than a ceramic cup Unlike a ceramic mug a thinner paper cup does not steal substantial heat from the coffee WOULD YOU LIKE A HOTTER COFFEE Have you ever wondered why coffee is served in paper cups when you order it to go The type of cup yo...

Page 14: ...d 2 Place the permanent filter or a 4 paper cone filter in the brew basket If using a paper filter first ensure the permanent filter is removed from the brew basket Then fold a 4 paper cone filter along the seams and insert firmly into the brew basket Fig 15 3 Use the Ninja Scoop and follow the measurements in the chart to fill the filter These measurements are based on level scoops adjust to your...

Page 15: ... beeps and the Drip Stop light will be illuminated Set the Drip Stop to the open position and select your brew concentration level CAN T WAIT FOR THAT FIRST CUP TO BE READY When brewing a carafe close the Drip Stop to pause the brew cycle and pour a cup Remember to reopen the Drip Stop to complete the brew Fig 17 NOTE If you forget to open the Drip Stop the Ninja Coffee Bar will pause the brew and...

Page 16: ...JA BREWS Specialty and Cafe Forte brews deliver a specific amount of concentrated coffee for the perfect brew every time Specialty delivers approximately 4 oz and Cafe Forte delivers approximately 8 oz SPECIALTY OR CAFE FORTE BREW The Specialty Brew delivers a strong coffee concentrate perfect for an iced blended coffee drink or milk based specialty drink Cafe Forte has a deep full bodied and comp...

Page 17: ...der the frother and submerge the whisk just below the surface of the milk This allows air to fold into the milk for the frothiest results Fig 23 4 Press and hold the frothing button for 30 to 45 seconds Fig 24 5 You can easily remove the frother whisk by twisting it clockwise Keep your cup below the whisk and carry it to your sink or dishwasher for cleaning Fig 25 CAUTION DO NOT reach across top o...

Page 18: ... the brew basket or in the overflow channels remove and rinse under water until grounds are removed 4 Wash the thermal carafe and brew through lid with soap and warm water Use a bottle brush or a cloth to wash the inside of the carafe NOTE The brew through lid permanent filter and water reservoir are top shelf dishwasher safe 5 Wipe machine down with a warm cloth with soap and water to clean the s...

Page 19: ...it through the system It will then pause for a half an hour deliver additional cleaning solution and pause for another half hour CAUTION DO NOT remove carafe at any time throughout the clean cycle DO NOT press any buttons during this 1 hour period as this will cancel all progress of the cleaning 5 After one hour your Ninja Coffee Bar will discharge the remainder of the cleaning mixture into the ca...

Page 20: ...keep your coffee hotter longer pre heat your mug or carafe by rinsing it with hot water from the tap If using a microwave safe mug with cream or milk try pre heating the cream or milk in the microwave for 30 seconds NOTE Never place carafe in the microwave Over Ice Brew is not cold The Over Ice Brew is designed to brew hot coffee over ice to lock in the flavor for rich smooth iced coffee Make sure...

Page 21: ...w you may notice leftover water in your water reservoir after filling to the minimum fill line of the size selected The water reservoir markings are minimum fill lines that indicate if there is enough water for the proper brew size in the reservoir but all brew styles use different amounts of water to create the proper flavor and concentration You can brew multiple cups before needing to refill Do...

Page 22: ...ur coffee without dripping It thoroughly mixes your coffee from the first drop to the last thanks to the brew through carafe lid Optimizes coffee temperature Allows you to brew both hot and iced coffee Coffee Brew Volume What impacts coffee brew volume When you make hot coffee coffee grounds will absorb some of the water that is brewed resulting in slightly less brewed coffee than the water used T...

Page 23: ...fails to operate properly while in use under normal household conditions within the warranty period return the complete appliance and accessories freight prepaid For assistance with warranty service options or customer support please call our customer care and product specialists at 1 877 646 5288 or visit ninjakitchen com warranty If the appliance is found to be defective in material or workmansh...

Page 24: ...action are registered trademarks of SharkNinja Operating LLC Printed in China Illustrations may differ from actual product We are constantly striving to improve our products therefore the specifications contained herein are subject to change without notice CF097W_IB_170601_2A VISIT US ONLINE AT ninjakitchen com Or follow us on any of our social media pages fb me ninjacoffeebar youtube com ninjacof...

Reviews: