15
THREAD CUTTING
CAUTION
:
:
:
:
DO NOT RUN SPINDLE IN REVERSE WHEN THREADING.
The SHARP 1118H is designed for rapid and accurate thread cutting. The quick-change
gearbox permits instant selection of 36 different inch and metric threads.
Threads can be cut to a shoulder without running into the shoulder since the automatic stop
will limit carriage travel at a predetermined point in either direction. Before staring to cut a
thread, select the proper cutting speed for the size of thread to be cut and to give the best
finish for the particular material being used. Maximum recommended threading speed is
800R.P.M.
Set the quick-change gearbox for desired pitch. To make a selection on the gearbox
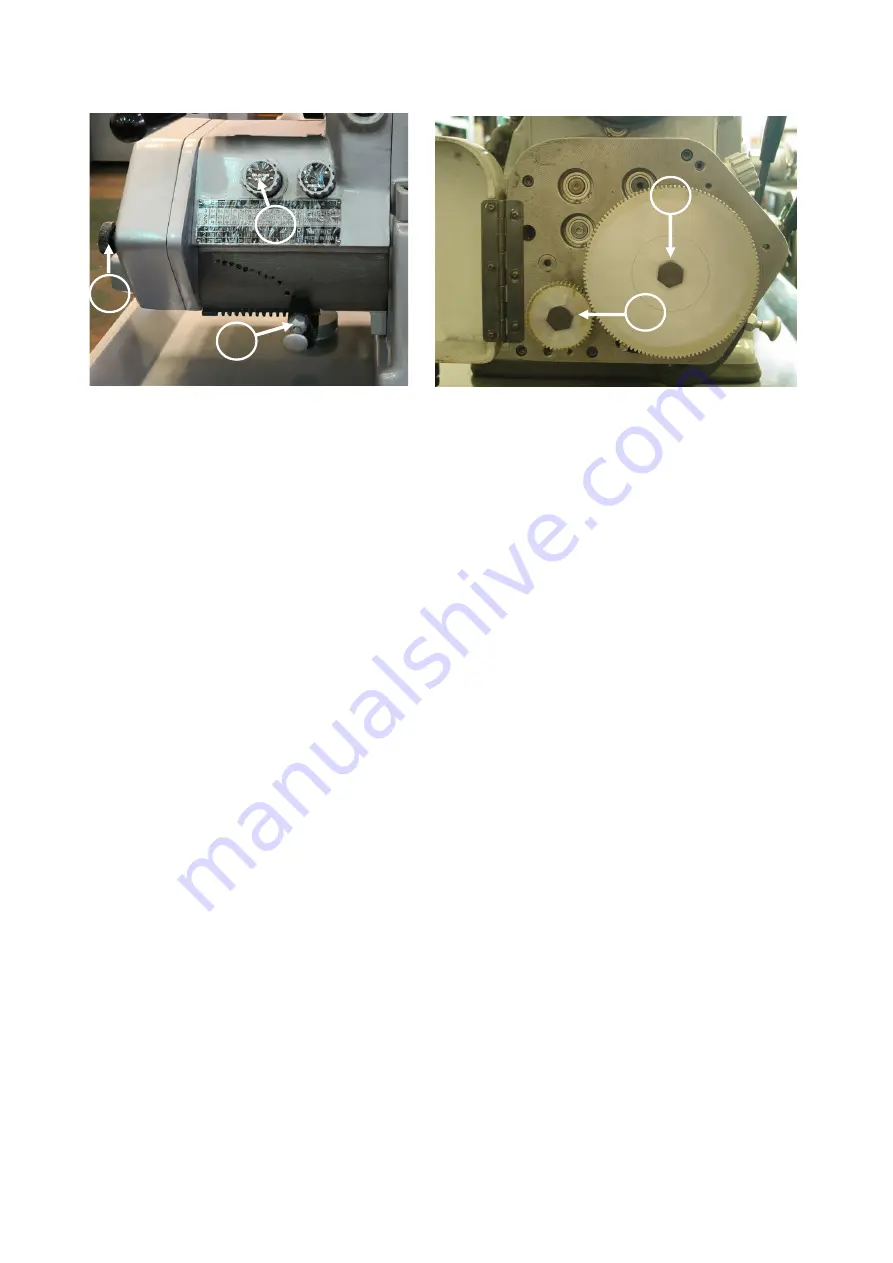
thread chart, pull the spring-pressured knob “A” (Figure 34), out as far as it will go and lower
it until it will move sideways to the desired notch directly under the thread required. Raise
the handle and let plunger drop into hole. If tumbler handle will not raise far enough to
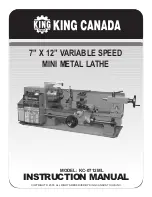
position plunger into hole, loosen knob “S” (Figure 35), open gear box door and rotate gear
“T” (Figure 35), until gears mesh and handle raises, permitting plunger to seat.
DO NOT SHIFT GEARS OR OPEN GEARBOX DOOR WHILE MACHINE
IS RUNNING.
Set selector knob “C” (Figure 34), for number corresponding to left side of gearbox
thread chart. Set knob “C” (Figure 34) so desired number is in bottom position in line with
arrow. If the sliding gear cluster dose not engage the other gears in gearbox properly to
bring the desired number on selector knob “C” (Figure 34) in line with arrow, loosen knob
“B” (Figure 34) open gearbox door and rotate gear “T” (Figure 35), until gear mesh.
Figure 34-Headstock and Gearbox
T
A
B
C
Figure 35-Thread Gearbox
S
Summary of Contents for 1118H
Page 1: ...OPERATION MANUAL PARTS LIST Machine Model No Machine S N 1118H ...
Page 34: ...31 HEADSTOCK ASSEMBLY ...
Page 38: ...35 THREADING GEAR BOX ASSEMBLY ...
Page 39: ...36 ...
Page 40: ...37 ...
Page 41: ...38 ...
Page 42: ...39 ...
Page 43: ...40 ...
Page 45: ...42 COLLET CLOSER ...
Page 47: ...44 BED ASSEMBLY ...
Page 49: ...PADESTAL ASSEMBLY 46 ...
Page 51: ...48 CARRIAGE ASSEMBLY ...
Page 53: ...50 GEAR BOX OF CARRIAGE ASSEMBLY ...
Page 56: ...53 CROSS AND COMPOUND SLIDE ASSEMBLY ...
Page 58: ...A C MOTOR POWER FEED CONTROL ASSEMBLY 55 ...
Page 60: ...CLUTCH ASSEMBLY 57 ...
Page 62: ...59 A C MOTOR ASSEMBLY ...
Page 64: ...61 VARIABLE SPEED CONTROL BOX ASSEMBLY ...
Page 66: ...TAILSTOCK ASSEBMLY 63 ...
Page 67: ...1118H 5HP 220V ...


