11
32K-X2000 CK32S60
36K-X2000 CK36S60
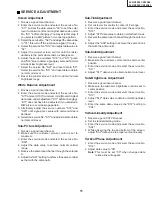
SERVICE ADJUSTMENT
Screen Adjustment
1. Receive a good local channel.
2. Enter the service mode and select the service No.
"S11" and set the data value to "00" to set the color
level to minimum. (Record original data code under
No. "S11" before changing) You may skip this step, if
you selected a B/W picture or monoscope pattern.
3. Select the service No. "S21" and adjust the data value
to "01", this turn off the luminance signal (Y-mute).
4. Select the service No. "S12" and adjust data value to
"58".
5. Adjust the master screen control until the raster
darkens to the point where raster is barely seen.
6. Adjust the service numbers "S16" red, "S17" green
and "S18" blue to obtain a good grey scale with normal
whites at low brightness level.
7. Select the service No. "S21" and reset data to "00".
Select the service No. "S11" and reset data to obtain
normal color level.
8. Reset the master screen control to obtain normal
brightness range.
White Balance Adjustment
1. Receive a good local channel.
2. Enter the service mode and select the service No.
"S11" and set to "00" (minimum color)(Record original
data code under adjustment "S11" before changing).
"S11" does not have to be adjusted, if you selected a
B/W picture or monoscope pattern.
3. Alternately adjust the service numbers "S19" and
"S20" until a good grey scale with normal whites is
obtained.
4. Select the service No. "S11" and adjust data to obtain
normal color level.
Sub-Picture Adjustment
1. Receive a good local channel.
2. Make sure the customer picture control is set to
maximum.
3. Enter the service mode and select the service No.
"S09".
4. Adjust the data value to achieve normal contrast
range.
5. Receive the same local channel through the antenna
A.
6. Adjust the "A01" setting to achieve the same contrast
as that with the antenna B.
Sub-Tint Adjustment
1. Receive a good local channel.
2. Set customer tint control to center of it's range.
3. Enter the service mode and select the service No.
"S10".
4. Adjust "S10" data value to obtain normal flesh tones.
5. Receive the same local channel through the antenna
A.
6. Adjust the "A02" setting to achieve the same tint as
that with the antenna B.
Sub-Color Adjustment
1. Receive a good local channel.
2. Make sure the customer color control is set to center
position .
3. Enter the service mode and select the service No.
"S11".
4. Adjust "S11" data value to obtain normal color level.
Sub-Brightness Adjustment
1. Receive a good local channel.
2. Make sure the customer brightness control is set to
center position.
3. Enter the service mode and select the service No.
"S12".
4. Adjust "S12" data value to obtain normal brightness
level.
5. Enter the same data value as the "S12" setting to
"C04".
Vertical Linearity Adjustment
1. Receive a good CATV channel.
2. Set to standard setting mode.
3. Enter the service mode and select the service No.
"S02".
4. While observing the top and bottom of the screen,
adjust "S02" data value to proper vertical linearity.
Vertical Phase Adjustment
1. Enter the service mode and select the service No.
"S14".
2. Adjust data value to "00".
Note: This must be set "00" when changed data
retrace line will appear.


