5-3
5
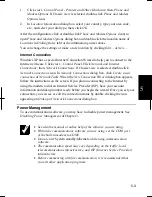
1. Click
start - Control Panel
-
Printers and Other Hardware
; then,
Phone and
Modem Options
. If Classic view is selected, double-click
Phone and Modem
Options
icon.
2. In
Location Information
dialog box, select your country, type your area code,
etc., and select your dial type; then, click
OK
.
After the configuration, click or double-click
Phone and Modem Options
(icon) to
open
Phone and Modem Options
dialog box and double-click the location name of
Locations
in
Dialing Rules
tab for the information you set above.
You can change the settings or make a new location by clicking
Edit…
or
New…
.
Internet Connection
Windows XP has a special Internet Connection Wizard to help you to connect to the
Internet with ease. Click
start
–
Control Panel
. Click
Network and Internet
Connections
; then,
Network Connections.
If Classic view is selected, double-click
Network Connections
icon
.
In
Network Connections
dialog box, click
Create a new
connection
of
Network Tasks
. When the
New Connection Wizard
dialog box appears,
follow the instructions on the screen. If you plan on connecting to the Internet by
using the modem to dial an Internet Service Provider (ISP), have your account
information and dial-up number ready before you begin the wizard. Once you set your
connection, you can see or edit the connection status by double-clicking the icon
appearing on
Dial-up
of
Network Connections
dialog box.
Power Management
To use communication software, you may have to disable power management. See
Disabling Power Management
of Chapter 3.
•
See also the manual or online help of the software you are using
.
•
Within the communications software you are using, set the COM port
of the built-in modem to COM3.
•
Do not enter
System standby/hibernate
while using communication
software.
•
The communication speed may vary depending on the traffic, local
telecommunications infrastructure, and ISP (Internet Service Provider)
infrastructure.
•
Before commencing with fax communication, it is recommended that
you exit other application programs.
Summary of Contents for Actius PC-UM32W
Page 1: ......
Page 47: ...3 14 3 ...
Page 73: ...4 26 4 ...
Page 93: ...6 8 6 ...
Page 113: ...Index 2 Index ...
Page 114: ......

