


AF-S50CX
AF-S60CX
AF-R50CX
AF-R55CX
AF-R60CX
AF-R70CX
ROOM AIR CONDITIONER
INSTALLATION AND OPERATION
MANUAL
PAGE
CONTENTS
This INSTALLATION AND OPERATION
MANUAL explains the proper use of your new
Sharp Air Conditioner. Read these instructions
carefully before installing or operating your air
conditioner. The INSTALLATION AND OP-
ERATION MANUAL should be kept in a safe
place for handy reference.
FOR YOUR PROTECTION ....................
2
CONSUMER LIMITED WARRANTY .....
3
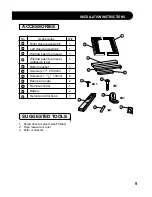
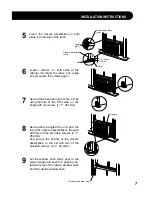
INSTALLATION INSTRUCTIONS
• CHECK WINDOW AREA ........................ 4
• LOCATlON .............................................. 4
• ACCESSORIES ...................................... 5
• SUGGESTED TOOLS ............................ 5
• INSTALLATION ....................................... 6
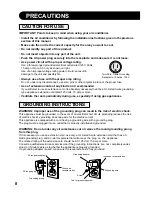
PRECAUTIONS
•
CAUTION FOR USE ............................ 8
• GROUNDING INSTRUCTIONS ........... 8
• NOTES ON OPERATION .................... 9
• ENERGY EFFICIENCY TIPS ............... 9
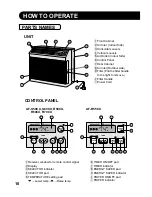
HOW TO OPERATE
•
PARTS NAMES ................................... 10
•
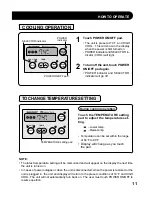
COOLING OPERATION ...................... 11
• TO CHANGE TEMPERATURE SETTING .......... 11
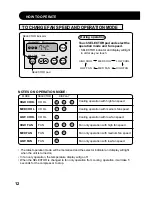
• TO CHANGE FAN SPEED AND OPERATION MODE .. 12
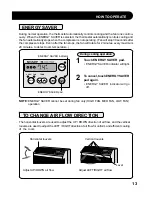
• ENERGY SAVER ................................. 13
• TO CHANGE AIR FLOW DIRECTION ....... 13
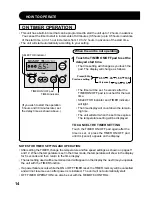
• ON TIMER OPERATION ..................... 14
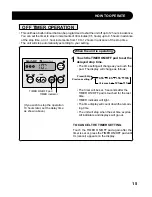
• OFF TIMER OPERATION .................... 15
• USING THE REMOTE CONTROL ....... 16
CLEANING AND MAINTENANCE ........
18
BEFORE CALLING FOR SERVlCE ......
19
As an ENERGY STAR Partner, Sharp Electronics has determined that these products (AF-S50CX, AF-
S60CX) meet the ENERGY STAR guidelines for energy efficient air conditioners. To meet these guidelines,
air conditioners must be at least 15% more efficient than the minimum Federal standard.


