background image

43

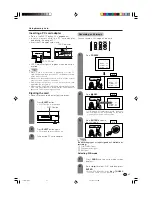
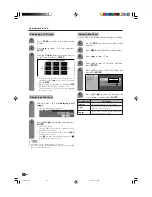
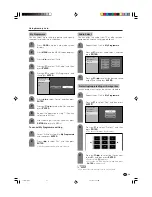
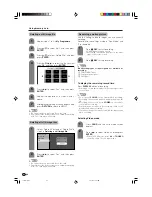
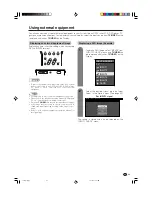
Using external equipment

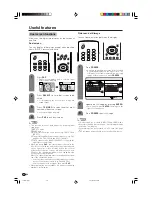
CAUTION

• To protect all equipment, always turn off the AVC System

before connecting to an HDTV tuner, VCR, DVD player,
PC, game console, camcorder or other external
equipment.

NOTE

• See pages 44 to 46 for external equipment connection.
• Please refer to the relevant operation manual (DVD player,

PC, etc.) carefully before making connections.

• Each time 

TV/VIDEO

 is pressed, the input source toggles.

• If the image does not come in clearly, you may need to

change the input signal type setting on the “Input Select”
menu.

• Refer to your external equipment operation manual for

the signal type.

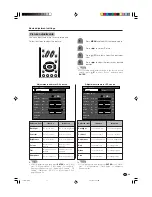
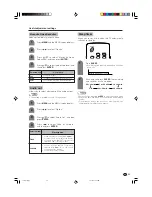
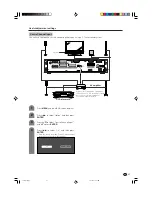
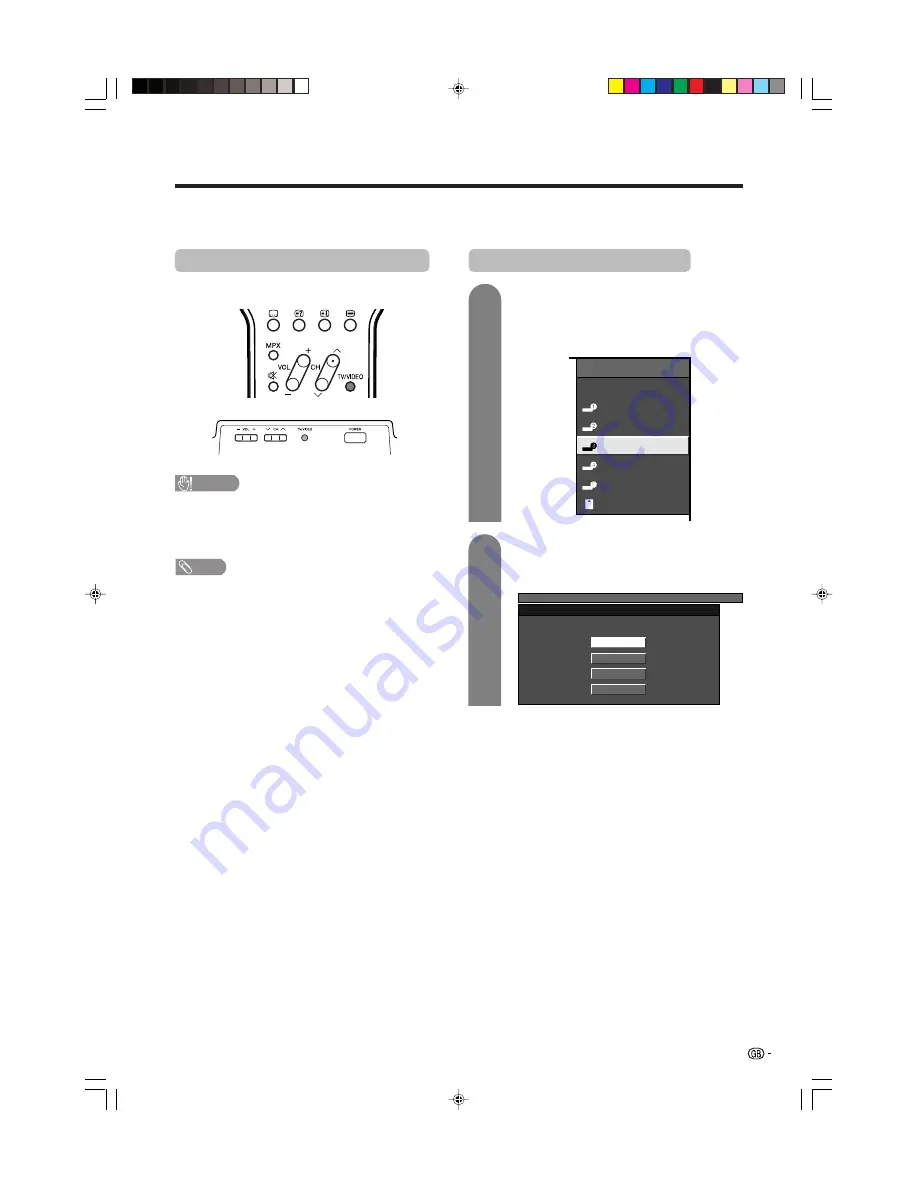
Displaying an external equipment image

Explanation here is for the setting when connecting
DVD to INPUT3 terminal.

Displaying a DVD image (Example)

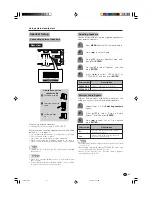
To watch a DVD image, select “INPUT3” from
“INPUT SOURCE” menu using 

TV/VIDEO

 on

the remote control unit or 

TV/VIDEO

  on the

Display.

Select the desired signal type on “Input
Select” in the “Option” menu. (See page 49.)

The setting is stored and can be selected on the
“INPUT SOURCE” menu.

INPUT SOURCE

TV

INPUT1

INPUT2

INPUT3

INPUT4

INPUT5

CARD

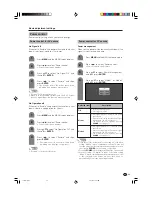
1

MENU    

[Option ... Input Select]

COMPONENT

Y/C

CVBS

RGB

2

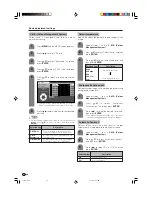
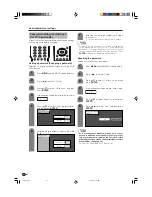
You can connect many types of external equipment to your System, like an HDTV tuner, VCR, DVD player, PC,
game console and camcorder. To view external source images, select the input source from 

TV/VIDEO

 on the

remote control unit or 

TV/VIDEO 

on the Display.

For INPUT3 signal

LC-45G1X(E)-g

04.10.15, 10:07 AM

43

Summary of Contents for Aquos LC-45G1X

Page 1: ...LCD COLOUR TELEVISION OPERATION MANUAL 45o o o o oDISPLAY LC 45G1X AVC SYSTEM TU 45GAX MODEL ...

Page 2: ...e tuning 24 Colour system 25 Sound system Broadcasting system 25 Labelling channels 25 Skipping channels 26 Setting the child lock 26 Password setting for child lock for TV input mode See page 56 Setting the booster 26 Sort 27 Erase Programme 27 Language setting for on screen display 28 OPC Optical Picture Control setting 28 Picture adjustments 29 C M S Colour Management System 30 Colour temperatu...

Page 3: ...l adjustment settings 48 Image position for TV AV input mode 48 Audio Only 48 Auto Sync adjustment PC input mode only 48 Fine Sync adjustment PC input mode only 49 Input Select 49 Input Label 50 Colour system setting for TV AV input mode 50 AV mode selection 51 Wide screen signalling WSS for TV AV input mode 51 Picture aspect ratio for TV AV input mode 51 WIDE mode for TV AV input mode 52 WIDE mod...

Page 4: ... For the same reason do not spill water or liquid on the product 10 Servicing Do not attempt to service the product yourself Removing covers can expose you to high voltage and other dangerous conditions Request a qualified service person to perform servicing 11 Repair If any of the following conditions occurs unplug the AC cord from the AC outlet and request a qualified service person to perform r...

Page 5: ... an enclosed place such as a bookcase or rack unless proper ventilation is provided or the manufacturer s instructions are followed The LCD panel used in this product is made of glass Therefore it can break when the product is dropped or impact applied If the LCD panel is broken be careful not to be injured by broken glass Heat sources Keep the product away from heat sources such as radiators heat...

Page 6: ...on manual Page 7 AC cord Display Optional accessories The listed optional accessories are available for the LCD colour TV Please purchase them at your nearest shop Additional optional accessories may be available in near future When purchasing please read the newest catalogue for compatibility and check the availability Wall mount bracket Part name Part number AN 37AG2 Antenna cable Page 13 RCA SC...

Page 7: ...u move the System carry it by two or more people When you move the Display hold the portion of the Display not the speaker Handling the AVC System CAUTION Do not put a VCR or other device on the AVC System Keep enough space above and on the sides of the AVC System Do not block the ventilation openings on the top and left side and the exhaust fan on the right side Do not spread a thick cloth beneat...

Page 8: ...ord to the Display 1 2 3 Removing the terminal cover Connecting the system cable and the AC cord to the AVC System CAUTION TO PREVENT RISK OF ELECTRIC SHOCK DO NOT TOUCH UN INSULATED PARTS OF ANY CABLES WITH THE AC CORD CONNECTED Press the two hooks toward the centre of the Display and remove the cover toward you GREY WHITE BLACK BLACK Check the alignment of the terminals before inserting Plug in ...

Page 9: ...bundling the cables with the clamp Closing the terminal cover Cable clamp Insert the cable clamp in the hole on the Display as shown Cables come out from the small opening Fasten the speaker cable with the holder LC 45G1X E a 04 10 15 9 58 AM 8 ...

Page 10: ...the stand as shown Peel each spacer away from the paper and attach to the four bulging areas on the stand 2 Attach each cushion to the stand as shown 3 Fit the stand to the AVC System Peel each cushion away from the paper and attach to the four areas at the bottom Insert the stand into the AVC System making sure that the thick and thin bulges of the stand align with the big and small holes on the ...

Page 11: ...only be performed by qualified service personnel Customers should not attempt to do the work themselves SHARP bears no responsibility for improper mounting or mounting that results in accident or injury Hanging on the wall AN 37AG2 wall mount bracket See the bracket instructions for details About setting the Display angle Vertical mounting Angular mounting 10 Angle of Display With Speakers Removed...

Page 12: ...nd and speaker from the Display unless using an optional bracket to mount it When using the Display with the supplied stand attached do not remove the speaker Doing so may disturb the balance leading to product damage or personal injury NOTE To attach the speaker and stand perform the above steps in reverse order Take off the speaker terminal cover Disconnect the cable from the speaker Unfasten th...

Page 13: ...f time remove the batteries from it Inserting the batteries Before using the System for the first time insert two AAA size batteries supplied When the batteries become depleted and the remote control fails to operate replace the batteries with new AAA size batteries Using the remote control unit Use the remote control unit by pointing it towards the remote sensor window Objects between the remote ...

Page 14: ...rief explanation of the types of connections that are used for coaxial cable Connecting to the power outlet Before connecting the AC cords make sure to connect the system cable first Display rear view NOTE Always turn off the main power of Display when connecting the AC cords Disconnect the AC cords from the AC outlet Display and AVC System if the System will not be used for a long period of time ...

Page 15: ...splay TV VIDEO button Remote control sensor OPC Optical Picture Control See page 28 OPC indicator Remote control indicator POWER On Off button Volume up k down l buttons VOL l k Channel up r down s buttons CHs r LC 45G1X E a 04 10 15 9 59 AM 14 ...

Page 16: ...dicator PC CARD slot CARD indicator Headphone When connecting headphones the sound from the speakers is muted Still image mode deactivates Teletext mode resets to normal Speaker setting resets to SPEAKER A Audio Out setting resets to Fixed Centre Channel Input setting resets to Off Audio Only setting resets to Off INPUT 5 terminal AUDIO R L ANTENNA INPUT terminal INPUT 5 terminal DVI I CENTRE CHAN...

Page 17: ...eturn to the previous image in normal viewing mode See page 18 9 SUBTITLE for TELETEXT TV External input mode To turn the subtitles on and off See page 61 10 k Reveal hidden for TELETEXT TELETEXT mode Display hidden characters See page 60 11 MPX Select the sound multiplex mode See page 19 12 VOLl VOLk Set the volume See page 20 13 e MUTE Mute the sound See page 20 14 EXIT Turn off the On Screen Di...

Page 18: ...trol NOTE If you are not going to use this System for a long period of time be sure to remove the AC cords from the power outlet Weak electric power is still consumed even when both POWER button on the Display and POWER button on the AVC System are turned off Watching TV Press POWER button on the Display POWER indicator blue The System is on After a few seconds programme information appears with s...

Page 19: ...elect mode and press 2 again To select a 2 digit channel e g channel 12 Press o to set the 2 digit select mode Press 1 followed by 2 NOTE Complete this procedure within 3 seconds otherwise the selection will not be made on the 2 digit channel mode When viewing Teletext information View a page directly which is 3 digit page number from 100 to 899 by pressing buttons 0 to 9 Using Flashback A on the ...

Page 20: ...2 MONO 99 BBC2 Stereo mode Bilingual mode Monaural mode 99 BBC2 MONO 99 BBC2 STEREO CH A 99 BBC2 CH B 99 BBC2 CH AB 99 BBC2 MONO 99 BBC2 When receiving a bilingual signal Each time you press MPX the mode switches among NICAM CH A NICAM CH B NICAM CH AB and MONO When receiving a monaural signal Each time you press MPX the mode switches between NICAM MONO and MONO When receiving a bilingual signal E...

Page 21: ...tion Using e Mute on the remote control unit e mutes the current sound output 20 VOLl l l l l k k k k k To increase the volume press VOLk k k k k To decrease the volume press VOLl l l l l Press e The sound is silenced e has been displayed on the screen for 30 minutes Mute NOTE Within 30 minutes after pressing e press one of the buttons below to cancel the mute VOLf f f f f VOLe e e e e e Mute will...

Page 22: ...the item 3 Item displayed in white This indicates an item can be selected 4 Item displayed in grey This indicates that the item cannot be selected There are various reasons why items cannot be selected but the main reasons are as follows 1 Nothing is connected to the selected input terminal 2 The function is not compatible with the current input signal NOTE Menu options differ in the selected inpu...

Page 23: ...e 32 Balance Page 32 Dolby Virtual Page 32 Audio Only Page 48 3D NR Page 54 Mosquito Noise Reduction Page 55 Input Select Page 49 Audio Out Page 55 Quick Shoot Page 54 Colour System Page 50 Centre Channel Input Page 57 Audio Power Control Setup Option PC input mode menu items List of PC menu items to help you with operations OPC Page 28 Backlight Page 29 Contrast Page 29 Brightness Page 29 Red Pag...

Page 24: ...can be tuned automatically or manually Press MENU and the MENU screen displays Press c d to select Setup 1 2 3 4 Press a b to select Programme Setup and then press ENTER If you have already set the password enter it here See page 56 for setting password NOTE After performing step 5 the menu screen shown in step 3 will reappear Do not turn off the System before then because the System is saving the...

Page 25: ...splays Press a b to select Fine and then press ENTER Press c d to adjust the frequency and then press ENTER Adjust while checking the background picture as a reference 1 2 Fine Colour sys Sound sys Label Skip Lock 179 25 Search AUTO B G Off SAT 1 Off Booster Off 179 25 MHz a 179 25 MHz Press 1 s 7 s 9 s 2 s 5 49 25 MHz Press 4 s 9 s 2 s 5 s ENTER Instead of the method above you can also set by dir...

Page 26: ...Press a b to select the optimum sound system and then press ENTER Sound system menu Fine Search Colour sys Sound sys Label Skip Lock 179 25 AUTO B G Off SAT 1 Off Booster Off B G D K I L L L 3 2 Fine Colour sys Sound sys Label Skip Lock 179 25 Search AUTO B G Off SAT 1 Off Booster Off A BACK CLEAR END K U B L V C M W D N X E O Y F P Z G Q H R _ I S J T 0 1 2 3 4 5 6 7 8 9 Labelling menu 4 Press a ...

Page 27: ...e displayed Inputting the correct password lifts the child lock temporarily until the power is turned off Setting the child lock You can block the viewing of any channel Fine Search Colour sys Sound sys Label Skip Lock 179 25 AUTO B G Off SAT 1 Off Booster Off Off On Lock menu Press a b to set Lock to On and then press ENTER Channels with Skip set to On are passed over when using CHr s even if sel...

Page 28: ...t the password enter it here See page 56 for setting password Erase Programme The individual programme can be erased Erase programme menus 01 06 07 08 09 10 11 12 13 14 15 16 17 18 19 20 SAT 1 01 SAT 1 Pro7 02 KABEL 03 04 05 Next 02 Pro7 Next 01 SAT 1 03 KABEL Pro7 02 06 07 08 09 10 11 12 13 14 15 16 17 18 19 20 04 05 Next 01 SAT 1 02 KABEL 06 07 08 09 10 11 12 13 14 15 16 17 18 19 20 02 KABEL 03 ...

Page 29: ...ccording to the lighting conditions Press c d to select Picture 2 Using OPC on the menu screen Press MENU and the MENU screen displays 1 Press a b to select OPC Press c d to select On 3 4 Description The brightness is fixed at the value set in Backlight see page 29 Automatically adjusts Selected item Off On NOTE When set to On the System senses the surrounding light and automatically adjusts the b...

Page 30: ...ed item Backlight Contrast Brightness Colour Tint Sharpness MENU Picture Picture Audio Contrast OPC Brightness Reset 30 0 0 30 40 30 Backlight 16 16 16 Off On Red Green Blue Advanced 0 0 0 30 30 30 30 30 30 USER PC NOTE Select Advanced and then press ENTER to set C M S Hue C M S Saturation C M S Value Colour Temp Sharpness Enhancement Automatic Contrast I P Setting Film Mode 3D Y C or Monochrome S...

Page 31: ...o magenta or yellow C M S Saturation C M S Value You can select C M S Saturation or C M S Value here instead of selecting C M S Hue Description This is a standard to adjust the colour either more reddish or more bluish in tone Increases or decreases the saturation of a selected colour A higher value makes the image brighter A lower value makes the image darker Selected item C M S Hue C M S Saturat...

Page 32: ...e depending on the input signal type or noisy input signal 3D Y C is automatically set to On when you change channels or input sources 3D Y C Provides high quality images with minimal dot crawl and cross colour noise Description Normal adjustment For movie image For still image Selected item Standard Fast Slow Press a b to select 3D Y C and then press ENTER 2 Press a b to select the desired level ...

Page 33: ...to On Press c d to select Audio 2 Press MENU and the MENU screen displays 1 Press c d to select On and then press ENTER 4 3 Press a b to select Dolby Virtual and then press ENTER NOTE Audio menu items are greyed out when Audio output is variable or when headphones are in use External Audio Bypass is greyed out when Dolby Virtual is set to On Balance is greyed out when Dolby Virtual is set to On Fo...

Page 34: ...PC source Power management When set the power will automatically shut down if no signal is input for a certain time Press a b to select Power Management and then press ENTER Press a b to select Mode1 or Mode2 and then press ENTER 3 4 Description No power management Factory preset value If no signal inputs for 8 minutes the power shuts down Even if you start using the PC and the signal inputs again...

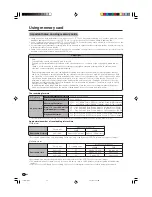
Page 35: ... for compensation for damages Therefore be sure to strictly observe the existing copyright laws In addition when using image data that includes third parties since the use of such images without prior permis sion may constitute an intrusion on the privacy of third parties be sure to refrain from such usage Using memory card Copyright Still picture Recording Playback file format Motion picture JPEG...

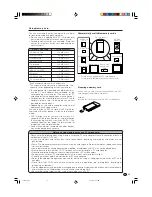
Page 36: ... using memory cards and PC card adapters to avoid corruption of data or malfunction of the LCD TV set If you use memory cards other than those shown above recording or playing back pictures are not guaranteed Some PC card adapters have restrictions of memory card capacity Refer to the relevant operation manual for such restrictions Some pictures which have been created modified or copied on your P...

Page 37: ...PC image data on the LCD TV Recording formats of image data When recording image data on the LCD TV the recording formats are as follows When recording motion pictures The SD_VIDEO folder is created and the data is stored in When playing the card the SD_VIDEO recording format is recognised When recording still pictures The DCIM folder is created and the data is stored in When playing the card the ...

Page 38: ...ing a PC card adapter Press in the EJECT button if it is popped out Insert a memory card to a PC card adapter beforehand See page 35 Insert the PC adapter card slowly CARD indicator lights up green when the card is inserted PC CARD slot CARD indicator NOTE When Card is not inserted is displayed eject the PC card adapter and then insert the PC card adapter slowly all the way to the end When over a ...

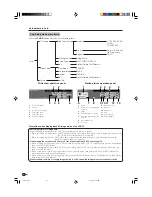
Page 39: ...show and press H to return to the index screen CARD STILL 0001 0045 ORDER NORMAL PREV SLIDE SHOW STOP NEXT REPEAT OFF NOTE See page 36 for operation panel function You cannot rotate the image during slide show Stop slide show to rotate the image Description Set the frame interval for a slideshow Set the frame order for a slideshow See My Programme for details If set to On the slideshow will play a...

Page 40: ...o pictures and specify the order for displaying in slide show Press a b to select My Programme and then press ENTER 5 6 7 Audio Select Setup Erase Slide Show Setup My Programme Edit Press c d to select Setup and then press ENTER Press a b c d to select the files and then press ENTER To cancel My Programme setting Select Erase at step 6 in My Programme and then press ENTER 1 2 Press c d to select Y...

Page 41: ...u no longer need press RETURN to return to MENU Recording a motion picture Use this setting to record images you are currently watching Record with the settings made in Rec Mode and Pre recording Press E REC to start recording CARD indicator lights up red Recording information displays in the lower right corner of the screen 1 2 Press E REC to stop recording To display the remaining record time Pr...

Page 42: ... recording Repeat Edit SP LP EP Press a b to select the desired mode and then press ENTER Press CARD and the card mode screen displays 1 CARD VIDEO PLAY PLAY MODE SP 0 0 1 5 2 5 0001 0045 REPEAT OFF Pre recording You can record the picture slightly before the point where you pressed the record button enabling you to record just the scene you wanted Press a b to select Pre recording and then press ...

Page 43: ...may malfunction NOTE Formatting a card deletes all files including the ones which set to protect Press a b to select Edit and then press ENTER Press a b to select Protect and then press ENTER 6 5 Press a b c d to select the file you want to protect and then press ENTER Protect mark displays Select the file with a protect mark and press ENTER to unprotect it Repeat the operation in step 7 After set...

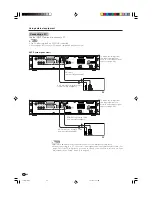
Page 44: ...xternal equipment image Explanation here is for the setting when connecting DVD to INPUT3 terminal Displaying a DVD image Example To watch a DVD image select INPUT3 from INPUT SOURCE menu using TV VIDEO on the remote control unit or TV VIDEO on the Display Select the desired signal type on Input Select in the Option menu See page 49 The setting is stored and can be selected on the INPUT SOURCE men...

Page 45: ...PUT 3 terminal when connecting a VCR and other audiovisual equipment To watch an image from this input terminal you may need to select the input signal type see page 49 S video cable commercially available Video cable commercially available Audio cable commercially available The system can be connected to a SCART terminal on the external equipment with SCART cable Please refer to the operation man...

Page 46: ...terminals to enjoy clearer picture To watch an image from this input terminal you need to select input signal type see page 49 AVC System rear view DVD player HDTV tuner When connecting a DVD player or an HDTV tuner using component cable You can use the INPUT 3 terminal when connecting a DVD player or an HDTV tuner and other audiovisual equipment To watch an image from this input terminal you may ...

Page 47: ...ct a PC NOTE The PC input terminals are DDC1 2B compatible Refer to page 63 for a list of PC signals compatible with the System AVC System rear view ø 3 5 mm stereo minijack cable commercially available PC ø 3 5 mm stereo minijack cable commercially available RGB DVI conversion cable commercially available DVI cable commercially available To watch the image from this input terminal you need to sel...

Page 48: ...o quality to suit internal supplied speakers Repeat steps 1 to 3 in Selecting speakers above 1 2 Press c d to select Yes or No and then press ENTER 3 Press a b to select External Audio Bypass and then press ENTER NOTE External Audio Bypass is greyed out when Dolby Virtual is set to On When using external speakers SPEAKER B make sure to set External Audio Bypass to Yes When Dolby Virtual is on Exte...

Page 49: ...to select Audio Only and then press ENTER 1 2 3 Audio Only When listening to music from a music programme you can set the display off and enjoy audio only Description Audio is output without screen image Both screen images and audio are output Selected item On Off 1 2 Auto Sync adjustment PC input mode only For automatically adjusting the PC image Press MENU and the MENU screen displays 3 Press a ...

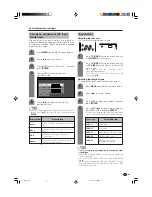
Page 50: ...s MENU and the MENU screen displays 1 2 4 3 Press c d to select Option Press a b to select Input Select and then press ENTER Press a b c d to select a signal type you want to set and then press ENTER If the selected signal type is incorrect an image does not display or no colour image displays NOTE If no colour image displays try to change the other signal type Check the operation manual of the ex...

Page 51: ...stem to one that is compatible with the image on the screen Press MENU and the MENU screen displays 1 2 4 3 Press c d to select Option Press a b to select Colour System and then press ENTER Press a b to select a compatible video signal system of your equipment and then press ENTER Some items may be greyed out They are not selectable AUTO PAL SECAM NTSC 3 58 NTSC 4 43 PAL 60 NOTE Factory preset val...

Page 52: ...st for sports viewing Selected item STANDARD MOVIE GAME USER DYNAMIC Wide screen signalling WSS for TV AV input mode WSS allows a television to switch automatically among the different screen formats Press MENU and the MENU screen displays 1 2 Press a b to select WSS and then press ENTER 3 Press c d to select Setup Press c d to select On or Off and then press ENTER 4 NOTE Try to set WIDE mode if a...

Page 53: ...ode Manual Selection Press WIDE The WIDE MODE menu displays The menu lists the wide mode options selectable for the type of video signal currently received Auto Selection If you set WSS and 4 3 Mode in the Setup menu on page 51 the optimum WIDE mode is automatically chosen for every broadcast containing the WSS information WSS menu To enable Auto Selection set WSS in the Setup menu to On See page ...

Page 54: ...l Cinema 640g480 Keeps the original aspect ratio in a full screen display Keeps the original aspect ratio in a full screen display The top and bottom of the image is slightly cropped Detects the resolution of the signal and displays an image with the same number of pixels on the screen An image fully fills the screen NOTE Connect the PC before making adjustments See page 46 Selectable screen size ...

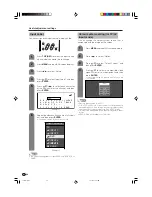
Page 55: ...ge Press MENU and the MENU screen displays Press c d to select Option Press a b to select 3D NR and then press ENTER Some items may be greyed out They are not selectable Press a b to select the desired level Off High Low and then press ENTER Press a b to select Quick Shoot and then press ENTER Press c d to select On and then press ENTER NOTE Quick Shoot may cause image noise If this occurs turn th...

Page 56: ... 2 hr 30 min 2 hr 00 min Off Each time you press SLEEP the remaining time switches as shown below Press SLEEP Remaining time displays when sleep timer has been set Sleep Timer Remain 2 hr 00 min 1 2 Mosquito Noise Reduction Reduces fine detail mosquito noise Press MENU and the MENU screen displays 1 2 Press a b to select Mosquito Noise Reduction and then press ENTER Press a b to select the desired...

Page 57: ...essage pops up Press ENTER to display the password input window Press c d to select Setup Useful adjustment settings Resetting the password Allows you to reset your password Press a b to select Child Lock and then press ENTER Press a b to select Reset and then press ENTER Press c d to select Yes and then press ENTER Press MENU and the MENU screen displays Press c d to select Setup If you already s...

Page 58: ...nel Input terminal is output from the speaker Press MENU and the MENU screen displays 1 2 Press c d to select Option and then press ENTER 3 Press a b to select Centre Channel Input and then press ENTER Off On Speaker Connect to external audio equipment that supports a 5 1ch surround system Refer to your external equipment operation manual for details AV amplifier DVD player etc LC 45G1X E j 04 10 ...

Page 59: ... the current inputs e g PAL and PAL Select a channel with no signal then press P P When this function is not available No dual screen display available will display FREEZE Press FREEZE A moving image displays on the left screen and a still image displays on the right screen The still image is one frame captured from a moving image at the moment you press FREEZE 1 2 Update the still image by pressi...

Page 60: ... ENTER Press a b to select the receivable teletext broadcasting language in your country MENU Setup Text Language West Europe East Europe Greek Turkish Cyrillic West Europe English French Scandinavian Czech German Spanish Italian East Europe Polish French Scandinavian Czech German Slovenian Croatian Italian Rumanian Greek Turkish English French Scandinavian Turkish German Spanish Italian Greek Cyr...

Page 61: ...reen switches as shown upper right If you select a programme with no Teletext signal No Teletext available is displayed The same message displays during dual screen or other modes if no Teletext signal is available 1 TELETEXT TELETEXT 2 3 RED GREEN YELLOW BLUE TELETEXT When viewing the Teletext information Press CH r to increase the page number Press CH s to decrease the page number Button functio...

Page 62: ...ed block or group pages Press l to exit the TOP Overview screen 4 5 NOTE Subtitle will not be displayed when the service does not contain the subtitle information Time display You can display the time information included in the Teletext broadcast Select a TV channel providing Teletext information The time information is automatically captured 1 2 3 4 Press DISPLAY The channel display will appear ...

Page 63: ...ut signal setting See page 49 Are both video cable and S video cable connected to a SCART conversion connector See pages 44 and 45 The unit s internal temperature has increased Remove any objects blocking vent or clean Check the power control setting See page 33 Is sleep timer set See page 55 Is connection to other components correct See pages 44 to 46 Has input signal setup been done correctly af...

Page 64: ... earth for audio 5 Earth for blue 6 Audio left input 7 Blue input 8 Audio video control 9 Earth for green 10 Not used 11 Green input 12 Not used 13 Earth for red 14 Not used 15 Red input 16 Red Green Blue control 17 Earth for video 18 Earth for Red Green Blue control 19 Video output TV Monitor out 20 Video input 21 Plug shield SCART INPUT 2 1 Audio right output 2 Audio right input 3 Audio left out...

Page 65: ...s Baud rate Parity bit Data length Stop bit Flow control 9 600 bps 8 bits None 1 bit None Appendix Command format Communication procedure Send the control commands from the PC via the RS 232C connector The Display operates according to the received command and sends a response message to the PC Do not send multiple commands at the same time Wait until the PC receives the OK response before sending...

Page 66: ...0 CLOCK 0 180 PHASE 0 40 TOGGLE AV NORMAL AV ZOOM 14 9 AV PANORAMA AV FULL AV CINEMA 16 9 AV CINEMA 14 9 AV NORMAL PC CINEMA PC FULL PC DOT BY DOT AV PC TOGGLE MUTE MUTE OFF TOGGLE ON OFF DUAL SCREEN OFF DUAL SCREEN ON TOGGLE OFF SLEEP TIMER 30 MIN SLEEP TIMER 1 HOUR SLEEP TIMER 1 HOUR 30 MIN SLEEP TIMER 2 HOUR SLEEP TIMER 2 HOUR 30 MIN TEXT OFF TEXT ON TOGGLE DIRECT PAGE JUMP 100 899 WIDE MODE PO...

Page 67: ...T 3 SCART AV input output Y C input RGB input RCA pin Component input Rear INPUT 1 AVC System AV OUTPUT RCA pin AV output Audio Variable Fixed DC OUTPUT DC9V 7W MAX UHF VHF 75 q Din type SCART AV input output Y C input AV Link ANTENNA IN SPEAKER B External speaker output terminal L and R INPUT 5 Ø 3 5 mm jack Audio input DVI I DVI I input CENTRE CHANNEL INPUT RCA pin Colour System PAL SECAM NTSC 4...

Page 68: ...67 Dimensional drawings 742 802 645 482 1 120 95 187 677 86 5 200 200 1084 989 1 556 7 145 Unit mm Display LC 45G1X E K 04 10 15 10 13 AM 67 ...

Page 69: ...68 Dimensional drawings 365 303 220 49 5 430 95 2 Unit mm AVC System LC 45G1X E K 04 10 15 10 13 AM 68 ...

Page 70: ...o clears the password You can run the Auto Installation again by using the following steps 1 Turn on the power of the Display and the AVC System 2 Press MENU Make sure the menu screen displays 3 Press c d to select Setup 4 Press a b to select Auto Installation and then press ENTER 5 Press c d to select Yes and then press ENTER NOTE As a precautionary measure make a note of your password above scis...

Page 71: ... FOR LOCATION ENQUIRIES WITHIN AUSTRALIA REGARDING YOUR LOCAL SHARP APPROVED SERVICE CENTRE VISIT OUR WEBSITE AT www sharp net au OR CALL SHARP CUSTOMER CARE 1300 135 022 SHARP CORPORATION OF AUSTRALIA PTY LTD SPform019 JUNE 2004 LOCAL CALL COST APPLY WITHIN AUSTRALIA SHARP APPROVED SERVICE CENTRE www sharp net nz CONTACT YOUR SELLING DEALER RETAILER OR CALL Hyo3 LC 45G1X 04 10 15 9 57 AM 2 ...

Page 72: ...d to defect or injury caused by or resulting from misuse abuse neglect accidental damage improper voltage liquid spillage vermin infestation software or any alterations made to the product which are not authorised by Sharp Please retain your sales documentation as this should be produced to validate a warranty claim This warranty is in addition to and in no way limits varies or excludes any expres...

Reviews: