LC-52/60/70LE640U/C6400U,LC-80LE633U/844U (1st Edition)
4 – 18
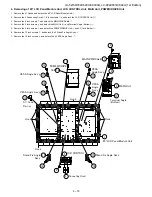
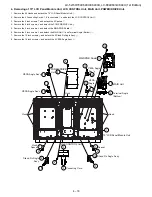
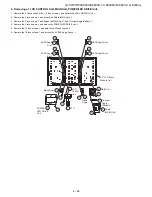
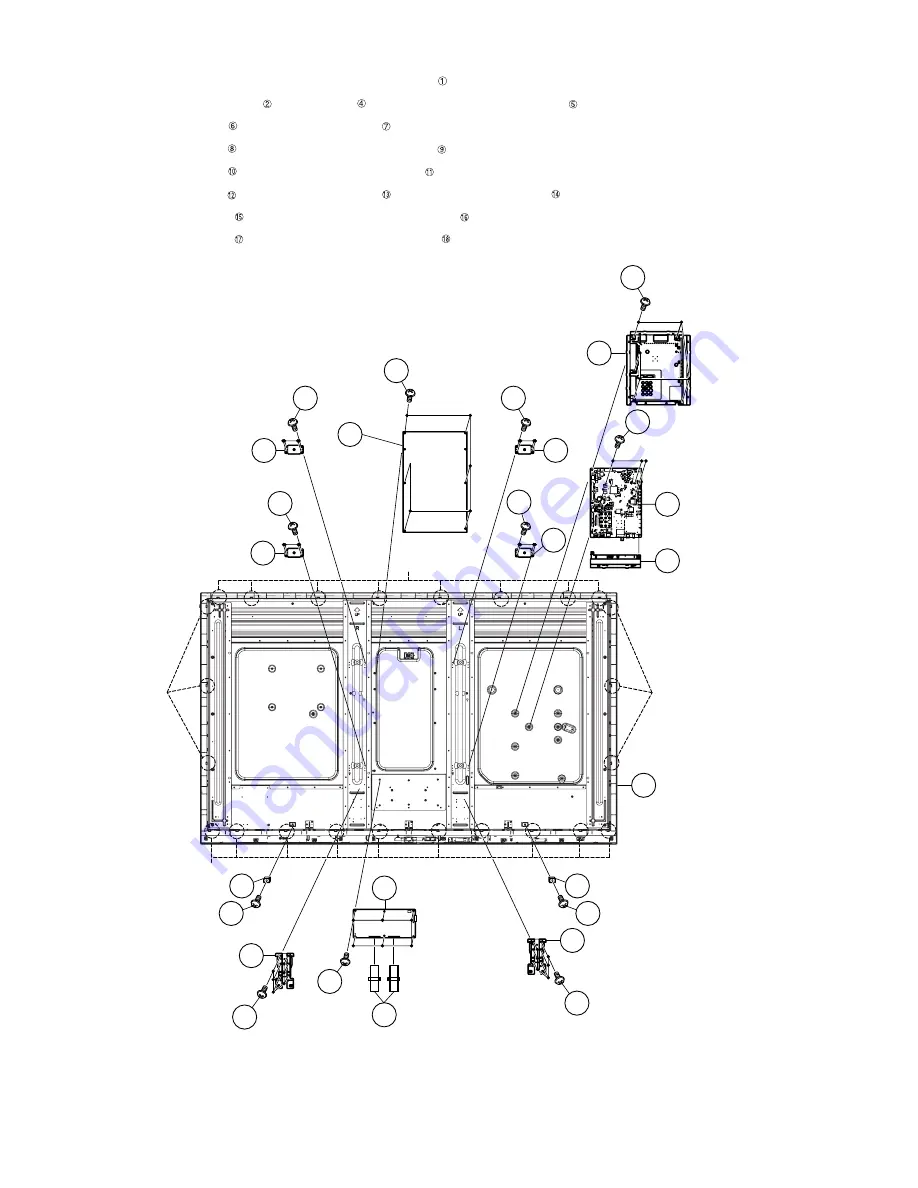
4. Removing of 70” LCD Panel Module Unit, LCD CONTROL Unit, MAIN Unit, POWER/DRIVE Unit.
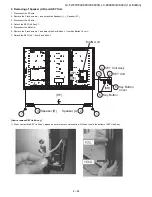
1. Remove the 24 Hooks and detach the 70” LCD Panel Module Unit .
2. Remove the 2 Connecting Cords , 6 lock screws and detach the LCD CONTROL Unit .
3. Remove the 2 look screws and detach the 2 Spacers .
4. Remove the 6 lock screws and detach the POWER/DRIVE Unit .
5. Remove the 5 lock screws and detach the MAIN PWB Shield .
6. Remove the 3 lock screws and detach the MAIN Unit and Terminal Angle (Bottom) .
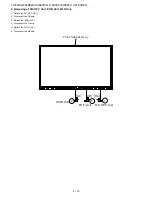
7. Remove the 12 lock screws and detach the 2 Stand Fix Angle Ass’y .
8. Remove the 16 lock screws and detach the 4 VESA Angle Ass’y .
䎔䎚
䎔䎛
䎔䎚
䎔䎚
䎔䎚
䎔䎛
䎜
䎛
䎔䎗
䎔䎖
䎔䎕
䎔䎔
䎔䎓
䎔䎙
䎔䎘
䎘
䎗
䎔䎘
䎔䎙
䎕
䎶䏗䏄䏑䏇䎃䎩䏌䏛䎃䎤䏑䏊䏏䏈
䎃䎤䏖䏖䎊䏜
䎯䎦䎧䎃䎦䎲䎱䎷䎵䎲䎯䎃䎸䏑䏌䏗
䎦䏒䏑䏑䏈䏗䏌䏑䏊䎃䎦䏒䏕䏇
䎷䏈䏕䏐䏌䏑䏄䏏䎃䎤䏑䏊䏏䏈
䎋䎥䏒䏗䏗䏒䏐䎌
䎰䎤䎬䎱䎃䎸䏑䏌䏗
䎰䎤䎬䎱䎃䎳䎺䎥䎃䎶䏋䏌䏈䏏䏇
䎹䎨䎶䎤䎃䎤䏑䏊䏏䏈
䎃䎤䏖䏖䏃䏜
䎹䎨䎶䎤䎃䎤䏑䏊䏏䏈䎃䎤䏖䏖䏃䏜
䎹䎨䎶䎤䎃䎤䏑䏊䏏䏈䎃䎤䏖䏖䏃䏜
䎳䎲䎺䎨䎵䎒䎧䎵䎬䎹䎨
䎃䎸䏑䏌䏗
䎚䎓䎅䎯䎦䎧䎃䎳䏄䏑䏈䏏䎃䎰䏒䏇䏘䏏䏈䎃䎸䏑䏌䏗
䎔
䎫䏒䏒䏎
䎫䏒䏒䏎
䎫䏒䏒䏎
䎹䎨䎶䎤䎃
䎤䏑䏊䏏䏈
䎤䏖䏖䏃䏜
䎫䏒䏒䏎
䎙
䎚
䎙
䎚
䎔䎛
䎔䎛
䎶䏓䏄䏆䏈䏕
䎶䏓䏄䏆䏈䏕
䎶䏗䏄䏑䏇䎃䎩䏌䏛䎃䎤䏑䏊䏏䏈䎃䎤䏖䏖䎊䏜
Summary of Contents for AQUOS LC-52LE640U
Page 8: ...LC 52 60 70LE640U C6400U LC 80LE633U 844U 1st Edition 1 2 2 SPECIFICATIONS LC 80LE633U 844U ...
Page 9: ...LC 52 60 70LE640U C6400U LC 80LE633U 844U 1st Edition 1 3 ...
Page 14: ...LC 52 60 70LE640U C6400U LC 80LE633U 844U 1st Edition 2 5 LC 80LE844U ...
Page 15: ...LC 52 60 70LE640U C6400U LC 80LE633U 844U 1st Edition 2 6 ...
Page 16: ...LC 52 60 70LE640U C6400U LC 80LE633U 844U 1st Edition 2 7 ...
Page 19: ...LC 52 60 70LE640U C6400U LC 80LE633U 844U 1st Edition 3 3 3 DIMENSIONS LC 80LE633U 844U ...
Page 168: ...LC 52 60 70LE640U C6400U LC 80LE633U 844U 1st Edition 8 6 MEMO ...
Page 190: ...LC 52 60 70LE640U C6400U LC 80LE633U 844U 1st Edition ...


