


7-2
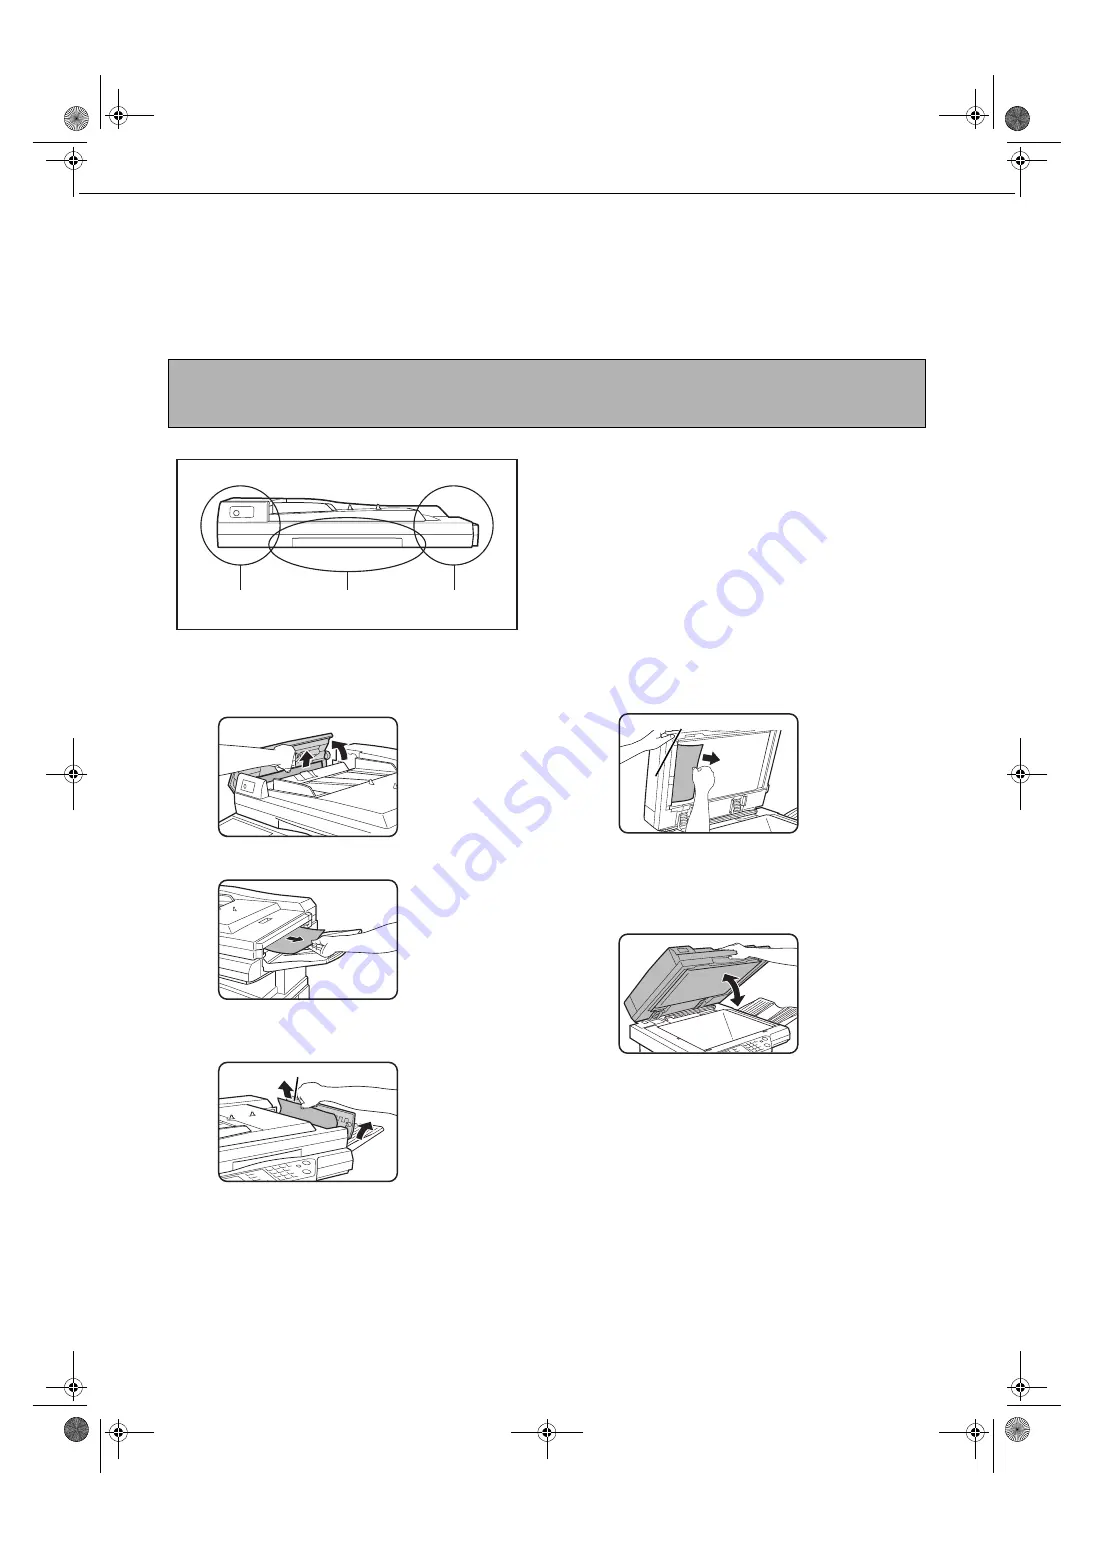
REMOVING AN ORIGINAL MISFEED
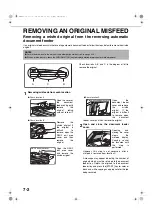
Removing a misfed original from the reversing automatic
document feeder
If an original misfeed occurs in the reversing automatic document feeder, follow the steps below to remove the misfed
original.
Check locations A, B, and C in the diagram at left to
remove the original.
1
Removing misfeeds from each location
●
Check location A
Open the cover of
the document
feeder and gently
remove the
original, taking
care not to tear it.
●
Check location B
Remove the
misfed original. If
the original is
difficult to
remove, open the
RADF exit area
cover and then
remove the
original.
Open the RADF
exit area cover
and remove the
misfed original.
●
Check location C
Open the
document feeder
cover and remove
the misfed
original. If the
original is difficult
to remove, open
the document
feeder cover and then remove the original.
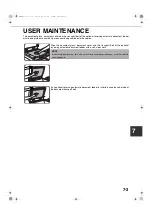
2
Open and close the document feeder
cover.
Opening and
closing the cover
clears the
misfeed display.
Copying cannot
be resumed until
this step is
performed.
However, this step is not necessary after a
misfeed is removed from location C.
A message may appear indicating the number of
originals which must be returned to the document
feeder tray. Return the originals to the document
feeder tray and press the [START] key for color or
black and white copying as appropriate for the job
being resumed.
NOTES
●
For misfeed removal in the main unit and other peripheral devices, see page 2-18.
●
When a misfeed occurs, touch the [INFORMATION] key to display detailed information for misfeed removal.
A
B
C
RADF exit area cover
Document feeding area cover
00-08.book 2
ページ
2002年11月8日 金曜日 午前9時39分
Summary of Contents for AR-C260
Page 3: ...Part 1 General Information 00 08 book 1 ページ 2002年11月8日 金曜日 午前9時39分 ...
Page 4: ...00 08 book 2 ページ 2002年11月8日 金曜日 午前9時39分 ...
Page 48: ...00 08 book 26 ページ 2002年11月8日 金曜日 午前9時39分 ...
Page 66: ...00 08 book 18 ページ 2002年11月8日 金曜日 午前9時39分 ...
Page 67: ...Part 2 Copier Operation 00 08 book 1 ページ 2002年11月8日 金曜日 午前9時39分 ...
Page 68: ...00 08 book 2 ページ 2002年11月8日 金曜日 午前9時39分 ...
Page 76: ...00 08 book 8 ページ 2002年11月8日 金曜日 午前9時39分 ...
Page 94: ...00 08 book 18 ページ 2002年11月8日 金曜日 午前9時39分 ...
Page 128: ...00 08 book 6 ページ 2002年11月8日 金曜日 午前9時39分 ...
Page 136: ...00 08 book 8 ページ 2002年11月8日 金曜日 午前9時39分 ...
Page 137: ...00 08 book 8 ページ 2002年11月8日 金曜日 午前9時39分 ...


