AR-FN6 UNPACKING AND INSTALLATION-2
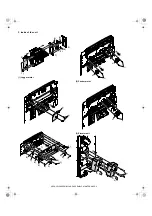
<5>Attach the mounting plates to the positions shown in the illustration
and fix them with screws A.
4) Insert the staple cartridge.
<1>Pull out the staple unit.
<2>Insert the staple cartridge.
<3>Slide the release lever to the left and return the staple unit.
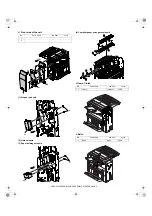
5) Attach the trays and the paper holder.
Attach tray 1, tray 2, and the paper holder to the positions shown in
the illustration.
6) Remove the AC inlet cover and then remove the rear cabinet of the
stand/paper drawer.
<1>Remove the screw that fixes the AC inlet cover and then remove the
AC inlet cover.
<2>Remove the AC cord of the power supply unit from the inlet
connector of the main unit of the printer.
Remove the four screws that fix the rear cabinet and then remove the
rear cabinet.
If a multi purpose drawer has been installed, steps 7) to 9) are needed.
If a stand/MPD & 2000 sheet paper drawer or stand/3 x 500 sheet paper
drawer has been installed, proceed to step 10).
7) Process the AC inlet cover attached to the rear cabinet of the stand/
paper drawer.
Remove the screw that fixes the AC inlet cover and then remove the
AC inlet cover.
Process the AC inlet cover as shown in the illustration.
Mounting plates
Screws A
(Rear side)
Tray 1
Paper holder
Tray 2
Screw
AC inlet cover
Rear cabinet
AC inlet cover
Cut out.


