background image

ENGLISH

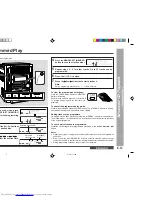
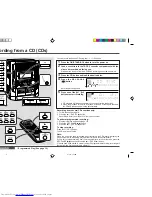
Repeat play

All tracks on up to 6 discs, or a programmed sequence can be continuously repeated.

To repeat all tracks on up to 6 discs:

Press the 

0/R 

(

0 R

) button twice.

By pressing the 

0/R 

(

0 R

) button after one of the 

s

 1 - 

s

 6 buttons is pressed,

repeat play will be performed on that disc.

To repeat a desired track:

Perform steps 1 - 4 in the “Programmed Play” section and then press the 

0/R 

(

0 R

)

button twice.

To cancel repeat play:

Press the 

0/R 

(

0 R

) button again.

R


will go out.

Repeat or Random Play

Random play

The tracks on the disc(s) can be played in random order automatically.

Press the RANDOM button on the remote control to begin random play.

By pressing the RANDOM button after one of the 

s

 1 - 

s

 6 buttons is pressed,

random play will be performed on that disc.

To cancel random play:

Press the 

0R 

button.

Notes:

If you press the 

2 / 4 

button during random play, you can move to the track selected

next by the random operation. On the other hand, the 

3 / 5 

button does not allow you

to move to the previous track. The beginning of the track being played will be located.

In random play, the CD player will select and play tracks automatically.
(You cannot select the order of the tracks.)

Caution:

After performing repeat or random play, be sure to press the 

 (CD 

) button.

Otherwise, the disc(s) will play continuously.

Advanced CD Playback

– T

o

 Specify a Disc to Play / Repeat or Random Play –

You can play a disc by specifying the disc number.

Press one of the 

s

s

s

s

s

 1 - 

s

s

s

s

s

 6 buttons to play the desired disc.

Only the chosen disc will be played and stopped automatically.

Note:
Among discs 1 - 6, those with whitely illuminated CD indicators in the frame can be
played. However, if the button of the disc tray with no disc is pressed, playback will not
start and the indicator in the frame will go out.

To stop playback:
Press the 

 (CD 

) button.

To Specify a Disc to Play

Selected disc number

E-15

 *BA3100C_EP15_16

01.2.19, 7:31 PM

2

Summary of Contents for CD-BA3100

Page 1: ...peaker system Mini chaîne stéréo CD BA3100 composée de CD BA3100 appareil principal et de CP BA3100 enceintes acoustiques MPONENT SYSTEM AÎNE STÉRÉO BA3100 ATION MANUAL E D EMPLOI Please refer to pages E 1 to E 28 Se reporter aux pages F 1 à F 28 ENGLISH FRANÇAIS 2001 2 1 2 40 PM 1 ...

Page 2: ...ntrols and Indicators 3 6 Preparation for Use System Connections 7 8 Remote Control 9 Basic Operation General Control 10 Sound Control 11 Setting the Clock 12 CD Playback Listening to a CD CDs 13 14 Advanced CD Playback To Specify a Disc to Play 15 Repeat or Random Play 15 Programmed Play 16 Radio Listening to the Radio 17 Listening to the Memorised Station 18 Tape Playback Listening to a Cassette...

Page 3: ...damage SHARP will not be held responsible for any damage resulting from use of this unit with a voltage other than that which is specified Volume control The sound level at a given volume setting depends on speaker efficiency location and various other factors It is advisable to avoid exposure to high volume levels which occurs whilst turn ing the unit on with the volume control setting up high or...

Page 4: ... Preset Down Button 14 18 19 13 CD Track Up or Fast Forward Tape 2 Fast Forward Tuner Preset Up Button 14 18 19 14 CD Button 13 21 15 Tuner Band Button 17 16 Tape 1 V V V V V 2 Button 19 22 17 Video Auxiliary Button 23 25 18 Power On Stand by Button 12 23 27 19 Dimmer Button 10 20 Headphone Socket 25 21 CD or Tape Stop Button with Indicator 14 19 22 CD Play or Repeat Tape Play Button with Indicato...

Page 5: ...Random Play Indicator 11 Tape 2 Record Indicator 12 Extra Bass Indicator 13 Timer Recording Indicator 14 Timer Play Indicator 15 Sleep Indicator 16 Spectrum Analyzer Volume Level Indicator Rear panel Reference page 01 FM AM Loop Aerial Socket 7 8 02 Video Auxiliary Audio Signal Input Sockets 25 03 Speaker Terminals 7 8 04 AC Power Lead 7 8 1 3 2 4 12 13 14 15 16 3 4 5 6 7 8 General Information Con...

Page 6: ...9 23 14 Extra Bass Button 11 15 CD Stop Button 14 21 16 CD Play or Repeat Button 14 15 17 CD Track Up or Fast Forward Button 14 18 CD Random Button 15 19 Tuner Preset Up and Down Buttons 18 20 Tape 2 Play Button 19 21 Tape 2 Rewind Button 19 22 Tape 2 Fast Forward Button 19 23 Video Auxiliary Button 25 24 Tape 1 V 2 Button 19 22 25 Volume Up and Down Buttons 11 1 2 15 16 17 18 19 20 21 24 3 6 4 7 ...

Page 7: ...equency range which is driven separately from the woofer and tweeter mid to high frequency range Two indepen dent amplifiers which have individual frequency characteristics are used By amplifying separately the two frequency bands clearer sound is achieved Duct re for SUBWOOFER Terminals re for MAIN Terminals Left speaker Right speaker 3 4 1 2 5 6 5 6 Power amplifier Mid to high range 200 Hz 20 kH...

Page 8: ...NGLISH tem Connections FM aerial Right speaker Left speaker AM loop aerial Wall socket AC 120 V 60 Hz VCR DVD etc not supplied 01 2 19 7 25 PM 2 ...

Page 9: ... he MAIN and the SUBWOOFER terminals peakers may be damaged d speakers should be used with this product r speakers with this unit or use the supplied her units he right and the left channels r is the one on the right side when you face the are speaker wires touch each other sit on the speakers You may be injured Position the FM aerial wire and rotate the AM loop aerial for optimum reception Place ...

Page 10: ...battery etc g the batteries incorrectly may cause the unit to malfunction ncerning use the batteries if the operating distance is reduced or if the operation be rratic ally clean the transmitter on the remote control and the sensor on the unit oft cloth g the sensor on the unit to strong light may interfere with operation Change ng or the direction of the unit e remote control away from moisture h...

Page 11: ...press the X BASS DEMO button The demonstration mode will be cancelled and the display will disappear To return to the demonstration mode When the unit is in the power stand by mode press the X BASS DEMO button again Note When the power is on the X BASS DEMO button can be used to select the extra bass mode Display brightness 2 levels You can switch the display brightness by pressing the DIMMER butt...

Page 12: ...emphasises the bass frequencies and X BASS will appear To cancel the extra bass mode press the X BASS DEMO X BASS button Equalizer When the EQUALIZER EQUALIZER MODE button is pressed the current mode set ting will be displayed To change to a different mode press the EQUALIZER EQUAL IZER MODE button repeatedly until the desired sound mode appears 0 1 2 29 30 MAXIMUM X BASS indicator The sound is no...

Page 13: ...lay and then press the MEMORY SET button 4 Press the TUNING TIME X X X X X or W W W W W button to adjust the hour and then press the MEMORY SET button Press the TUNING TIME X or W button once to advance the time by 1 hour Hold it down to advance continuously When the 12 hour display is selected AM will change automatically to PM 5 Press the TUNING TIME X X X X X or W W W W W button to adjust the m...

Page 14: ... 1 7 7 7 7 7 button to close the disc tray 1 The music schedule will display only the number of tracks on the disc If the CD contains more than 15 tracks C will appear 6 You can place discs on the trays 2 6 by following steps 3 5 Note The system will search CD trays until it finds a CD and will not search the rest of the trays 12 cm 5 8 cm 3 m can play audio CD R and CD RW discs just as CD discs b...

Page 15: ...the disc will be skipped To locate the desired portion For audible fast forward Press and hold down the 2 4 button during playback For audible fast reverse Press and hold down the 3 5 button during playback Notes Normal playback will resume when the 3 5 or 2 4 button is released You can locate the desired portion on a single disc only When the end of the last track is reached during fast forward D...

Page 16: ...c To cancel random play Press the 0R button Notes If you press the 2 4 button during random play you can move to the track selected next by the random operation On the other hand the 3 5 button does not allow you to move to the previous track The beginning of the track being played will be located In random play the CD player will select and play tracks automatically You cannot select the order of...

Page 17: ... cancel the programmed play mode Whilst in the stop mode press the CLEAR button The MEMORY indicator will disap pear and all the programmed contents will be cleared Adding tracks to the programme If a programme has been previously stored the MEMORY indicator will be displayed Then follow steps 1 6 to add tracks The new tracks will be stored after the last track of the original programme To check w...

Page 18: ...e first receivable broad cast station Notes When radio interference occurs auto scan tuning may stop automatically at that point Auto scan tuning will skip weak signal stations To stop the auto tuning press the TUNING TIME button again To receive an FM stereo transmission Press the TUNER BAND button to display the ST indicator j will appear when an FM broadcast is in stereo If the FM reception is ...

Page 19: ...ned automatically Preset memory scan 1 Press the PRESET X or W button for more than 0 5 seconds The preset number will flash and the programmed stations will be tuned in sequentially for 5 seconds each 2 Press the PRESET X or W button again when the desired sta tion is located To recall a memorised station Press the PRESET X X X X X or W W W W W button for less than 0 5 seconds to se lect the desi...

Page 20: ...ton then press the TAPE 1 V 2 button to select TAPE 2 2 To advance the tape press the 2 4 button To rewind it press the 3 5 button Caution To remove the cassette press the TAPE button and then open the compart ment Before changing from one tape operation to another press the TAPE button If a power failure occurs during tape operation the tape head will remain engaged with the tape and the cassette...

Page 21: ...station move the AM loop aerial ding from the Radio Erase prevention tab of cassette tapes When recording on a cassette tape make sure that the erase prevention tabs are not re moved Cassettes have removable tabs that prevent accidental recording or erasing To protect the recorded sound remove the tab after recording Cover the tab hole with adhesive tape to record on the tape without the tab Side ...

Page 22: ...ically Recording from several CDs continuously 1 Follow the above steps 1 4 2 Press the 0 R TAPE 2 0 button Recording will start from the disc of the lowest number To perform programmed recording 1 Programme discs and tracks page 16 2 Press the REC PAUSE I6 button 3 Press the 0 R TAPE 2 0 button To stop recording Press the CD button The CD and tape will stop Note When the end of the tape is reache...

Page 23: ...ording will be paused 5 Press the 0 0 0 0 0 R R R R R button on the main unit or the TAPE 2 0 0 0 0 0 button on the remote control to start dubbing Tape Recording Dubbing from Tape to Tape ng from Tape to Tape To stop dubbing Press the TAPE button TAPE 1 and TAPE 2 will simultaneously stop Erasing recorded tapes 1 Load the tape to be erased into the TAPE 2 cassette compartment with the side to be ...

Page 24: ...TAND BY button to turn the power on 2 Press the CD TUNER BAND or TAPE 1 V V V V V 2 button to select the desired function To select the timer playback source CD TUNER BAND or TAPE 1 V 2 To select the timer recording source TUNER BAND When you selected the TUNER BAND tune in to the desired station 3 Adjust the volume using the VOLUME control Do not turn the volume up too high 4 Press the TIMER SLEE...

Page 25: ... when the end of the recording tape is reached in timer recording or playback starts in timer playback However another unit will not be d Sleep Operation continued Sleep operation 1 Play back the desired sound source 2 Press the TIMER SLEEP button repeatedly until SLEEP is dis played To change the sleep time Whilst the sleep time is displayed press the TUNING TIME X or W button Maximum 3 hours Min...

Page 26: ...4 Play the VCR DVD etc Note To prevent hum interference place this unit away from a television Red White To record on a tape 1 Insert a cassette in the TAPE 2 cassette compartment 2 Press the VIDEO AUX button 3 Press the REC PAUSE I6 I6 I6 I6 I6 button 4 Press the 0 R 0 R 0 R 0 R 0 R TAPE 2 0 0 0 0 0 button 5 Play the VCR DVD etc Headphones Before plugging in or unplugging the headphones reduce th...

Page 27: ... disc satisfy the standards Is the disc distorted or scratched Is the unit located near excessive vibra tions Is the disc very dirty Has condensation formed inside the unit References Troubleshooting Chart Remote control Symptom The remote control does not op erate Possible cause Is the AC power lead of the unit plugged in Is the battery polarity respected Are the batteries dead Is the distance or...

Page 28: ...s may become magnetised causing poor sound Demagnetise these parts once every 30 hours of playing recording time by using a commercial tape head demagnetiser Read the demagnetiser s instructions carefully before use Cleaning the CD pickup lens In order to ensure proper operation of the CD player preventative maintenance clean ing of the laser pickup lens should be performed periodically Lens clean...

Page 29: ...164 W Width 260 mm 10 1 4 Height 338 mm 13 5 16 Depth 375 mm 14 13 16 8 6 kg 19 0 lbs r RMS 200 W 100 W 100 W 10 T H D Main speaker woofer and tweeter 80 W 40W 40W Subwoofer 120 W 60W 60W Speakers 6 ohms Headphones 16 50 ohms recommended 32 ohms Video Auxiliary audio signal 500 mV 47 kohms er 6 disc multi play compact disc player Non contact 3 beam semiconductor laser pickup 1 bit D A converter ns...

Page 30: ...voyants 3 6 Avant l utilisation Raccordement du système 7 8 Télécommande 9 Fonctionnement de base Commande générale 10 Réglage du son 11 Réglage de l horloge 12 Lecture CD Écoute de CD 13 14 Lecture avancée de CD Pour spécifier un disque à reproduire 15 Répétition et lecture au hasard 15 Lecture des morceaux programmés 16 Radio Écoute de la radio 17 Écoute d une station mise en mémoire 18 Lecture ...

Page 31: ...ée Commande de volume Le niveau sonore réel dans un réglage donné dépend de divers éléments rendement des enceintes lieu d écoute etc Éviter une augmentation brusque du volume Elle se produit par exemple lors de la mise sous tension avec un réglage du volume élevé Éviter aussi une longue écoute à niveau élevé Entretien des compact discs Le compact disc résiste bien aux dommages mais il peut se pro...

Page 32: ...présélection bas 14 18 19 13 Touche d avance rapide ou plage haut CD d avance rapide de la cassette 2 de présélection haut 14 18 19 14 Touche CD 13 21 15 Touche de tuner gamme d ondes 17 16 Touche de cassette 1 V V V V V 2 19 22 17 Touche vidéo auxiliaire 23 25 18 Touche de marche attente 12 23 27 19 Touche de gradateur 10 20 Jack de casque 25 21 Touche d arrêt de CD ou cassette avec voyant 14 19 ...

Page 33: ...13 Voyant d enregistrement programmé 14 Voyant de lecture programmée 15 Voyant de mise en arrêt différée 16 Analyseur spectral voyant de niveau de volume Panneau arrière Page de référence 01 Jack de cadre antenne AM FM 7 8 02 Jacks d entrée vidéo auxiliaire signal audio 25 03 Bornes d enceinte 7 8 04 Cordon d alimentation 7 8 12 13 14 15 16 3 4 5 6 7 8 Informations générales Commandes et voyants F...

Page 34: ... Touche d arrêt CD 14 21 16 Touches de lecture ou répétition CD 14 15 17 Touche d avance rapide ou plage haut CD 14 18 Touche de lecture au hasard CD 15 19 Touches de présélection haut bas de tuner 18 20 Touche de lecture de la cassette 2 19 21 Touche de rebobinage de la cassette 2 19 22 Touche d avance rapide de la cassette 2 19 23 Touche vidéo auxiliaire 25 24 Touche de cassette 1 V 2 19 22 25 T...

Page 35: ...nts qui ont des caractéristiques différentes Ces deux unités peuvent donc éviter des interférences et offrir un son très clair liaire ffle réflex nte pour les BWOOFER nte pour les N 3 4 1 2 5 6 5 6 che te Informations générales Commandes et voyants F 6 MODÈLE N CP BA3100 ENCEINTES ACOUSTIQUES HAUT PARLEURS WOOFERAUXILIAIRE 13 cm WOOFER 13 cm TWEETER 5 cm IMPÉDANCE 6 OHMS PUISSANCE NOMINALE TOTALE ...

Page 36: ...ANÇAIS cordement du système Antenne FM Enceinte de droite Enceinte de gauche Cadre antenne AM Prise murale 120 V CA 60 Hz Magnétoscope DVD etc Non fourni 01 2 19 7 34 PM 2 ...
Page 37: ... Bleu e les bornes MAIN et SUBWOOFER es enceintes risquent de s endommager vrées avec l appareil peuvent être utilisées ce dernier et non avec d autres accorder d autres enceintes à ce produit e canal droit pour le canal gauche L enceinte e située à droite quand on se place devant le se toucher les fils dénudés des enceintes ou s asseoir sur les enceintes On risque de mbant Positionner l antenne l...

Page 38: ...etc aise installation des piles peut entraîner un mauvais fonctionnement de l la distance de commande diminue ou que le fonctionnement est irrégulier er les piles chiffon doux on essuiera régulièrement l émetteur de la télécommande et ur de l appareil principal e lumière frappant le capteur peut déranger le fonctionnement Modifier ge ou l orientation de l appareil télécommande à l abri de l humidi...

Page 39: ...uyer sur la touche X BASS DEMO Le mode de démonstration est annulé et son affichage disparaît Pour repasser au mode de démonstration Lorsque l appareil est en veille réappuyer sur la touche X BASS DEMO Note Dès la mise sous tension la touche X BASS DEMO peut être utilisée pour passer au mode d extra graves Luminosité de l afficheur 2 niveaux On peut éclaircir ou assombrir l afficheur en agissant s...

Page 40: ... basses fréquences et affiche X BASS Pour annuler ce mode il suffit d appuyer sur la touche X BASS DEMO X BASS Égaliseur La pression sur la touche EQUALIZER EQUALIZER MODE permet de visualiser le mode d égaliseur en cours Pour passer à un autre mode on le sélectionnera en agissant à plusieurs reprises sur la touche EQUALIZER EQUALIZER MODE 0 1 2 29 30 MAXIMUM Voyant X BASS Le son n est pas modifié...

Page 41: ... sur la touche ET 4 Appuyer sur la touche TUNING TIME X X X X X ou W W W W W pour régler les heures et puis appuyer sur la touche MEMORY SET Appuyer une fois sur la toucheTUNING TIME X ou W pour avancer l heure de 1 heure On la maintiendra enfoncée pour avancer l heure continuellement S il s agit de l affichage 12 heures AM passe automatiquement à PM 5 Appuyer sur la touche TUNING TIME X X X X X o...

Page 42: ...7 7 7 7 pour refermer le tiroir 1 Le répertoire de musique affiche seulement pour les morceaux sur le disque S il s agit d un CD contenant plus de 15 morceaux l appareil affiche C 6 On peut mettre des CD sur les tiroirs 2 6 en renouvelant les étapes 3 5 Note Le système recherche un CD sur les tiroirs et se cale sur le CD 12 cm 8 cm e permet de reproduire des disques CD R et CD RW audio ainsi que C...

Page 43: ... que endommagé encrassé ou mis à l envers l appareil le sautera Pour localiser un passage souhaité Pour l avance rapide audible En cours de lecture presser la touche 2 4 Pour l inversion audible En cours de lecture presser la touche 3 5 Notes La lecture normale se déclenche dès qu on relâche la touche 3 5 ou 2 4 La recherche d un passage souhaité se fait sur un seul disque Lorsque l avance rapide ...

Page 44: ...e la lecture au hasard Appuyer sur la touche 0 R Notes Si en lecture au hasard on appuie sur la touche 2 4 on peut passer à un morceau suivant choisi par l opération au hasard Par contre la touche 3 5 ne permet pas de passer au précédent L appareil passe simplement au début du morceau en cours La lecture au hasard consiste à reproduire les morceaux dans un ordre aléatoire Il n est donc pas possibl...

Page 45: ...mé s efface à partir du dernier Pour annuler la lecture des morceaux programmés En mode d arrêt appuyer sur la touche CLEAR MEMORY disparaît et toute la programmation s efface Ajout de morceaux au programme S il existe un programme dans la mémoire l appareil affiche MEMORY On suivra les étapes 1 à 6 pour ajouter des morceaux Ces derniers seront placés à la suite du programme en mémoire Pour vérifi...

Page 46: ...cale sur la première station qu il capte Notes La recherche automatique s arrêtera dès qu il se produira des parasites Le balayage automatique sautera des stations à faible puissance Pour arrêter la recherche réappuyer sur la touche TUNING TIME Pour recevoir une émission en FM stéréo Appuyer sur la touche TUNER BAND pour allumer le voyant ST j apparaît lorsque l émission FM captée est en stéréo Si...

Page 47: ...matiquement balayage dans la mémoire de présélection 1 Appuyer moins de 0 5 seconde sur la touche PRESET X X X X X ou W W W W W Les numéros de présélection se mettent à clignoter et l appareil se cale sur chaque station pendant 5 secondes 2 Réappuyer sur la touche PRESET X X X X X ou W W W W W lorsque la station souhaitée est détectée Rappel d une station mémorisée Appuyer moins de 0 5 seconde sur...

Page 48: ... la bande appuyer sur la touche 2 4 Pour le rembobinage appuyer sur la touche 3 5 Attention Pour retirer la cassette appuyer sur la touche TAPE et puis ouvrir le compartiment Pour changer de mode en cours d opération cassette appuyer sur la touche TAPE S il se produit une panne de courant pendant le fonctionnement de la cassette la tête de lecture restera engagée avec la bande magnétique et le com...

Page 49: ...AM éloigner le cadre antenne AM strement à partir de la radio L enregistrement se fait dans le compartiment TAPE 2 Le TAPE 1 est pour la lecture seulement Écoute de la radio Voir page 17 rement istrement important faire un essai pour s assurer que l enregistre ectement s tenu responsable de tout dommage ou perte d enregistrement lter d un mauvais fonctionnement de l appareil r les commandes de vol...

Page 50: ...ement successif de plusieurs CD 1 Suivre les étapes 1 4 2 Appuyer sur la touche 0 R TAPE 2 0 L enregistrement commence par un disque portant le numéro le plus petit Pour enregistrer des morceaux programmés 1 Programmer des disques et des morceaux voir page 16 2 Appuyer sur la touche REC PAUSE I6 3 Appuyer sur la touche 0 R TAPE 2 0 Arrêt de l enregistrement Appuyer sur la touche CD Le CD s arrête ...

Page 51: ... la touche 0 0 0 0 0 R R R R R de l appareil principal ou sur la touche TAPE 2 0 0 0 0 0 de la télécommande pour déclencher la copie Enregistrement sur la cassette Copie entre cassettes entre cassettes Arrêt de la copie Appuyer sur la touche TAPE Les cassettes TAPE 1 et TAPE 2 s arrêtent en même temps Effacement de cassettes enregistrées 1 Mettre la cassette à effacer dans le compartiment TAPE 2 e...

Page 52: ... BY pour allumer l appareil 2 Appuyer sur la touche CD TUNER BAND ou TAPE 1 V V V V V 2 pour sélectionner une fonction souhaitée Pour sélectionner une source pour la lecture programmée CD TUNER BAND ou TAPE 1 V 2 Pour sélectionner la source pour l enregistrement programmé TUNER BAND Si on choisit TUNER BAND faire l accord sur une station souhaitée 3 Régler le volume en pressant sur les touches VOL...

Page 53: ... l élément raccordé ne se fait pas nt d Sleep Operation continued Mise en arrêt différée 1 Reproduire la source souhaitée 2 Agir à plusieurs reprises sur la touche TIMER SLEEPpour afficher SLEEP Changement de la durée pour la mise en arrêt différée Lorsque la durée est affichée appuyer sur la touche TUNING TIME X or W Maximum 3 heures Minimum 1 minute 3 heures 5 minutes intervalle de 5 minutes 5 m...

Page 54: ...gnétoscope le lecteur de DVD etc Note Pour supprimer un bourdonnement mettre l appareil à l écart du téléviseur Blanc Rouge Pour enregistrer sur une cassette 1 Mettre une cassette en place dans le compartiment TAPE 2 2 Appuyer sur la touche VIDEO AUX 3 Appuyer sur la touche REC PAUSE I6 I6 I6 I6 I6 4 Appuyer sur la touche 0 R 0 R 0 R 0 R 0 R TAPE 2 0 0 0 0 0 5 Déclencher le magnétoscope le lecteur...

Page 55: ... envers Le disque satisfait il à la norme Le disque est il distordu ou rayé L appareil subit il des vibrations Le disque est il encrassé Une condensation est elle formée dans l appareil Références Dépannage Télécommande Problème La télécommande ne fonctionne pas Cause L appareil est il branché Les polarités sont elles respectées Les piles sont elles épuisées La distance ou l angle est correct Le c...

Page 56: ...ent causant un son médiocre Démagnétiser ces pièces toutes les 30 heures de lec ture enregistrement à l aide d un démagnétiseur de tête en vente dans le commer ce Avant utilisation lire attentivement la notice du démagnétiseur Nettoyage de la cellule porte laser CD Pour bien assurer le bon fonctionnement du lecteur CD un entretien préventif nettoyage de la cellule porte laser devra être effectué r...

Page 57: ...8 kg chacune echnique 120 V CA 60 Hz 164 W Largeur 260 mm Hauteur 338 mm Profondeur 375 mm 8 6 kg ateur tie RMS 200 W 100 W 100 W 10 de D H T Haut parleurs principaux woofer et tweeter 80 W 40W 40W Subwoofer 120 W 60W 60W Enceintes 6 ohms Casque 16 50 ohms recommandé 32 ohms Vidéo auxiliaire signal audio 500 mV 47 kilohms CD Lecteur de 6 disques compacts re Sans contact par laser à semi conducteur...

Page 58: ...MEMO MÉMORANDUM 2001 2 1 2 39 PM 2 ...

Page 59: ...MEMO MÉMORANDUM 2001 2 1 2 39 PM 3 ...

Page 60: ...t distribué au Canada par Sharp ou par un Détaillant autorisé Sharp Sharp garantit que ledit produit est s il est utilisé et entretenu normalement exempt de défaut de fabrication Si un défaut de fabrication est décelé durant la période de garantie stipulée Sharp s engage à réparer ou remplacer selon son choix le produit spécifié ci dessous La garantie offerte par Sharp ne s applique pas a Aux appa...

Reviews: