background image

1

2

3

4

5

6

7

8

9

10

11

12

13

14

15

ENGLISH

CD-DD4500

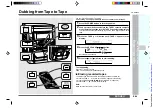
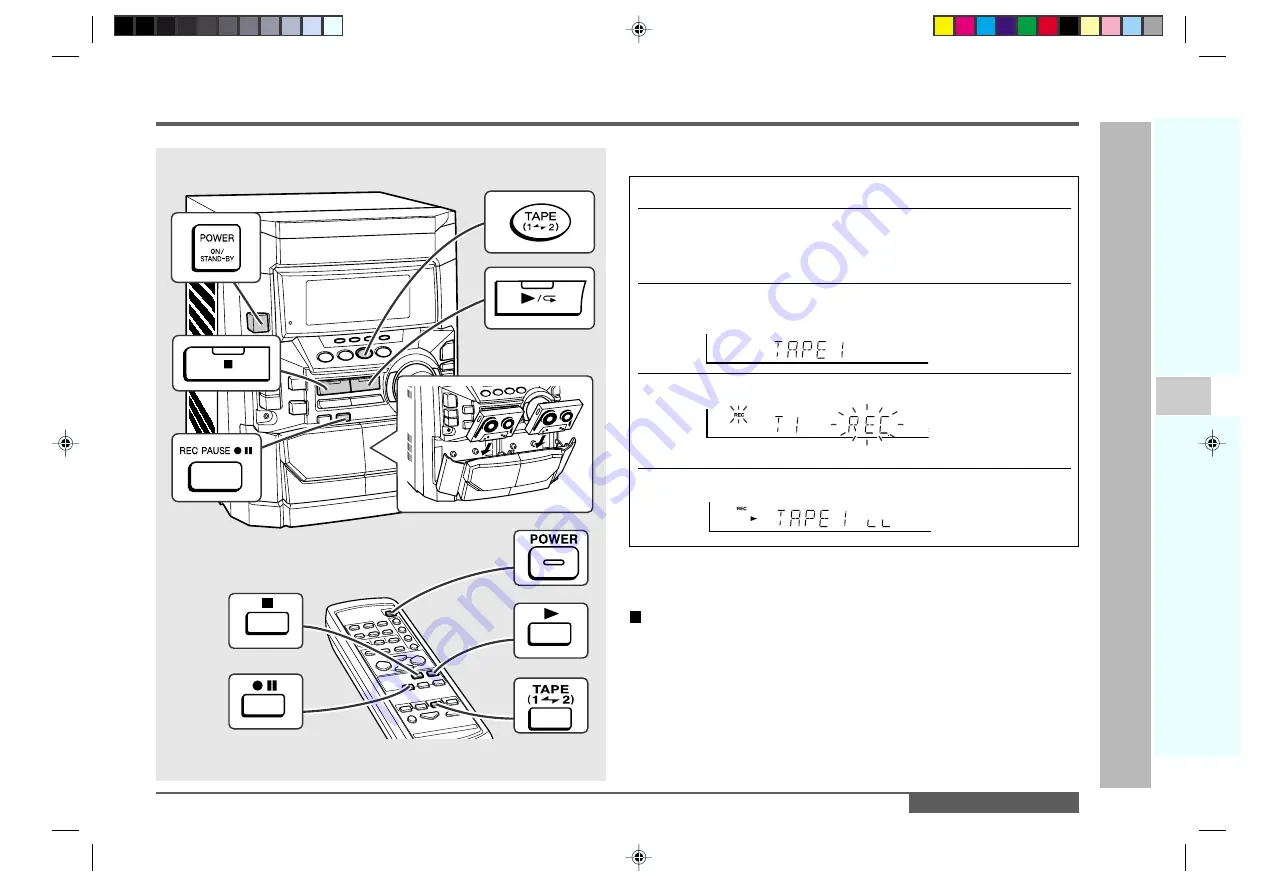
You can record from TAPE 1 to TAPE 2.
For recording, use only normal tapes. Do not use metal and CrO

2

 tapes.

1

Press the POWER button to turn the power on.

2

Load a prerecorded cassette into the TAPE 1 cassette compart-
ment. Insert a blank tape into the TAPE 2 cassette compartment.

It is recommended that the recording tape be the same length as the master
tape.

3

Press the TAPE (1 

V

V

V

V

V

 2) button until “TAPE 1” appears in the

display.

4

Press the REC PAUSE 

I6 

I6 

I6 

I6 

I6 

(

I6

I6

I6

I6

I6

) button.

Recording will be paused.

5

Press the 

0

0

0

0

0

 / 

R

R

R

R

R

 ( 

) button to start dubbing.

To stop dubbing:

Press the 

 (TAPE 

) button.

TAPE 1 and TAPE 2 will simultaneously stop.

 Erasing recorded tapes

1. Load the tape to be erased into the TAPE 2 cassette compartment.
2. Press the TAPE (1 

V

 2) button until “TAPE 2” appears in the display.

3. Press the REC PAUSE 

I6 

(

I6

) button. (“ERASE” will appears.)

4. Press the  

0

 / 

) button to start erasing.

Note:

Make sure that the TAPE 1 is not in use.

T

ape Recording

 Dubbing from T

ape to T

ape 

Dubbing from Tape to Tape

E-24

Downloaded from: 

http://www.usersmanualguide.com/

Summary of Contents for CD-DD4500

Page 1: ...ée de CD DD4500 appareil principal de CP DD4500 enceintes avant d une enceinte centrale GBOXS0064AWM1 d une enceinte surround R GBOXS2008AWM1 et d une enceinte surround L GBOXS4008AWM1 MINI COMPONENT SYSTEM MINI CHAÎNE STÉRÉO MODEL MODÈLE CD DD4500 OPERATION MANUAL MODE D EMPLOI ENGLISH Please refer to pages E 1 to E 42 FRANÇAIS Se reporter aux pages F 1 à F 42 Downloaded from http www usersmanual...

Page 2: ...res Timer and Sleep Operation 33 34 Enhancing Your System 35 36 References Troubleshooting Chart 37 39 Maintenance 40 Specifications 41 42 Contents Accessories Please confirm that the following accessories are included ENGLISH Thank you for purchasing this SHARP product To obtain the best performance from this product please read this manual carefully It will guide you in operating your SHARP prod...

Page 3: ...ge used must be the same as that specified on this unit Using this product with a higher voltage other than that which is specified is dan gerous and may result in a fire or other type of accident causing damage SHARP will not be held responsible for any damage resulting from use of this unit with a voltage other than that which is specified Volume control The sound level at a given volume setting...

Page 4: ... 15 CD Button 15 23 16 Tuner Band Button 19 17 Tape 1 V V V V V 2 Button 21 24 18 DVD VCR Button 25 36 19 Dimmer Button 12 20 Clock Button 14 33 21 Timer Sleep Button 33 22 Headphone Socket 36 23 CD Play or Repeat Tape Play Button with Indicator 16 18 21 24 39 24 CD Fast Forward Tape 2 Fast Forward or Tuner Preset Up Button 16 18 21 25 Tuning and Time Down Button 14 19 33 26 Memory Set Button 14 1...

Page 5: ...or 17 Memory Indicator 18 CD Random Play Indicator 19 CD Play Indicator 20 CD Pause Indicator 21 Tape Play Indicator 22 CD Music Schedule Indicators 23 Timer Recording Indicator 24 Timer Play Indicator 25 Dolby Digital Indicator 26 Dolby Virtual Indicator Rear panel Reference page 01 DVD Digital Input Socket 35 02 Centre Speaker Sockets 7 8 03 Surround Speaker Sockets 7 8 04 FM AM Loop Aerial Sock...

Page 6: ...d Effect Buttons 18 Equalizer Mode Select Button 19 CD Play or Repeat Button 20 CD Fast Forward Preset Up Button 21 Tape 1 Tape 2 Play Button 22 Tape 1 Tape 2 Stop Button 23 Tape 2 Fast Forward Button 24 Tape 2 Rewind Button 25 DVD VCR Button 26 Tape 1 V 2 Button 27 Volume Up or Down Buttons 1 1 2 15 16 17 20 3 5 6 7 8 9 13 14 12 11 10 4 21 27 26 25 24 23 22 18 19 General Information Controls and ...

Page 7: ... Reflex Duct 06 Speaker Wire for MAIN Terminals Front speaker left Front speaker right General Information Controls and Indicators 2 1 3 2 1 3 4 5 6 4 5 6 2 1 Centre speaker 2 1 Surround speaker left 01 Full Range Speaker 02 Speaker Wire 01 Full Range Speaker 02 Speaker Wire E 6 2 1 Surround speaker right Downloaded from http www usersmanualguide com ...

Page 8: ...erial Front speaker left AC socket AC 120 V 60 Hz Preparation for Use System Connections AM loop aerial Front speaker right Surround speaker left Surround speaker right Centre speaker E 7 Downloaded from http www usersmanualguide com ...

Page 9: ...ation mode See page 12 Centre speaker Connect the centre speaker wire to the CENTER SPEAKER socket as shown Use speakers with an impedance of 6 ohms or more as lower impedance speakers can damage the unit CENTER Black Surround speakers Connect each surround speaker wire to the SURROUND SPEAKER socket as shown Use speakers with an impedance of 8 ohms or more as lower impedance speakers can damage t...

Page 10: ...D player playing a disc with the trade mark you can enjoy realistic powerful sound by playing the soundtrack through 5 channels the front left front right centre surround left and surround right speakers The best sound will be achieved by placing each speaker the same distance from the listener Arrange the speakers so that the layout is as close as possible to the diagram shown in this illustratio...

Page 11: ...on Make sure that both the screw and the wall can support a load of 20 kg 45 lbs Drive the screws so the screw head extends about 5 mm 3 16 out from the wall 2 Install the surround speakers on the wall by inserting the screw heads into the slots on the back of the speakers Power amplifier Mid to high range 200 Hz 20 kHz Ultra low range 60 Hz 200 Hz Pre amplifier Pre amplifier Power amplifier L ch ...

Page 12: ...etc Installing the batteries incorrectly may cause the unit to malfunction Notes concerning use Replace the batteries if the operating distance is reduced or if the operation be comes erratic Periodically clean the transmitter on the remote control and the sensor on the unit with a soft cloth Exposing the sensor on the unit to strong light may interfere with operation Change the lighting or the di...

Page 13: ...will disappear To return to the demonstration mode When the unit is in the power stand by mode press the X BASS DEMO button again Note When the power is on the X BASS DEMO button can be used to select the extra bass mode General Control Basic Operation General Control Display brightness 2 levels You can switch the display brightness by pressing the DIMMER button Brightened Dimmed To turn the power...

Page 14: ... bass mode press the X BASS DEMO X BASS button Equalizer When the EQUALIZER button is pressed the current mode setting will be displayed To change to a different mode press the EQUALIZER button repeatedly until the de sired sound mode appears 0 1 2 29 30 MAXIMUM X BASS indicator Basic Operation Sound Control E 13 Note If the EQUALIZER button is pressed in the Normal Phantom Virtual mode the unit i...

Page 15: ...ton to select the 12 hour or 24 hour display and then press the MEMORY SET button 4 Press the TUNING TIME X X X X X or W W W W W button to adjust the hour and then press the MEMORY SET button Press the TUNING TIME X or W button once to advance the time by 1 hour Hold it down to advance continuously When the 12 hour display is selected AM will change automatically to PM 5 Press the TUNING TIME X X ...

Page 16: ...positions 5 Press the 7 7 7 7 7 OPEN CLOSE button to close the disc tray The music schedule will display only the number of tracks on the disc If the CD contains more than 15 tracks C will appear 6 To select the CD you want to listen to first press one of s s s s s 1 s s s s s 3 buttons 12 cm 5 8 cm 3 CD Playback Listening to a CD CDs Total number of tracks on the CD whose number is flashing Total...

Page 17: ...ng CD operation move the unit away from the TV or radio If a disc is damaged dirty or loaded upside down the disc will be skipped To locate the desired portion For audible fast forward Press and hold down the W PRESET 2 4 button during playback For audible fast reverse Press and hold down the 5 3 PRESET X button during playback Notes Normal playback will resume when the 5 3 PRESET X or W PRESET 2 ...

Page 18: ...he tracks Caution After using repeat or random play be sure to press the CD button Otherwise the disc s will play continuously Starting playback with a desired track You can play a disc starting with the desired track 1 Whilst in the stop mode press one of the s s s s s 1 s s s s s 3 buttons or DISC SKIP button to select the desired disc 2 Press the 5 3 5 3 5 3 5 3 5 3 PRESET X X X X X or W W W W ...

Page 19: ...back CD Playback Programmed Play By specifying discs from 1 to 3 and tracks from 1 to 99 you can choose up to 32 selections for playback in the order you like To clear the programmed selections Whilst in the stop mode press the CLEAR button on the remote control Each time the button is pressed one track will be cleared beginning with the last track programmed When all the tracks are cleared MEMORY...

Page 20: ...AM 3 Press the TUNING TIME X X X X X or W W W W W button to tune in to the desired station Manual tuning Press the TUNING TIME button as many times as required to tune in to the desired station Auto tuning When the TUNING TIME button is pressed for more than 0 5 seconds scan ning will start automatically and the tuner will stop at the first receivable broad cast station Notes When radio interferen...

Page 21: ...ations or to change a preset station When a new station is stored in memory the station previously memorised will be erased Note The backup function protects the memorised stations for a few hours should there be a power failure or the AC power lead disconnection Preset channel Frequency and frequency band Radio Listening to the Memorised Station Listening to the Memorised Station To erase entire ...

Page 22: ...ess the 5 3 PRESET X 3 button Caution To remove the cassette press the TAPE button and then open the compart ment Before changing from one tape operation to another press the TAPE button If a power failure occurs during tape operation the tape head will remain engaged with the tape and the cassette door will not open Wait until the power is restored Before playback For playback use normal or low n...

Page 23: ... of cassette tapes When recording on a cassette tape make sure that the erase prevention tabs are not re moved Cassettes have removable tabs that prevent accidental recording or erasing To protect the recorded sound remove the tab after recording Cover the tab hole with adhesive tape to record on the tape without the tab Side A Tab for side A Tab for side B Recording can be operated in the TAPE 2 ...

Page 24: ...from the selected CD When the playback of the last disc is finished or the end of the tape is reached the CD and the cassette will stop automatically To perform programmed recording 1 Programme discs and tracks page 18 2 Press the REC PAUSE I6 I6 button 3 Press the 0 R 0 button To stop recording Press the CD or TAPE button The CD and tape will stop Note When the end of the tape is reached whilst r...

Page 25: ...pears in the display 4 Press the REC PAUSE I6 I6 I6 I6 I6 I6 I6 I6 I6 I6 button Recording will be paused 5 Press the 0 0 0 0 0 R R R R R 0 0 0 0 0 button to start dubbing To stop dubbing Press the TAPE button TAPE 1 and TAPE 2 will simultaneously stop Erasing recorded tapes 1 Load the tape to be erased into the TAPE 2 cassette compartment 2 Press the TAPE 1 V 2 button until TAPE 2 appears in the d...

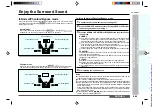
Page 26: ... Type of Dolby digital signal There are different types of Dolby digital signals The type of Dolby digital signal being input into this unit can be checked in the display If a low frequency sound effect Low Frequency Effect contains a Dolby digital signal LFE will light in the display When this LFE is lit low frequency signals will be output from the subwoofer Surround Operation Dolby Digital Norm...

Page 27: ...hat no sound is output from the centre speaker The centre speaker signal is split equally and added to the sound for the front left and front right speakers BYPASS Sound will only be output from the front left and front right speakers For a Dolby digital multichannel input any centre or rear signals will be mixed and output from the front speakers For a Dolby digital 1 0 input monaural sound will ...

Page 28: ...hree dimensional surround stereo image using just the 2 front speak ers Surround Operation Enjoy the Surround Sound Indicates a virtual speaker Front speaker Right Front speaker Left Virtual Dolby Surround To listen to Virtual Dolby Surround sound 1 Select the desired audio source and begin playback 2 Press the VIRTUAL button to select VIRTUAL When a Dolby digital signal is being input VIRTUAL and...

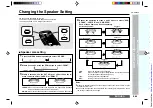
Page 29: ...om the factory The unit can be used as it is straight out of the box 4 Repeat the operation in steps 2 and 3 above to select SUR ROUND CENTER and S WOOFER Each of these items can be set separately Surround speakers Centre speaker Subwoofer YES When the speakers are connected NO When no speaker is connected When NO is selected the indica tor for that speaker position will go out INT Setting of the ...

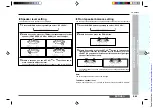
Page 30: ...e Speaker Setting 1 Press the MENU button repeatedly to select SP DELAY 2 Within 8 seconds press the ITEM button to select CENT or SURR CENT To delay the sound from the centre speaker SURR To delay the sound from the surround speakers 3 Within 8 seconds use the SET UP W W W W W or X X X X X button on the re mote control to select a value Adjustable range CENTRE 0 ms 5 ms SURROUND 0 ms 15 ms Can be...

Page 31: ...ker Setting Front speaker balance setting You can adjust the balance between the left and right channels of the front speakers 1 Press the MENU button repeatedly to select SP LEVEL 2 Within 8 seconds press the ITEM button 3 Within 8 seconds press the SET UP W W W W W button to increase the right speaker level the left speaker level to decrease or press the SET UP X X X X X button to increase the l...

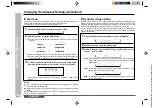
Page 32: ...und Operation Changing the Speaker Setting Test tone You can check and adjust the speaker level by listening to the sound output from each speaker individually in the actual listening position in the room The speaker level can be adjusted using the remote control 1 Press the MENU button repeatedly to select TEST 2 Within 8 seconds press the ITEM button The test tone will be heard from each speaker...

Page 33: ...ill have the feeling of being at a live performance as if the action is taking place right in front of you LFE Low Frequency Effect This refers to the special low frequency sound effects used in Dolby Digital recordings When a signal containing LFE encoding is played by this unit LFE will appear in the display PCM Pulse Code Modulation This is a recording transmission system used for digital audio...

Page 34: ...MORY SET button The illustrations show the timer playback setting Timer playback or Timer recording Before setting timer 1 Press the CLOCK button to check that the clock is on time 2 For timer playback Load a cassette or discs to be played For timer recording Load a cassette for recording in the TAPE 2 cassette compartment Timer and Sleep Operation Timer playback The unit turns on and plays the de...

Page 35: ...ed until a new time is entered When performing timer playback or recording using another unit connected to the VIDEO AUX IN or DIGITAL IN sockets select DVD VCR in step 2 At this time only this unit will be turned on or enter the power stand by mode automatically Another unit will not be turned on or turned off Timer and Sleep Operation continued Sleep operation 1 Play back the desired sound sourc...

Page 36: ...al units are connected you need commercially available leads Enhancing Your System E 35 To the digital output socket Optical digital lead not supplied To the line output sockets VCR etc DVD player RCA lead not supplied Speaker with a built in amplifier TV Downloaded from http www usersmanualguide com ...

Page 37: ...uce the volume Be sure your headphones have a 3 5 mm 1 8 diameter plug and are between 16 ohms and 50 ohms impedance The recommended impedance is 32 ohms Plugging in the headphones disconnects the speakers automatically Adjust the volume using the VOLUME control Note It is not possible to use the Normal Phantom or Dolby Digital surround modes when using your headphones When headphones are connecte...

Page 38: ...ion formed inside the unit Possible cause Did a power failure occur Reset the clock Refer to page 14 Set this unit to the power stand by mode and then turn it back on If the unit still malfunctions reset it Refer to page 39 Is the volume level set to 0 Are the headphones connected Are the speaker wires disconnected Are the front and surround speakers connected to the correct left and right channel...

Page 39: ...D player Symptom Although a DVD player is con nected no sound is heard Possible cause Is the power to the DVD player con nected improperly Is a digital signal not being output from the DVD player Is DVD NO being displayed Does the type of DVD digital signal not appear in the display When DVD is not displayed it can not be decorded Refer to page 25 Is a Dolby digital 2 0 monaural signal being outpu...

Page 40: ...centre References Troubleshooting Chart Troubleshooting Chart continued Before transporting the unit 1 Press the POWER button to turn the power on 2 Press the CD button 3 Press the 7 7 7 7 7 OPEN CLOSE button to open the disc tray Remove all CDs from the unit 4 Press the 7 7 7 7 7 OPEN CLOSE button to close the disc tray Make sure that NO DISC is displayed 5 Press the POWER button to enter the sta...

Page 41: ... Demagnetise these parts once every 30 hours of playing recording time by using a commercial tape head demagnetiser Read the demagnetiser s instructions carefully before use In order to ensure proper operation of the CD player preventative maintenance cleaning of the laser pickup lens should be performed periodically Lens cleaners are commercially available Contact your local CD software dealer fo...

Page 42: ... kg 19 4 lbs Amplifier Output power RMS 210 W Total 10 T H D Front speakers Main 60 W 30 W 30 W Front speakers Subwoofer 80 W 40 W 40 W Centre speaker 30 W Surround speakers 40 W 20 W 20 W Output terminals Front speakers Main 8 ohms Front speakers Subwoofer 6 ohms Centre speaker 6 ohms Surround speakers 8 ohms Subwoofer Pre out 10 kohms Headphones 16 50 ohms recommended 32 ohms Input terminals DVD...

Page 43: ...5 mm 9 5 8 Weight 4 1 kg 9 0 lbs each Centre speaker Type Full range 100 mm 4 Maximum input power 60 W Impedance 6 ohms Dimensions Width 260 mm 10 1 4 Height 142 mm 5 5 8 Depth 170 mm 6 11 16 Weight 1 0 kg 2 2 lbs Surround speaker Type Full range 100 mm 4 Maximum input power 40 W Impedance 8 ohms Dimensions Width 200 mm 7 7 8 Height 172 mm 6 3 4 Depth 95 mm 3 3 4 Weight 0 6 kg 1 3 lbs each Specifi...

Page 44: ...ées et mise en arrêt différée 33 34 Enrichissement du système 35 36 Références Dépannage 37 39 Entretien 40 Fiche technique 41 42 Table des matières Accessoires Vérifier que les accessoires ci dessous sont présents dans l emballage FRANÇAIS Nous vous remercions d avoir porté votre choix sur ce produit SHARP Pour en tirer le meilleur parti veuillez lire ce mode d emploi très attentivement Introduct...

Page 45: ...act disc sont à l origine de bruit ou d un alignement erroné Si le com pact disc est encrassé ou ne fonctionne pas correctement nettoyer le disque avec un chiffon doux et sec Essuyer du centre vers la périphérie en ligne droite Informations générales Précautions Précautions Général Vérifier que l appareil est installé dans un lieu bien aéré et qu il est dégagé de tous côtés pas d obstacle à moins ...

Page 46: ...e d ondes 19 17 Touche de cassette 1 V V V V V 2 21 24 18 Touche de DVD magnétoscope 25 36 19 Touche de gradateur 12 20 Touche d horloge 14 33 21 Touche de minuterie mise en arrêt différée 33 22 Jack de casque 36 23 Touche de lecture ou répétition de CD de lecture de cassette avec voyant 16 18 21 24 39 24 Touche d avance rapide de CD d avance rapide de la cassette 2 ou de présélection haut de tune...

Page 47: ...oyant de lecture CD 20 Voyant de pause CD 21 Voyant de lecture de cassette 22 Voyants de répertoire musical de CD 23 Voyant d enregistrement programmé 24 Voyant de lecture programmée 25 Voyant Dolby digital 26 Voyant Dolby virtuel Dos Page de référence 01 Jack d entrée numérique DVD 35 02 Jacks de l enceinte centrale 7 8 03 Jacks des enceintes surround 7 8 04 Jack de cadre antenne FM AM 7 8 05 Jac...

Page 48: ...und 18 Touche de sélection de mode de l égaliseur 19 Touche de lecture ou répétition de CD 20 Touche d avance rapide CD présélection haut 21 Touche de lecture de cassettes 1 2 22 Touche d arrêt de cassettes 1 2 23 Touche d avance rapide de la cassette 2 24 Touche de rebobinage de la cassette 2 25 Touche de DVD magnétoscope 26 Touche de cassette 1 V 2 27 Touches de volume haut et bas 1 1 2 15 16 17...

Page 49: ...STIQUES HAUT PARLEURS WOOFER AUXILIAIRE 13 cm IMPÉDANCE 6 OHMS WOOFER 10 cm TWEETER 5 cm IMPÉDANCE 8 OHMS PUISSANCE NOMINALE TOTALE 70 W PUISSANCE NOMINALE MAXIMALE TOTALE 140 W SHARP CORPORATION 2 1 2 1 ENCEINTES ACOUSTIQUES IMPÉDANCE 8 OHMS PUISSANCE NOMINALE 20 W PUISSANCE NOMINALE MAXIMALE 40 W SHARP CORPORATION ENCEINTES ACOUSTIQUES IMPÉDANCE 8 OHMS PUISSANCE NOMINALE 20 W PUISSANCE NOMINALE ...

Page 50: ...inte avant gauche Prise de courant 120 V CA 60 Hz Avant l utilisation Raccordement du système Cadre antenne AM Enceinte avant droite Enceinte surround gauche Enceinte surround droite Enceinte centrale F 7 Downloaded from http www usersmanualguide com ...

Page 51: ...système Mode de démonstration Voir page 12 Enceinte centrale Raccorder l enceinte centrale au jack CENTER SPEAKER voir illustration Utiliser une enceinte ayant une impédance de 6 ohms ou plus Dans le cas contraire l appareil risque de s endommager CENTER Black Enceintes surround Raccorder chaque enceinte surround au jack SURROUND SPEAKER voir illustra tion Utiliser une enceinte ayant une impédance...

Page 52: ...tes surround devront être fixées au mur On les placera à 60 90 cm au dessus d un auditeur assis voir page 10 Si on ne place pas les enceintes surround au mur leurs emblèmes sont mis sens dessus dessous On les retournera alors à la main Note Les enceintes avant et centrale sont magnétiquement blindées Elles peuvent donc être placées à proximité d un téléviseur Toutefois il peut se produire une vari...

Page 53: ...rter une charge de 20 kg La tête de vis devra se situer alors à 5 mm du mur 2 Accrocher l enceinte sur la vis en introduisant cette dernière dans le trou prévu à l arrière de l enceinte Power amplifier Mid to high range 200 Hz 20 kHz Ultra low range 60 Hz 200 Hz Pre amplifier Pre amplifier Power amplifier L ch Tweeter Woofer Subwoofer Speakers continued Système à bi ampli Chaque enceinte dispose d...

Page 54: ...allation des piles peut entraîner un mauvais fonctionnement de l appareil Notes Remplacer les piles si la distance télécommandable est réduite ou si le fonction nement est irrégulier Avec un chiffon doux nettoyer régulièrement l émetteur de la télécommande et le capteur de l appareil principal Une forte lumière frappant le capteur gênera le fonctionnement Modifier l éclairage ou changer l orientat...

Page 55: ... affiche rien Pour repasser au mode de démonstration Lorsque l appareil est en veille réappuyer sur la touche X BASS DEMO Note Lorsque l appareil est allumé la touche X BASS DEMO permet de sélectionner le mode extra graves Commande générale Fonctionnement de base Commande générale Luminosité de l affichage 2 niveaux On peut éclaircir ou assombrir l affichage en agissant sur la touche DIMMER Éclair...

Page 56: ...ur la touche X BASS DEMO X BASS Égaliseur La pression sur la touche EQUALIZER permet de visualiser le mode d égaliseur en cours Pour passer à un autre mode on le sélectionnera en agissant à plusieurs re prises sur la touche EQUALIZER 0 1 2 29 30 MAXIMUM Fonctionnement de base Réglage du son F 13 Note Si on appuie sur la touche EQUALIZER dans le mode normal fantôme virtuel l appareil passe automati...

Page 57: ...e d une panne de courant ou d un débranchement de l appareil Remettre l horloge à l heure comme suit Pour remettre l horloge à l heure Renouveler Réglage de l horloge depuis le début Si l heure affichée est en clignotement sauter l étape 3 sélection de l affichage 12 ou 24 heures Pour passer à l affichage 12 ou 24 heures 1 Effacer toute la mémoire Pour plus de détails se reporter à Effacement de t...

Page 58: ...mplacement 5 Appuyer sur la touche 7 7 7 7 7 OPEN CLOSE pour refermer le tiroir Le répertoire musical affiche seulement les numéros existant sur le disque Si le CD contient plus de 15 morceaux l appareil affiche C 6 Pour sélectionner le premier CD à écouter appuyer sur l une des touches s s s s s 1 s s s s s 3 12 cm 8 cm Lecture CD Écoute de CD Nombre de morceaux sur le CD dont le numéro clignote ...

Page 59: ... en pressant sur la touche DISC SKIP pour enlever le troisième Après utilisation Appuyer sur la touche POWER pour mettre l appareil en attente Attention Placer un seul CD sur le tiroir Ne pas pousser le tiroir en cours de mouvement Ne pas tourner le tiroir de disque à la main Cela entraînera un mauvais fonctionne ment S il se produit une panne de courant alors que le tiroir est ouvert attendre le ...

Page 60: ...igner l ordre de la lecture Attention Après la répétition ou la lecture au hasard penser à appuyer sur la touche CD Dans le cas contraire l appareil lira le ou les disques indéfiniment Lecture à partir d un morceau souhaité On peut commencer la lecture à partir d un morceau souhaité 1 En mode d arrêt sélectionner un disque en pressant sur l une des touches s s s s s 1 s s s s s 3 ou sur la touche ...

Page 61: ...sur la touche 0 R 0 R 0 R 0 R 0 R 0 R 0 R 0 R 0 R 0 R Lecture CD Lecture des morceaux programmés En spécifiant les disques 1 3 et les morceaux 1 99 on peut programmer jusqu à 32 morceaux pour la lecture dans un ordre souhaité Effacement des morceaux programmés En mode d arrêt appuyer sur la touche CLEAR de la télécommande Chaque fois que la touche est pressée un morceau s efface à partir du dernie...

Page 62: ...2 Appuyer à plusieurs reprises sur la touche TUNER BAND pour sélectionner une gamme d ondes souhaitée FM ou AM 3 Appuyer sur la touche TUNING TIME X X X X X ou W W W W W pour faire l accord sur la station souhaitée Accord manuel Appuyer sur la touche TUNING TIME autant de fois qu il est nécessaire pour régler le tuner sur la station Accord automatique Si on presse la touche TUNING TIME plus de 0 5...

Page 63: ...vant 30 secondes appuyer sur la touche 5 5 5 5 5 3 3 3 3 3 PRESET X X X X X ou W W W W W PRESET 2 2 2 2 2 4 4 4 4 4 pour sélectionner un numéro de présélection Stocker des stations en mémoire dans l ordre à partir du canal de présélection 1 4 Avant 30 secondes appuyer sur la touche MEMORY SET pour mettre la station en mémoire Si le voyant MEMORY et le voyant de numéro de présélection s éteignent a...

Page 64: ...RESET X 3 Attention Pour retirer la cassette appuyer sur la touche TAPE et puis ouvrir le comparti ment Pour changer de mode appuyer sur la touche TAPE S il se produit une panne de courant en cours d opération cassette la tête magnéti que reste engagée avec la bande et le compartiment refuse de s ouvrir On attendra alors le rétablissement de courant Avant la lecture Pour assurer la meilleure quali...

Page 65: ...dio Languette contre l effacement Avant de faire un enregistrement vérifier la présence de la languette qui une fois retiré interdira un enregistrement ou un effacement accidentels Pour protéger l enregistrement retirer la lan guette Pour effectuer un nouvel enregistrement couvrir le trou d un morceau de bande adhésive Face A Languette pour la face A Languette pour la face B L enregistrement peut ...

Page 66: ...ette L enregistrement commence par le disque sélectionné Le CD et la cassette se mettront automatiquement en arrêt si l un des deux est terminé Pour enregistrer des morceaux en les programmant 1 Programmer des disques et des morceaux voir page 18 2 Appuyer sur la touche REC PAUSE I6 I6 3 Appuyer sur la touche 0 R 0 Arrêt de l enregistrement Appuyer sur la touche CD ou TAPE Le CD s arrête ainsi que...

Page 67: ...puyer sur la touche REC PAUSE I6 I6 I6 I6 I6 I6 I6 I6 I6 I6 L enregistrement est mis en pause 5 Appuyer sur la touche 0 0 0 0 0 R R R R R 0 0 0 0 0 Arrêt de la copie Appuyer sur la touche TAPE Les cassettes TAPE 1 et TAPE 2 s arrêtent en même temps Effacement de cassettes enregistrées 1 Mettre une cassette à effacer dans le compartiment TAPE 2 2 Agir sur la touche TAPE 1 V 2 pour afficher TAPE 2 3...

Page 68: ...e signaux Dolby digital Le type de l entrée en cours peut être vérifié en regardant sur l afficheur Si l effet de basses fréquences Low Frequency Effect contient des signaux Dolby digital LFE s inscrira sur l afficheur Si LFE s allume les signaux de basses fréquences sont émis du woofer auxiliaire Fonctionnement surround Dolby digital Lecture PCM normale Enceinte centrale seulement mono Avant gauc...

Page 69: ... Dolby digital 1 0 le son monaural est émis des encein tes avant 4 Déclencher la lecture sur l élément raccordé Notes Si on appuie sur la touche EQUALIZER en modes normal fantôme virtuel le mode polarisation s active En mode normal fantôme l égaliseur sera réglé sur FLAT Les caractéristiques normal fantôme Dolby digital surround ne sont pas utilisables pour l audition avec un casque Si on branche ...

Page 70: ... travers les 2 enceintes avant seule ment Fonctionnement surround Son surround représente une enceinte virtuelle Enceinte avant droite Enceinte avant gauche Dolby surround virtuel Pour écouter en Dolby surround virtuel 1 Sélectionner une source audio et déclencher la lecture 2 Appuyer sur la touche VIRTUAL pour sélectionner VIRTUAL S il s agit d un signal Dolby digital VIRTUAL et DIGITAL apparais ...

Page 71: ...du woofer auxiliaire même si on modifie le paramétrage du woofer auxiliaire Taille des enceintes 1 Agir à plusieurs reprises pour sélectionner SP SIZE 2 Avant 8 secondes appuyer sur la touche ITEM pour sélectionner FRONT FRONT apparaît 3 Avant 8 secondes agir sur la touche SET UP W W W W W ou X X X X X de la télécommande pour sélectionner LARGE ou SMALL LARGE Enceintes capables de reproduire les b...

Page 72: ...emps de délai pour les enceintes surround le son sera élargi Si on le réduit l espace sonore est limité mais avec une atmosphère intime Modification du réglage des enceintes suite Réglage du délai des enceintes Pour obtenir la meilleure restitution du son toutes les enceintes avant centrale sur round devront être placées à une même distance de l auditeur Si cette disposition est impossible on peut...

Page 73: ...lage des enceintes Balance des enceintes avant On peut régler l équilibre des deux enceintes avant 1 Agir à plusieurs reprises sur la touche MENU pour sélectionner SP LEVEL 2 Avant 8 secondes appuyer sur la touche ITEM 3 Avant 8 secondes appuyer sur la touche SET UP W W W W W pour augmenter le niveau de l enceinte droite celui de gauche baisse ou la touche SET UP X X X X X pour augmenter le niveau...

Page 74: ...onne EXT pour la taille du woofer auxiliaire équipant l enceinte avant il n émettra aucun son Modification du réglage des enceintes suite Gamme dynamique Les disques DVD offrent une plus large gamme dynamique plage de volume sonore auprès des vidéocassettes VHS ou CD audio Si on les reproduit sur un système domestique il y a trop d écart entre les niveaux sonores haut et bas Si on ajuste le niveau...

Page 75: ... se déroulait juste devant le nez LFE Low Frequency Effect Il s agit d un effet sonore de basses fréquences employé dans les enregistrements Dolby digital Cet appareil affiche LFE s il détecte un signal codé LFE en cours de lecture PCM Pulse Code Modulation Système d enregistrement transmission employé pour les signaux audionumériques Cet appareil peut traiter trois fréquences d échantillonnage de...

Page 76: ...le réglage de la lecture programmée Opérations programmées lecture ou enre gistrement Avant de régler la minuterie 1 Appuyer sur la touche CLOCK pour vérifier que l horloge est à l heure 2 Pour la lecture programmée Mettre en place une cassette ou des disques à reproduire Pour l enregistrement programmé Mettre une cassette d enregistrement dans le compartiment TAPE 2 Opérations programmées et mise...

Page 77: ...c un élément raccordé aux jacks VIDEO AUX IN ou DIGITAL IN sélectionner VIDEO VCR à l étape 2 Seul cet appareil peut alors s allumer ou passer en attente automati quement L autre appareil ne s allume pas et ne s éteint pas automatiquement Timer and Sleep Operation continued Mise en arrêt différée 1 Déclencher la source audio souhaitée 2 Agir à plusieurs reprises sur la touche TIMER SLEEP pour affi...

Page 78: ...âbles vendus dans le commerce Enrichissement du système F 35 Vers le jack de sortie numérique Câble de raccordement optique non fourni Vers les jacks de sortie de ligne Magnétoscope etc Lecteur de DVD Cordon RCA non fourni Caisson de grave avec un amplificateur intégré Téléviseur Downloaded from http www usersmanualguide com ...

Page 79: ...System Continued Casque Avant de brancher ou de débrancher le casque réduire le niveau sonore Utiliser un casque muni d une fiche de 3 5 mm de diamètre et ayant une impédance de 16 à 50 ohms L impédance préconisée est de 32 ohms Le branchement du casque déconnecte automatiquement les enceintes Régler le volume en agissant sur la commande VOLUME Note Les modes normal fantôme et Dolby digital surrou...

Page 80: ... Mettre l appareil en veille et le rallumer Si l appareil fonctionne toujours mal il faut le réinitialiser Se reporter à la page 39 Le volume est il réglé sur 0 Le casque est il branché Lesfilsdesenceintessont ilsdébranchés Les enceintes avant et surround sont elles raccordées aux canaux corrects Si un élément est raccordé est il rac cordé aux canaux corrects Les fils des enceintes sont ils raccor...

Page 81: ...er une lecture normale Essuyer l émetteur de la télécommande avec un chiffon doux Lecteur de DVD Problème Aucun son malgré le raccordement d un lecteur de DVD Cause Le lecteur de DVD est il éteint Le signal numérique n est il pas émis du lecteur de DVD DVD NO est il affiché Le type de signal DVD ne s inscrit il pas sur l afficheur DVD n est pas affiché Décodage im possible voir page 25 Le signal D...

Page 82: ... transporter l appareil 1 Appuyer sur la touche POWER pour allumer l appareil 2 Appuyer sur la touche CD 3 Appuyer sur la touche 7 7 7 7 7 OPEN CLOSE pour ouvrir le tiroir Retirer tous les CD de l appareil 4 Refermer le tiroir en appuyant sur la touche 7 7 7 7 7 OPEN CLOSE Vérifier que l appareil affiche NO DISC 5 Appuyer sur la touche POWER pour mettre l appareil en mode d attente et débrancher l...

Page 83: ...usant un son médiocre Démagnétiser ces pièces toutes les 30 heures de lec ture enregistrement à l aide d un démagnétiseur de tête en vente dans le com merce Avant utilisation lire attentivement la notice du démagnétiseur Pour assurer le bon fonctionnement du lecteur CD il faut nettoyer régulièrement la cellule porte laser Il existe un kit de nettoyage dans le commerce Se renseigner auprès du reven...

Page 84: ...urs indiquées dans ce docu ment sont les valeurs nominales des appareils de série mais de légères différences peuvent être constatées d un appareil à l autre F 41 Général Alimentation 120 V CA 60 Hz Consommation 230 W Dimensions Largeur 270 mm Hauteur 330 mm Profondeur 372 mm Poids 8 8 kg Amplificateur Puissance de sortie RMS 210 W total 10 de D H T Enceintes avant principales 60 W 30 W 30 W Encei...

Page 85: ... Largeur 220 mm Hauteur 330 mm Profondeur 245 mm Poids 4 1 kg chacune Enceinte centrale Type Large bande 100 mm Puissance d entrée maximale 60 W Impédance 6 ohms Dimensions Largeur 260 mm Hauteur 142 mm Profondeur 170 mm Poids 1 0 kg Enceinte surround Type Large bande 100 mm Puissance d entrée maximale 40 W Impédance 8 ohms Dimensions Largeur 200 mm Hauteur 172 mm Profondeur 95 mm Poids 0 6 kg cha...

Page 86: ...uring the warranty period warranty service may be obtained upon delivery of the Sharp product together with proof of purchase and a copy of this LIMITED WARRANTY statement to an Authorized Sharp Service Centre or an Authorized Sharp Servicing Dealer In home warranty service may be provided at Sharp s discretion on any Sharp television with the screen size of 27 or larger and on any Sharp Over The ...

Page 87: ...rication est décelé dans ce produit Sharp au cours de la période de la garantie La réparation sous garantie est offerte à la condition que le produit Sharp soit livré accompagné de la preuve d achat et une copie de cette GARANTIE LIMITÉE à un centre agréé de service Sharp ou à un Détaillant autorisé au service Sharp La garantie de service à domicile peut être offerte à la discrétion de Sharp sur t...

Page 88: ... IN MALAYSIA IMPRIMÉ EN MALAISIE A0105 TO TINSK0117AWZZ SHARP ELECTRONICS OF CANADA LTD 335 Britannia Road East Mississauga Ontario L4Z 1W9 SHARP CORPORATION 9906 Downloaded from http www usersmanualguide com ...

Page 89: ... tv dvd and othes Manual users user manuals user guide manual owners manual instruction manual manual owner manual owner s manual guide manual operation operating manual user s manual operating instructions manual operators manual operator manual product documentation manual user maintenance brochure user reference pdf manual Downloaded from http www usersmanualguide com ...

Reviews: