background image

01/11/30

1500_UK3.fm

33

XL-1500H

Re

fe

re

nce

s

- T

roub

le

s

h

ooting c

h

a

rt / M

a

inte

na

nc

e

 -

„

If trouble occurs

When this product is subjected to strong external interference
(mechanical shock, excessive static electricity, abnormal supply
voltage due to lightning, etc.) or if it is operated incorrectly, it may
malfunction.

If such a problem occurs, do the following:

Caution:

This operation will erase all data stored in memory including clock,
timer settings, tuner preset, and CD programme.

Maintenance

„

Cleaning the CD pickup lens


„

Cleaning the cabinet

1

Set the unit to the stand-by mode and turn the power on 
again.

2

If the unit is not restored in step 1, unplug and plug in the 
unit, and then turn the power on.

3

If neither step 1 nor 2 restores the unit, do the following:

Press the ON/STAND-BY button to enter the power stand-by 
mode.
Unplug the AC power lead from the AC INPUT socket on the 
unit.
Whilst pressing down the MEMORY/SET button and the 


button, plug the AC power lead into the AC INPUT socket on 
the unit.

AC INPUT

Do not touch the laser pickup lens. If finger-
prints or dust accumulate on the pickup, 
clean it gently with a dry cotton swab.

Periodically wipe the cabinet with a soft cloth 
and a diluted soap solution, then with a dry 
cloth.
 

Caution:

z

Do not use chemicals for cleaning (petrol, 
paint thinner, etc.). It may damage the 
cabinet finish.

z

Do not apply oil to the inside of the unit. It 
may cause malfunctions.

Downloaded from: 

http://www.usersmanualguide.com/

Summary of Contents for CP-XL1500H

Page 1: ...1500H main unit and CP XL1500H speaker system COMPACT AUDIO SYSTEM MODEL XL 1500H OPERATION MANUAL If you require any advice or assistance re garding your Sharp product please visit our web site www sharp co uk support Customers without internet access may telephone 08705 274277 during office hours or 01 676 0648 if telephoning from Ireland XL_1500H_E FRONT 01 12 10 01 46 PM 1 Downloaded from http...

Page 2: ... proceed as follows The wire which is coloured blue must be connected to the plug terminal which is marked N or coloured black The wire which is coloured brown must be connected to the plug terminal which is marked L or coloured red Ensure that neither the brown nor the blue wire is connected to the earth terminal in your three pin plug Before replacing the plug cover make sure that If the new fit...

Page 3: ...n Accessories 4 Precautions 5 Controls and indicators 6 9 Preparation for Use System connections 10 11 Remote control 12 Basic Operation General control 13 Sound control 14 Setting the clock 15 CD Playback Listening to a CD 16 18 Repeat or random play 18 Programmed play 19 Radio Listening to the radio 20 21 Listening to the memorised station 21 22 RDS Radio Using the Radio Data System RDS 23 27 Ad...

Page 4: ... Accessories Accessories Please confirm that the following accessories are included Note Only the above accessories are included AC power lead 1 Remote control 1 AM loop aerial 1 FM aerial 1 Speaker wire 2 Downloaded from http www usersmanualguide com ...

Page 5: ...r local SHARP service facility z The ventilation should not be impeded by covering the ventilation openings with items such as newspapers tablecloths curtains etc z No naked flame sources such as lighted candles should be placed on the apparatus z Attention should be drawn to the environmental aspects of bat tery disposal z The apparatus is designed for use in moderate climate z This unit should o...

Page 6: ...Button 18 22 10 CD Track Down or Fast Reverse Tuner Preset Down Button 18 22 11 Volume Up and Down Buttons 14 12 CD Play or Pause Tuning Up Button 17 20 Display 1 Timer Play Indicator 2 Sleep Indicator 3 CD Random Play Indicator 4 Memory Indicator 5 RDS Indicator 6 Traffic Programme Indicator 7 Traffic Announcement Indicator 8 FM Stereo Mode Indicator 9 CD Play Indicator 10 CD Repeat Play Indicato...

Page 7: ... Aerial Terminal 10 11 4 Aerial Earth Terminal 10 11 5 FM 75 Ohms Aerial Socket 10 11 6 Video Auxiliary Audio Signal Input Sockets 31 7 Speaker Terminals 10 11 8 AC Power Input Socket 10 11 MODEL NO XL 1500H The bottom of the unit COMPACT AUDIO SYSTEM 230 V 50 Hz 30 W SERIAL NO SHARP CORPORATION 3 2 1 4 5 6 7 8 Downloaded from http www usersmanualguide com ...

Page 8: ...ton 18 19 CD Fast Reverse Tuning Down Button 18 20 20 CD Play Button 17 21 CD Track Up Button 18 22 CD Fast Forward Tuning Up Button 18 20 23 CD Pause Button 17 24 CD Stop Button 17 25 Tuner Preset Down Button 22 26 Bass Up and Down Buttons 14 27 Treble Up and Down Buttons 14 28 RDS Programme Type Traffic Information Search Button 27 29 RDS ASPM Auto Station Programme Memory Button 25 30 RDS Displ...

Page 9: ...uct 4 Speaker Terminals Speaker grilles are removable Placing the speaker system There is no distinction between the right and the left speakers 1 2 4 3 Make sure nothing comes into contact with the speaker diaphragms when you remove the speaker grilles Left speaker Right speaker Downloaded from http www usersmanualguide com ...

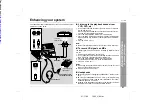
Page 10: ...connections System connections Right speaker Left speaker FM aerial AM loop aerial Wall socket AC 230 V 50 Hz Right speaker Left speaker Black White line VCR DVD etc MD recorder not supplied not supplied See page 31 Downloaded from http www usersmanualguide com ...

Page 11: ... right speaker is the one on the right side when you face the unit z Do not let the bare speaker wires touch each other Connecting the AC power lead After checking all the connections have been made correctly con nect the AC power lead to the AC power input socket then plug the AC power lead of this unit into the wall socket Notes z Unplug the unit if it will not be used for a prolonged period of ...

Page 12: ...ed or if the operation becomes erratic z Periodically clean the transmitter on the remote control and the sensor on the unit with a soft cloth z Exposing the sensor on the unit to strong light may interfere with operation Change the lighting or the direction of the unit z Keep the remote control away from moisture heat shock and vibrations Test of the remote control Face the remote control directl...

Page 13: ...rol Opening and closing the CD compartment The CD compartment cover is motorised When the power is turned on you can open or close the CD com partment cover by pressing the OPEN CLOSE button Caution z Do not stop or move the CD compartment cover manually It may cause malfunctions to the unit z Be careful not to jam your fingers in the CD compartment cover Opening the control cover Slide the contro...

Page 14: ...ust the bass Adjusting the treble Main unit operation 1 Press the BASS TREBLE button until TRE appears on the dis play 2 Within 5 seconds press the VOLUME or button to adjust the treble Remote control operation Press the TREBLE or button to adjust the treble Setting the surround Press the SURROUND button to allow you to enjoy music that seems to surround you SURROUND will appear To cancel the surr...

Page 15: ...EMORY button 2 Within 1 minute press the PRESET or button to select 24 hour or 12 hour display and then press the MEMORY button 0 00 The 24 hour display will appear 0 00 23 59 AM 12 00 The 12 hour display will appear AM 12 00 PM 11 59 Note that this can only be set when the unit is first installed or it has been reset Refer to step 3 under If trouble occurs on page 33 3 Within 1 minute press the P...

Page 16: ...rs on the display z When operating with the remote control press the CD but ton z If no disc is loaded the display will be NO DISC instead of CD STOP 3 Press the OPEN CLOSE button to open the CD com partment 4 Place a CD on the spindle label side up 5 Press the OPEN CLOSE button to close the CD com partment z The CD playback will start automatically z When the last track on the disc has finished p...

Page 17: ...or READ ERR will appear on the display z Keep foreign objects out of the CD compartment z Subjecting the unit to shock or vibration may cause mistracking z When the unit is not being used be sure to close the CD com partment If it is left open the lens may be covered with dust and the unit may not operate properly z If TV or radio interference occurs during CD operation move the unit away from the...

Page 18: ...e random operation On the other hand the button does not allow you to move to the previous track The beginning of the track being played will be located Caution After performing repeat or random play be sure to press the but ton Otherwise the disc will play continuously To cancel repeat or random play Press the RANDOM REPEAT button on the remote control repeat edly to select the normal playback mo...

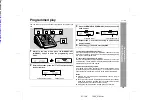
Page 19: ...u press the ON STAND BY button to enter the stand by mode or the function is changed from CD to some other function the programmed selections will not be cleared z During programme operation random play is not possible 1 Whilst in the stop mode press the MEMORY SET MEMORY button to enter the programming save mode 2 Within 30 seconds press the or button to select the desired track Selected track nu...

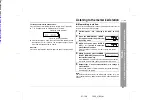
Page 20: ...ressed for more than 0 5 sec onds scanning will start automatically and the tuner will stop at the first receivable broadcast station Notes z This can be operated by pressing the TUN or button on the remote control z When radio interference occurs auto scan tuning may stop automatically at that point z Auto scan tuning will skip weak signal stations z To stop the auto tuning press the TUNING butto...

Page 21: ...ts the memorised stations for a few hours should there be a power failure or the AC power lead discon nection FM stereo mode indicator FM stereo receiving indicator 1 Perform steps 1 3 in Listening to the radio on page 20 2 Press the MEMORY SET MEMO RY button to enter the preset tun ing saving mode 3 Within 5 seconds press the PRE SET or button to select the preset channel number Store the station...

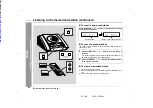
Page 22: ...seconds to select the desired station Preset channel Frequency and frequency band 1 Press the PRESET or button for more than 0 5 seconds The preset number will flash and the programmed stations will be tuned in sequentially for 5 seconds each 2 Press the PRESET or button again when the de sired station is located 1 Recall the memorised station 2 Whilst it is displayed press the MEMORY SET MEMORY b...

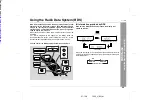
Page 23: ...l be displayed TP Traffic Programme will appear on the display when the received broadcast carries traffic information and TA Traffic Announcement will appear whilst a traffic information is on air You can control the RDS by using the remote control only Information provided by RDS Each time the DISPLAY button is pressed the display will switch as follows When you are tuning in to a station other ...

Page 24: ... styles Jazz Folk or Country Music in this category is often but not always vocal and usually of short duration LIGHT M Classical music for general rather than specialist appreciation Examples of music in this category are instrumental music and vocal or choral works CLASSICS Performances of major orchestral works sympho nies chamber music etc and including Grand Op era OTHER M Musical styles not ...

Page 25: ...sually played on acoustic instru ments The narrative or story may be based on his torical events or people DOCUMENT Programme concerned with factual matters pre sented in an investigative style TEST Broadcast when testing emergency broadcast equipment or receivers ALARM Emergency announcement made under exception al circumstances to give warning of events causing danger of a general nature NONE No...

Page 26: ...noise or if the signal is too weak In this case perform as follows Notes z The same station name can be stored in different channels z In a certain area or during certain time periods the station names may temporarily be different Notes for RDS operation If any of the following events occur it does not mean that the unit is faulty z PS NO PS and a station name appear alternately and the unit does ...

Page 27: ...affic information at that time When a traffic information is broadcast TA will appear To specify station names and select stations manually You can select a station by specifying the name BBC R1 BBC R2 etc from the stations stored in memory Before starting this operation you must store one or more station names in memory 1 Press the TUNER button and then the BAND button to select FM 2 Press the PT...

Page 28: ... Timer playback Before setting timer 1 Press the CLOCK button to check that the clock is on time 2 Load a disc to be played 1 Press the ON STAND BY button to turn the power on 2 Press the CD or TUNER button to select the desired function When you selected the TUNER tune in to the desired sta tion 3 Adjust the volume using the VOLUME buttons Do not turn the volume up too high 4 Press the TIMER butt...

Page 29: ...y the hour to start then press the MEMORY but ton 6 Within 1 minute press the PRESET or button to specify the minutes to start then press the MEMORY button z The timer playback starting time function and volume will be displayed and then the unit will enter the stand by mode au tomatically z will appear and the current time will be displayed To cancel the timer playback Press the ON STAND BY butto...

Page 30: ...sound source 2 Press the SLEEP button To change the sleep time Press the SLEEP button repeatedly to select the desired sleep time The time will decrease as follows The amount of sleep time can also be changed whilst in the sleep mode 3 Your system will enter the power stand by mode auto matically after the preset time has elapsed The volume will be turned down 1 minute before the sleep op eration ...

Page 31: ...g in the headphones disconnects the speakers automati cally Adjust the volume using the VOLUME buttons VCR DVD etc MD recorder White White RCA lead Red Red To the line output sockets To the optical line input socket Headphones Connection cable for digital recording 1 Use a connection lead to connect the VCR DVD etc to the VID EO AUX IN sockets When using video equipment connect the audio output to...

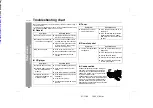
Page 32: ...n dards z Is the disc distorted or scratched z Playback sounds are skipped or stopped in the middle of a track z Is the unit located near excessive vibrations z Is the disc very dirty z Has condensation formed inside the unit Symptom Possible cause z Radio makes unusual noise consecutively z Is the unit placed near the TV or computer z Is the FM AM loop aerial placed properly Move the AC power lea...

Page 33: ...d in step 1 unplug and plug in the unit and then turn the power on 3 If neither step 1 nor 2 restores the unit do the following Press the ON STAND BY button to enter the power stand by mode Unplug the AC power lead from the AC INPUT socket on the unit Whilst pressing down the MEMORY SET button and the button plug the AC power lead into the AC INPUT socket on the unit AC INPUT Do not touch the lase...

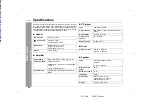
Page 34: ...t 145 mm 5 3 4 Depth 292 mm 11 1 2 Weight 2 8 kg 6 2 lbs Output power RMS 20 W 10 W 10 W 10 T H D Output terminals Speakers 8 ohms Headphones 16 50 ohms recommended 32 ohms CD digital output optical Input terminals Video Auxiliary audio signal 500 mV 47 kohms Type Compact disc player Signal readout Non contact 3 beam semiconductor laser pickup D A converter 1 bit D A converter Frequency re sponse ...

Page 35: ...MEMO XL_1500H_E BACK 01 12 11 04 58 PM 1 Downloaded from http www usersmanualguide com ...

Page 36: ...hased Proof of purchase must be provided 4 The guarantee does not cover carriage costs jewelled styli audio tapes compact discs or batter ies 5 In the unlikely event of this product requiring repair please contact the supplier from whom it was purchased Where this is not possible please contact the Sharp Customer Information Centre on the telephone number given below 6 No person has any authority ...

Page 37: ... tv dvd and othes Manual users user manuals user guide manual owners manual instruction manual manual owner manual owner s manual guide manual operation operating manual user s manual operating instructions manual operators manual operator manual product documentation manual user maintenance brochure user reference pdf manual Downloaded from http www usersmanualguide com ...

Reviews: