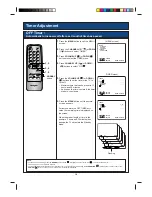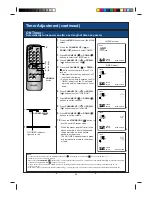
13
Picture Adjustment
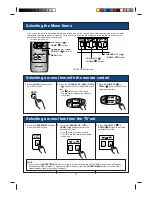
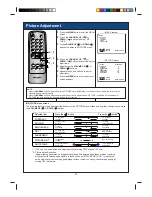
1
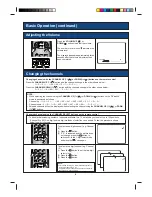
Press the
MENU
button to call the MENU
screen.
2
Press the
CHANNEL UP
(
CH
) or
DOWN
(
CH
) buttons to select “PIC-
TURE”.
3
Press
VOLUME UP
( ) or
DOWN
( )
buttons to display the PICTURE menu.
4
Press the
CHANNEL UP
(
CH
) or
DOWN
(
CH
) buttons to select the adjust-
ment items.
5
Adjust using the
VOLUME UP
( ) or
DOWN
( ) buttons.
6
Repeat steps 4 and 5 above to adjust
other items.
7
Press the
MENU
button until the normal
screen appears.
MENU
PICTURE
SOUND
FEATURE
TIMER
CH-SETTING
CH
: SELECT
: ADJUST
MENU : RETURN
(MENU screen)
PICTURE
(STANDARD)
CH
: SELECT
: ADJUST
MENU : RETURN
CONTRAST
10
COLOUR
0
BRIGHTNESS
+10
TINT
SHARPNESS
-10
PICTURE NR
ON
WHITE TEMP
+20
(PICTURE menu)
NOTE :
• When the
NORMAL
button is pressed while the PICTURE menu is displayed, the setting for the selected item is reset to the
standard (factory setting) position.
• When the
NORMAL
button is pressed while the MENU screen is displayed and “PICTURE” is selected, all the settings for
PICTURE items are reset to the standard (factory setting) position.
n
PICTURE menu screen
The following table lists the adjustment items shown in the PICTURE menu screen and how they change as you press
the
VOLUME UP
( ) or
DOWN
( ) buttons.
Selected Item
CONTRAST
COLOUR
BRIGHTNESS
TINT
*1
SHARPNESS
PICTURE NR
*2
WHITE TEMP
Press the ( ) button
Press the ( ) button
To decrease
contrast
For less colour
intensity
For less
brightness
To move tint
towards purple
For less
sharpness
To decrease
contrast
To a more reddish
background
To increase
contrast
For more
colour intensity
For more
brightness
To move tint
towards green
For more
sharpness
(See note below)
To a more bluish
background
-
+
-
+
-
+
-
+
-
+
-
+
-
+
ON
OFF
*1 : TINT can only be selected and adjusted when receiving NTSC signals. (AV only)
*2 : Picture Noise Reduction
Noise might be generated on images when playing deteriorated video tapes or when receiving
broadcasts with relative weak signals. In these cases, set PICTURE NR to “ON” to reduce the
noise. However, when receiving good images without noise, you can get better image quality by
turning OFF this feature.
TV/VIDEO
TV
1
2
3
4
5
6
7
8
0
9
MPX
POWER
SAVE
AV MODE
MENU
NORMAL
CH
CH
MENU
3 , 5
2 , 4
1 , 6
CH
CH


