111
GB
Function Setting
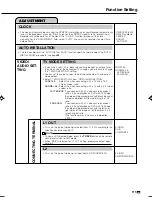
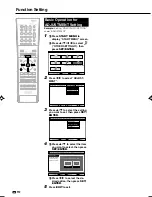
TV MODE SETTING
• If you switch your TV (i.e. because you have bought a new one) and
the screen size of the connected TV changes, you will have to change
the “TV MODE SETTING” setting.
• You can set the screen aspect ratio of the connected TV, and adjust
video output.
• Select “TV MODE SETTING” from “VIDEO/AUDIO SETTING”.
WIDE 16:9:
Select this when connecting with a TV with a 16:9
screen aspect ratio.
NORMAL 4:3:
Select this when connecting with a TV with a 4:3 screen
aspect ratio.
LETTER BOX:
If you connect with a TV whose screen aspect
ratio is 4:3 and playback a DVD with 16:9 video,
the video will be played back with black bands at
the top and bottom, while maintaining the 16:9
ratio.
PAN SCAN:
If you connect with a TV whose screen aspect
ratio is 4:3 and playback a DVD with 16:9 video,
the video will be played back with the left and
right sides of the image cut off to display in 4:3
screen aspect ratio.
(This function works if the disc is labeled for
4:3PS.)
L1 OUT
• This sets the type of video signal output from L1 (TV) according to the
specification of connected TV.
NOTE
• To view an RGB output video, press the
TV/DVD
button on the remote
control and switch to DVD mode.
• When “RGB” is selected for “L1 OUT” setting, progressive output does
not work.
L2
• This sets the type of video signal input from L2 (DECODER/EXT).
WIDE 16:9
NORMAL 4:3
LETTER BOX
PAN SCAN
ADJUSTMENT
VIDEO/
AUDIO SET-
TING
S-VIDEO
RGB
COMPOSITE
S-VIDEO
RGB/COMPOSITE
TIME:XX:XX(24H)
DATE:Day/Month
YEAR:XX
ADJUST:
AUTO/OFF
CONNECTING TERMINAL
CLOCK
• The clock will normally be set using the VPS/PDC information when your Recorder automatically
tunes in the broadcast channels. If for any reason the VPS/PDC signals are not present, your
Recorder will not be able to set the clock. The “CLOCK” function lets you set the clock
manually. For the “ADJUSTMENT” field, select “AUTO” if you want the recorder to adjust time
automatically.
AUTO INSTALLATION
• This lets you perform the “AUTO INSTALLATION” function again. For details about the “AUTO
INSTALLATION” procedure, see page
25
.
HR480S-107-116
05.3.23, 10:03 AM
111

