27
EN
Recording
Disc Playback
Editing
Before you start
Connections
Getting started
Changing the
Setup menu
Others
VCR functions
Recording
Formatting a disc (cont’d)
Note
• You cannot set or clear
chapter marks on DVD-R discs
manually.
1
2
3
6
5
4
7
0
8
9
AUDIO
REPEAT
PAUSE
SEARCH
SLOW
MENU LIST
TOP MENU
STOP
PLAY
FWD
REV
SKIP
PROG.
CLEAR/C-RESET
VCR
REC/OTR
DVD
REC/OTR
PQRS
TUV
WXYZ
GHI
JKL
MNO
.@/:
ABC
DEF
SPACE
DISPLAY
ENTER
ZOOM
REC MODE
VCR
RAPID PLAY
DVD
CM SKIP
SETUP
T-SET
OPEN/CLOSE
EJECT
TIMER PROG.
DUBBING
VCR/DVD RECORDER
COMBINATION
NB203ED
RETURN
OPERATE
3
1
5
4
2
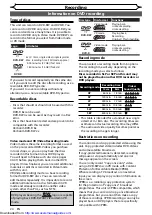
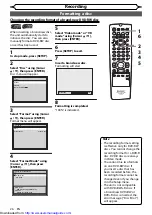
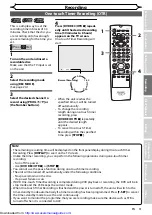
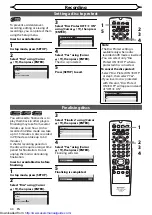
The unit inserts a chapter mark
periodically (every 10 minutes by
default) during recording. Using
the Auto Chapter menu, you can
set this function off or change the
time period.
1
In stop mode, press [SETUP].
2
Select “Recording” using
[Cursor
K
/
L
], then press
[ENTER].
Satellite Link
Bilingual Recording Audio
Auto Finalise
External Input Audio
Auto Chapter
Main
Recording Audio Select (XP)
Dolby Digital
Stereo
10 minutes
OFF
Dubbing Mode
Recording
DVD
VCR DVD
3
Select “Auto Chapter” using
[Cursor
K
/
L
], then press
[ENTER].
Auto Chapter
5 minutes
10 minutes
15 minutes
30 minutes
60 minutes
OFF
DVD
4
If you wish to set “Auto
Chapter” off, select “OFF”
using [Cursor
K
/
L
], then press
[ENTER].
If you wish to change the time
period for Auto Chapter, select
the required time period using
[Cursor
K
/
L
], then press
[ENTER].
5
Press [SETUP] to exit.
Setting Auto Chapter
Note
• “PCM” stands for Pulse Code
Modulation. It changes
analogue sound to digital
sound without compressing
audio data.
• When the recording mode is
set at other than XP, the unit
records “Dolby Digital” audio
automatically even if you
selected “PCM”.
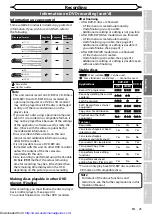
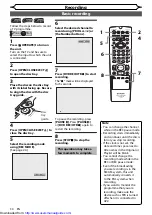
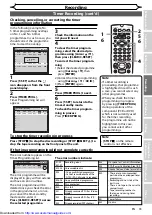
You can enjoy high quality sound
recording. This function works
only when the recording mode is
set at XP.
1
In stop mode, press [SETUP].
2
Select “Recording” using
[Cursor
K
/
L
], then press
[ENTER].
3
Select “Recording Audio Select
(XP)” using [Cursor
K
/
L
], then
press [ENTER].
PCM
Dolby Digital
Recording Audio Select (XP)
DVD
The default is “Dolby Digital”.
4
Select “PCM” or “Dolby Digital”
using [Cursor
K
/
L
], then press
[ENTER].
PCM:
Records PCM audio for the best
quality sound.
Dolby Digital:
Records Dolby Digital audio for
good quality sound.
5
Press [SETUP] to exit.
Recording Audio Select (XP)
1
2
3
6
5
4
7
0
8
9
MENU LIST
TOP MENU
STOP
PLAY
FWD
REV
SKIP
PROG.
CLEAR/C-RESET
VCR
REC/OTR
DVD
REC/OTR
PQRS
TUV
WXYZ
GHI
JKL
MNO
.@/:
ABC
DEF
SPACE
DISPLAY
ENTER
ZOOM
REC MODE
VCR
RAPID PLAY
DVD
CM SKIP
SETUP
T-SET
OPEN/CLOSE
EJECT
TIMER PROG.
DUBBING
RETURN
OPERATE
3
1
5
4
2
http://www.usersmanualguide.com/


