background image

E-35

SD-AT50(U)E4.fm

02/7/19

SD-AT50

ENGLISH

DX-AT50

Advanced Disc Features

- V

a

ri

ous

 s

e

tt

in

g

s

 -

Various settings (continued)

"

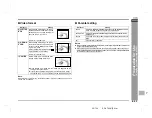
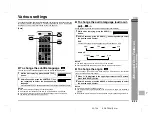
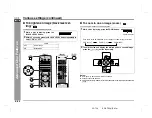
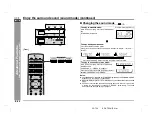
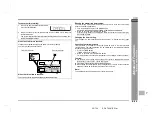
To brighten an image (black level set-
ting)    

The image can be adjusted during playback.

"

To zoom in on an image (zoom)    

You can magnify images during DVD playback.

Notes:

!

An image may become distorted when zoomed.

!

Subtitles cannot be zoomed.

!

For the part currently viewed, refer to the indication in the lower right section of the
screen.

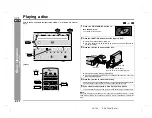
1

While a disc is playing, press the
BLACK LEVEL button.

2

Within 5 seconds, press the BLACK LEVEL button repeatedly to
select "ON" or "OFF".

 Setting

OFF

Normal image

ON

Bright image

BLACK LEVEL:   ON

[Front]

[Back]

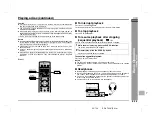
1

While a disc is playing, press the ZOOM button.

ZOOM indicator

Each press of the ZOOM button cycles through the zoom settings as follows:

2

To shift the view and display the desired part of a zoomed image,
press the  ,  ,   or   button repeatedly.

ZOOM [x2]

ZOOM [    2]

ZOOM [    4]

ZOOM [OFF]

Summary of Contents for DX-AT50

Page 1: ...E D EMPLOI 1 BIT DIGITAL HOME THEATER ENSEMBLE HOME THEATER 1 BIT Please refer to pages i to iv and E 1 to E 52 ENGLISH Se reporter aux pages iv et F 1 à F 52 FRANÇAIS DX AT50 DVD PLAYER LECTEUR DVD SDAT50U_FRONT 02 7 12 4 50 PM 1 ...

Page 2: ... 820 40 of the National Electrical Code that provides guidelines for proper grounding and in particular specifies that the cable ground shall be connected to the grounding sys tem of the building as close to the point of cable entry as practical CAUTION TO REDUCE THE RISK OF ELECTRIC SHOCK DO NOT REMOVE COVER OR BACK NO USER SERVICEABLE PARTS INSIDE REFER SERVICING TO QUALIFIED SERVICE PERSONNEL E...

Page 3: ...ace This product should not be placed in a built in installation such as a bookcase or rack unless proper ventilation is provided or the manufacturer s instructions have been adhered to 11 Power Sources This product should be operated only from the type of power source indicated on the marking label If you are not sure of the type of power supply to your home consult your product dealer or local p...

Page 4: ...moving covers may expose you to dangerous voltage or other hazards Refer all servicing to qualified service personnel 21 Damage Requiring Service Unplug this product from the wall outlet and refer servicing to qualified service personnel under the following conditions a When the power supply cord or plug is damaged b If liquid has been spilled or objects have fallen into the product c If the produ...

Page 5: ... Laboratories Dolby Pro Logic et le symbole double D sont des marques de commerce de Dolby Laborato ries Œuvres confidentielles non publiées 1992 1999 Dolby Laborato ries Tous droits réservés ENERGY STAR Program Information As an ENERGY STAR Partner SHARP has determined that this product meets the ENERGY STAR guidelines for energy efficiency ENERGY STAR is a U S registered mark WHY PURCHASE ENERGY...

Page 6: ...desired order programmed playback 31 To play repeatedly repeat play 32 To play the contents between the specified points repeatedly A B repeat 32 To select a title from the top menu of the disc 32 MP3 disc operation MP3 disc playback 33 Various settings To change the subtitle language 34 To change the audio language audio output 34 To change the angle 34 To brighten an image black level setting 35...

Page 7: ...ing or disassembly is prohibited Types of playable discs The DVD player can play back discs bearing any of the following marks For unplayable discs see page 5 Icons used in this operation manual Some functions may not be available depending on discs The following icons indicate the discs that can be used in the section Indicates DVDs Indicates audio CDs Indicates CD R RW with MP3 recording Some op...

Page 8: ...ystem connection cable 3 Video cable 1 Digital audio cable 1 FM antenna 1 Satellite speaker 5 QCNQG0055AWZZ QCNWG0048AWZZ 92LFANT1535A GBOXS0099AWM2 AM loop antenna 1 Stand 2 Antislip speaker cushion 1 sheet 20 pcs Speaker connection cord 5 QANTL0012AWZZ HOLD4809ASY1 PCUSG0129AWSA QCNWG0052AWZZ For signal power QCNWG0056AWZZ For DVD player QCNWG0047AWZZ For sound QCNWG0057AWZZ Blue Black Yellow Or...

Page 9: ...ponsible for any damage resulting from use of this system with a voltage other than that which is specified Caution During use the DVD player and the subwoofer amplifier unit will get warm do not touch warm areas of the DVD player and the subwoofer amplifier unit for pro longed periods to avoid damage to you or the DVD player and the subwoofer amplifier unit This system is equipped with special fu...

Page 10: ...s without the region number 1 or ALL CDG Video CD DVDs with PAL system Photo CD DVDs with SECAM system CD ROM DVDs with MPEG sound SACD DVD ROM Discs recorded in special formats etc DVD RAM DVD Audio Chapter 1 Title 1 Title 2 Chapter 2 Chapter 3 Chapter 1 Chapter 2 Track 1 Track 2 Track 3 Track 4 Track 5 Display Description Region number playable area number DVD discs are programed with region num...

Page 11: ...VD player 11 16 Audio Digital Input Jack 46 17 Coaxial Digital Audio Input Jack 11 18 Audio Input Jacks 11 15 46 19 System Connection Jacks to subwoofer amplifier unit 11 20 AM Loop Antenna Terminal 13 21 Antenna Ground Terminal 13 22 FM 75 Ohms Antenna Jack 13 7 8 9 10 11 13 14 1 2 3 4 5 1 7 8 2 3 4 5 6 9 10 11 12 13 15 16 17 18 20 21 22 19 Display Front Back 12 6 1 Left Front Speaker Indicator 8...

Page 12: ...gnetically shielded Center speaker 1 magnetically shielded Surround speaker 2 magnetically shielded Reference page 1 Speaker 2 Speaker Terminals 12 3 Mounting Holes for Stand or Bracket Optionally available 16 Using antislip speaker cushions You can install satellite speakers either vertically or horizontally Affix the cushions supplied to the bottom of the speakers to prevent them from slid ing o...

Page 13: ... Button 18 11 DVD Chapter Skip or CD MP3 Disc Track Down Button 29 33 12 DVD Chapter Skip or CD MP3 Disc Track Up Button 29 33 13 Disc Stop Button 28 14 Disc Play Button 27 28 15 Disc Tray Open Close Button 27 16 Disc Tray 27 17 System Connection Jack to AV control unit 11 18 Audio Output Jacks 11 19 Coaxial Digital Audio Output Jack 11 20 Video Output Jack 13 21 S video Output Jack 14 22 DVD Vide...

Page 14: ...43 12 Volume Up and Down Buttons 18 13 Return Button 19 31 42 14 DVD Zoom Button 35 15 TV Display Select Button 36 16 Timer Button 24 43 17 Sound Mode Select Buttons 39 18 Audio Mode Select Button 34 19 Display Select Button 18 20 TV Channel Select Buttons 47 21 Disc Stop Button 28 22 Disc Play Button 27 28 23 Digital Analog Band Select Button 25 47 24 Function Button 25 27 47 25 Disc Fast Forward...

Page 15: ... Button 31 7 Clear Button 26 30 8 DVD Initial Setting Button 19 9 Amplifier Initial Setting Button 41 10 Timer Button 24 43 11 Return Button 19 31 42 12 Audio Mode Select Button 34 13 Black Level Select Button 35 14 Disc Stop Button 28 15 Disc Play Button 27 28 16 Direct Number Buttons 26 30 40 17 Enter Button 24 33 43 18 Cursor Buttons 24 33 43 19 Sliding Cover 17 10 1 2 3 4 5 6 7 8 9 11 12 13 14...

Page 16: ...sound black Set the arrow upward Set them close to one another Set them close to one another Set the arrow to the left System connection cable For signal power Blue FM antenna Digital audio cable Connect either an audio digital cable or commercially available RCA cord Press the DIGITAL ANALOG button to switch between digital and analog signals accord ing to the connection AV control unit Connectin...

Page 17: ...e and and right and left terminals of the speaker cords The right speaker is placed on the right when you face the system See page 16 Only the supplied speakers should be used with this product Do not stand or sit on the speakers You may be injured Binding cords Tie the cords connected to the subwoofer amplifier unit with a cord holder Red Red Red Red Red Red Red Gray Gray Black Black Black Black ...

Page 18: ... turn off all the equipment Connecting to TV with video cable Notes Change the TV input in accordance with the connected jack Do not connect other equipment between the TV and the DVD player If they are connected via a VCR pictures may be distorted Supplied FM antenna Connect the FM antenna wire to the FM 75 OHMS jack and position the FM antenna wire in the direction where the strongest signal can...

Page 19: ... to INTER LACE Notes If your TV has different indications for the component video inputs Y CB and CR or Y B Y and P Y connect jacks with its matching color Do not connect to a component video input jack designed for the high vision sys tem which is not DVD compatible the images may be distorted or not appear What is progressive scanning The conventional TV system displays 30 frames of still images...

Page 20: ...display window to the upper side When set vertically an 3 8 cm disc cannot be played Note If the display window of the DVD player is placed on the lower side a disc may fall or may not be ejected Avoid changing the DVD player installation vertical or horizontal while a disc is playing The disc may be scratched To listen to the TV sound via the speakers of this system Using the audio cable you can ...

Page 21: ...er stands and speaker wall brackets are optionally available See page 51 Refer to their manuals for assembly The speakers may be placed beside or near the TV as they are magnetically shielded However color variation may occur depending on the type of the TV If color variation occurs Turn off the TV from the power switch After 15 30 minutes turn the TV on again If the color variation is still prese...

Page 22: ...ote control away from moisture heat shock and vibrations Test of the remote control Check the remote control after checking all connections have been made correctly See pages 11 18 Point the remote control directly at the remote sensor on the AV control unit Likewise point the remote control at the AV control unit to operate the DVD player unit The remote control can be used within the range shown...

Page 23: ...hey will not be used for a prolonged period of time CAUTION TO PREVENT ELECTRIC SHOCK MATCH WIDE BLADE OF PLUG TO WIDE SLOT FULLY INSERT To turn the power on Press the ON STAND BY button The power indicator lights up If the power does not turn on check if the power cord is plugged in properly Note When the ON STAND BY button on the remote control is pressed the power on both units turns on Volume ...

Page 24: ...Press the ON STAND BY button to turn the power on The startup screen appears If the startup screen does not appear set the input to DVD The disc should be stopped at this time 2 After pressing the button press the SETUP DVD button 3 Press the or button to select the menu and press the ENT but ton 4 Press the or button to change the setting and press the ENT button Example PLAYER MENU is selected R...

Page 25: ... DRC OFF Sets or cancels the control over the volume range Digital output ON Do not change the initial settings DOLBY DIGITAL BITSTREAM Selects the type of a sound signal sent from the coaxial dig ital audio output jack DPCM DTS ON OFF DOWN SAMPLING AUTO Converts the sound signal recorded by PCM of 96 kHz into 48 kHz 48 kHz 96 kHz PARENTAL PARENTAL LEVEL ALL Sets the viewing restriction level of t...

Page 26: ...for conversation and narration SUBTITLE A language for subtitle can be set The subtitle is displayed in a specified language DISC MENU A language for disc menus can be set Menu screens are displayed in a specified language English French Merci Thank you English French Merci Thank you ACTEURS PERSONNEL CAST STAFF English French Indicator Setting PLAYER MENU A language for screen display can be set ...

Page 27: ...ges 16 9 on a 4 3 size TV A 4 3 disc is played in 4 3 4 3 PAN SCAN When playing a wide image 16 9 disc the left and right sides of the image are cut pan scan to display a natural look ing 4 3 size image A wide image disc without pan scan is played back in 4 3 letterbox A 4 3 disc is played in 4 3 16 9 WIDE A wide image 16 9 is displayed when playing a wide image 16 9 disc When playing a 4 3 image ...

Page 28: ... KU Kurdish 5167 EU Basque 5771 KY Kirghiz 5247 FA Persian 5847 LA Latin 5255 FI Finnish 5860 LN Lingala 5256 FJ Fiji 5861 LO Laotian 5261 FO Faroese 5866 LT Lithuanian 5264 FR French 5868 LV Latvian Lettish Code Language name Code Language name 5953 MG Malagasy 6560 SN Shona 5955 MI Maori 6561 SO Somali 5957 MK Macedonian 6563 SQ Albanian 5958 ML Malayalam 6564 SR Serbian 5960 MN Mongolian 6565 S...

Page 29: ...e time will be displayed Follow steps 2 4 Note You can set the clock even when the power is off 1 Press the TIMER button 2 Within 5 seconds press the ENTER button 3 Press the or button to adjust the hour and then press the ENTER but ton AM 12 00 is 12 o clock midnight PM 12 00 is 12 o clock noon Press the or button once to advance the time by 1 hour Hold it down to advance continuously The 12 hour...

Page 30: ...urn the power on 2 Press the FUNCTION button to display FM or AM and then the BAND button repeatedly to select the desired frequency band FM STEREO FM or AM 3 Press the or button to tune in to the desired station Manual tuning Press the or button as many times as required to tune in to the desired station Auto tuning When the or button is pressed for more than 0 5 seconds scanning will start autom...

Page 31: ...eset number Example 28th station 10 2 8 Press buttons within 5 seconds To erase all the contents of the preset memory Back 1 Perform steps 1 3 in Listening to the radio on page 25 2 Press the ENTER button to enter the preset tuning saving mode 3 Within 5 seconds press the TUNER PRESET or button to select the preset channel number Store the stations in memory in order starting with preset channel 1...

Page 32: ...ying a audio CD The same operation can be performed by pressing the DVD CD button on the remote control 3 Press the button to open the disc tray Place the disc on the disc tray label side up If the display window of the DVD player is placed on the lower side a disc may fall or may not be ejected 4 Press the button to close the disc tray If the disc you are using supports auto start it starts playi...

Page 33: ... stop button a screen saver appears Then after additional 30 minutes the power turns off Front To interrupt playback Press the STILL PAUSE button To resume playback from the same point press the DVD CD button To stop playback Press the DVD CD button To resume playback after stopping sequential playback You can resume playback from the point that the playback is stopped To cancel the sequential pla...

Page 34: ...o 16 times The sound will break up during search but this is not faulty When search is performed during the DVD playback pictures may not be for warded or reversed in the search speed specified in this manual depending on the disc or the scene being played The same operation can be performed by holding down the or button on the DVD player for 2 seconds or more While a disc is playing press the or ...

Page 35: ...n playback functions are disabled 1 While in the stop or playback mode press the DIRECT button Example During DVD playback Example During CD playback 2 Selecting a chapter track Enter the chapter track number using the direct buttons 0 9 within 30 sec onds Selecting by title Select by pressing the or button within 30 seconds and enter the title number using the direct buttons 0 9 The cursor automa...

Page 36: ...disables programming To exit the programming procedure halfway through press the RETURN but ton To check the status during the programmed playback press the ON SCREEN or MODE button Even if you press the ON STAND BY button to enter the stand by mode or change the function from CD to another the programmed selections will not be cleared 1 While stopped press the MODE button twice 2 Press the DVD CD...

Page 37: ... from the top menu Notes The procedure shown here provides only general steps The actual procedure for using the title menu depends on the disc you are using See the disc jacket for details If the disc you are using does not have a title menu nothing appears on the screen 1 While the disc is playing press the REPEAT button Each time the button is pressed repeat play mode changes in the following o...

Page 38: ... turned off The screen displays up to 5 tracks for the programmed play If more tracks are entered the next screen appears Press the or button to switch the screen If you enter a wrong track press the CLEAR button To stop the programmed play press the DVD CD button twice 1 Load a disc containing MP3 tracks A menu screen appears 2 Press the or button to select a track and press the DVD CD button Pre...

Page 39: ...age and audio system refer to the manual of the disc To change the angle You can change the angle of view when playing a DVD video disc that contains scenes recorded from multiple angles Notes Some DVDs prohibit changing the angle The angle number is not displayed if the disc on which angle not recorded is entered Refer to the manual of the disc as the operation may vary depending on the disc 1 Wh...

Page 40: ...he part currently viewed refer to the indication in the lower right section of the screen 1 While a disc is playing press the BLACK LEVEL button 2 Within 5 seconds press the BLACK LEVEL button repeatedly to select ON or OFF Setting OFF Normal image ON Bright image BLACK LEVEL ON Front Back 1 While a disc is playing press the ZOOM button ZOOM indicator Each press of the ZOOM button cycles through t...

Page 41: ...pears 1 While the disc is stopped or played press the MENU button to display the disc menu Example Chapter Time Title Time Bit rate Total number of chapters Remaining playback time for the current chapter Elapsed playback time for the current chapter Current chapter number Remaining playback time for the current title Elapsed playback time for the current title Total number of titles Current title...

Page 42: ...n the home theater system Stereo Disc with this trademark The disc recorded in the Dolby Digital system is recognized by the system automatically when it is played back Standard Dynamic sound DTS Digital Theater Sys tems One of the digital audio systems for theatrical use As the sound quality is emphasized you can enjoy the realistic sound effect in the home theater system The disc recorded in the...

Page 43: ...t according to the input audio source Acoustic effect Standard The maximum of 5 1ch surround sound is reproduced to provide three dimen sional effect The system automatically emits the 5 1ch sound according to the recorded audio signal STANDARD will appear Dynamic sound You can enjoy the normal surround with various scenes MOVIE The bass level is increased for powerful sound effect MUSIC You can e...

Page 44: ... of disc is played the sound mode is changed to STEREO automatically The sound mode cannot be changed during its playback To enjoy in standard mode Example Dolby Digital 5 1ch While the disc is playing press the STANDARD but ton STANDARD will appear To enjoy with dynamic sound Press the DYNAMIC SOUND button Each press of this button changes the mode in the order of MOVIE MUSIC NIGHT Press the STAN...

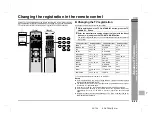
Page 45: ... batteries in the remote control the registered number may automatically be set to 01 SHARP If it occurs register the desired number again Registration cannot be executed depending on TVs Even if numbers can be set some buttons may not work Front Back 1 While holding down the TV ON STAND BY button press the TV CHANNEL button 2 Enter the manufacturer setting number 2 digits with the direct buttons ...

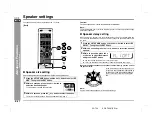
Page 46: ...ge 1 Press the SETUP AMP button and the or button to select SP SIZE Then press the ENT button 2 Within 10 seconds press the or button to select the desired speaker The indicators of selected speakers flash 3 Within 10 seconds press the or button to select their sizes To set sizes of other speakers repeat the operation from step 2 1 Press the SETUP AMP button and the or button to select SP DELAY Th...

Page 47: ...SETUP AMP button and the or button to select SP LEVEL Then press the ENT button 2 Within 10 seconds press the or button to select the desired speaker 3 Within 10 seconds press the or button to adjust the level You can adjust the level at 1 dB intervals To adjust the levels of other speakers repeat the operation from step 2 Press the SETUP AMP button and the or button to select TONE Then press the ...

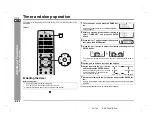
Page 48: ...Y does not appear 2 Within 10 seconds press the or button to select TIMER SET and press the ENTER button 3 Press the or button to adjust the hour and then press the ENTER button 4 Press the or button to adjust the minutes and then press the ENTER button The start time is set and the finish time 1 hour later will be displayed automati cally 5 Set the time to finish as in steps 3 and 4 above 6 Switc...

Page 49: ...ment should be set to timer playback at the same time Note The timer operation is disabled with discs containing menus 1 While in the timer playback stand by mode press the TIMER button 2 Within 10 seconds press the or button to select TIMER CALL and press the ENTER button The system returns to the timer playback stand by mode after the setting con tents are displayed in order When the start time ...

Page 50: ...e same CD 1 While the disc is playing press the TIMER but ton 2 Within 10 seconds press the or button to select SLEEP SET and press the ENTER button 3 Press the or button to select set the time Maximum 2 hours Minimum 1 minute 2 hours 5 minutes 5 minute intervals 5 minutes 1 minute 1 minute intervals 4 Press the ENTER button The sleep timer indicator lights up and playback begins 5 Your system wil...

Page 51: ...cal digital cable If you are using the digital tuner with the optical output jack you can enjoy better sound by connecting the tuner to the optical digital input jack of the AV control unit Caution Turn off the other equipment before making this connection Notes Change the audio between analog and digital with the DIGITAL ANALOG button page 47 Insert the plugs fully to avoid fuzzy pictures or nois...

Page 52: ...trol 1 Press the TV ON STAND BY button to turn on the TV 2 Press the TV CHANNEL or button to set the channel 3 Press the TV VOLUME or button to control the TV volume To enjoy the sound from the speakers of this system Turn on the system and press the FUNCTION button to select TV 1 Turn on the system and press the FUNCTION button For the digital tuner select AUX For the video select VCR 2 Turn on t...

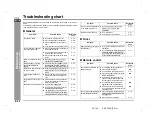
Page 53: ...gain The subwoofer amplifier is defective Place the system away from noise source or plug the AC power cords to other AC outlets The cooling fan on the back of the subwoofer ampli fier does not run due to foreign objects caught in it Is the system unplugged The digital audio input jack is not connected proper ly Unspecified signal is received and cannot be recog nized The system connection cable i...

Page 54: ...Hold down the DISPLAY button on the remote control for 2 seconds or more to select ON P 18 The power is not turned on Is the system unplugged P 18 Is the system connection cord for DVD player disconnected P 11 The protection circuit may be acti vated Unplug and plug in the power cord again after 5 minutes or more P 50 Symptom Possible cause Reference page The sound is not reproduced in the Dolby D...

Page 55: ...ymptom Possible cause Reference page Even though a disc has been loaded is displayed Is the disc loaded upside down Is the disc very dirty Playback sounds are skipped Does the disc satisfy the standards Is the system located near exces sive vibrations Has condensation formed inside the system P 48 The control buttons do not function Music or video play back is interrupted Is the disc very dirty Do...

Page 56: ...idual units DVD Player Periodically wipe the cabinet with a soft cloth and a diluted soap solution then with a dry cloth Do not use chemicals for cleaning gasoline paint thinner etc It may damage the cabinet finish Do not apply oil to the inside of the each component It may cause malfunctions FLOOR SPEAKER STAND TABLE SPEAKER STAND Model AD AT10ST Model AD AT10LS SPEAKER WALL BRACKET OPTICAL DIGIT...

Page 57: ...th 16 5 8 421 mm Weight 21 8 lbs 9 9 kg Power output FTC 40 watts minimum RMS per channel into 4 ohms from 20 Hz to 20 kHz 1 total harmonic distortion Rated power output Front 50 W 50 W Center 50 W Surround 50 W 50 W 4 ohms at 1 kHz Subwoofer 50 W 4 ohms at 100 Hz Amplification system 64fs 1 bit switching Remarks fs 44 1 kHz A D noise shaping 7th order delta sigma modulation Terminals Front speake...

Page 58: ...yond the time period described herein on behalf of Sharp The warranties described herein shall be the sole and exclusive warranties granted by Sharp and shall be the sole and exclusive remedy available to the purchaser Correction of defects in the manner and for the period of time described herein shall constitute complete fulfillment of all liabilities and responsibilities of Sharp to the purchas...

Reviews: