background image

Summary of Contents for EC-12SXT4B

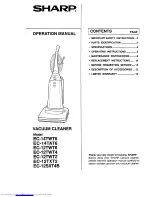
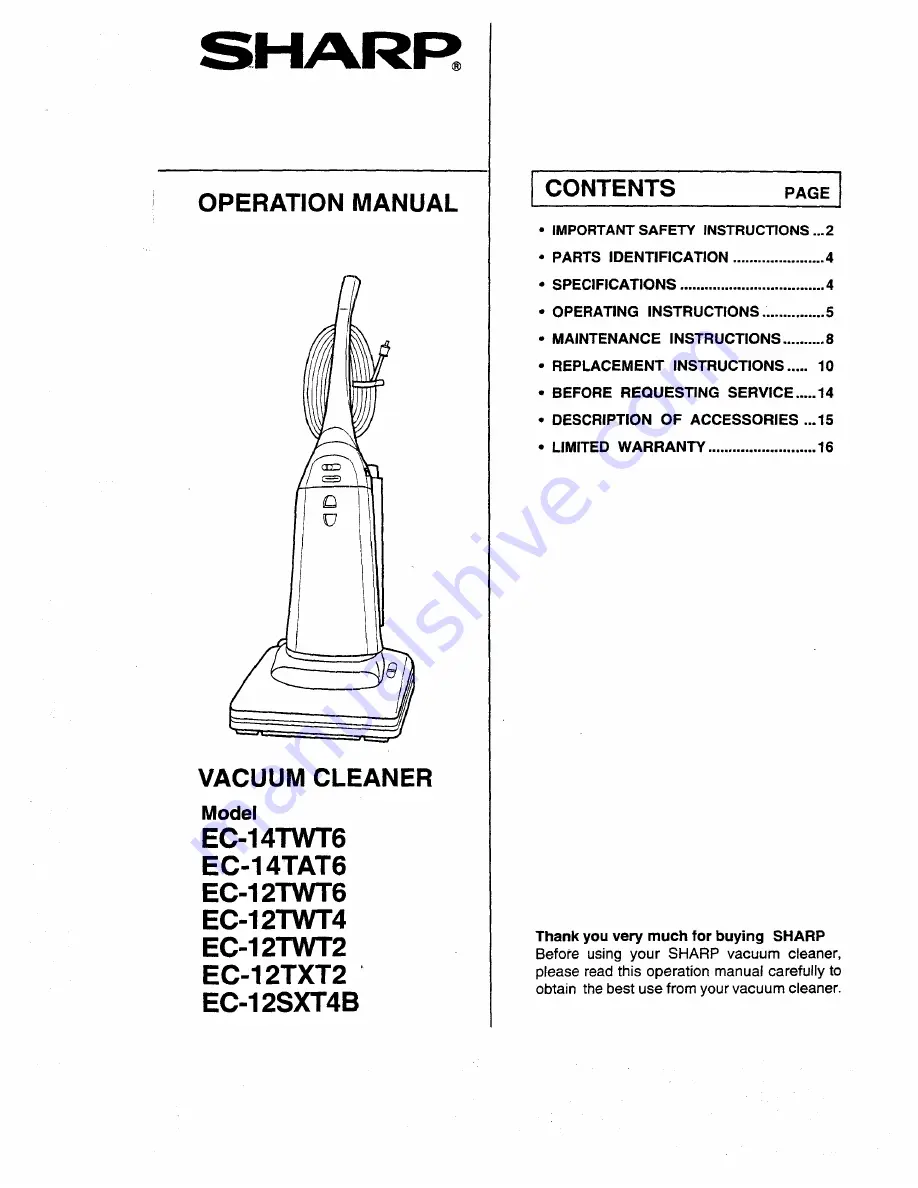
Page 1: ...PARTS IDENTIFICATION 4 SPECIFICATIONS 4 OPERATING INSTRUCTIONS 5 MAINTENANCE INSTRUCTIONS 8 REPLACEMENT INSTRUCTIONS 10 BEFORE REQUESTING SERVICE 14 DESCRIPTION OF ACCESSORIES 15 LIMITED WARRANTY 16 Thank you very much for buying SHARP Before using your SHARP vacuum cleaner please read this operation manual carefully to obtain the best use from your vacuum cleaner ...

Page 2: ... in the United States for examination and repair Do not pull or carry this vacuum cleaner by the power cord Do not use the power cord as a handle close a door on the cord or pull the cord around sharp edges or corners Keep cord away from heated surfaces Do not run this vacuum cleaner over the cord 7 Never disconnect the plug by pulling on the cord To disconnect from an outlet grasp the plug not th...

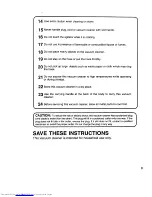
Page 3: ...ting or during storage _ 2 Store this vacuum cleaner in a dry place 23 use the carrying handle at the back of the body to carry this vacuum cleaner 24 Before servicing this vacuum cleaner allow all metal parts to cool first i i m iiiii i i i CAUTION To reduce the risk of electric shock this vacuum cleaner has a polarized plug _ I one blade is wider than the other This plug will fit in a polarized ...

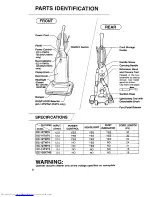
Page 4: ...Crevice Tool Packed in the box assemble by placing crevice tool inside wand as shown Clip wand into place C q _ _ zZ3 Suction Hose Upholstery Tool with Detachable Brush Foot Pedal Release SPECIFICATIONS s EC 14TWT6 EC 14TAT6 EC 12TWT6 EC 12TWT4 EC 12TWT2 EC 12TXT2 _EC 12SXT4B INPUT AMP 12 0 12 0 12 0 12 0 10 0 9 0 8 5 POWER CONTROL YES YES YES NO NO NO NO HEADLIGHT DUST iNDICATOR YES YES YES NO NO...

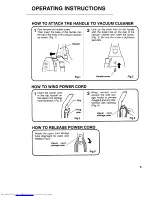
Page 5: ... cleaner and insert the screw Fig 2 Be sure the screw is tightened securely Handle screw Fig 2 HOW TO WIND POWER CORD 1 Insert the power cord in the clip located on the upper cord storage hook as shown Ficj 3 Clip side Fig 3 2 Wrap excess cord around the cord stor age hooks to prevent dragging and any inter ference with cleaning Fig 4 Upper cord storage hook Fig 4 HOW TO RELEASE POWER CORD r Rotat...

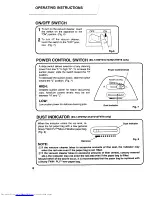
Page 6: ...s Medium power levels may be set between H and L LOW Low suction power for delicate cleaning jobs 1 ii i Fig 7 6 DUST INDICATOR EC 14Tw r6 14TAT6 12TWT6 only When the indicator enters the red area re place the full paper bag with a new genuine Sharp TWIN PLY_Micro Filtration paper bag Fig 8 NOTE Dust Indicator Red area 00000000 Fig 8 If the vacuum cleaner takes in excessive amounts of fine dust th...

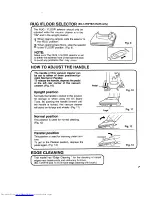
Page 7: ...r Parallel To release the handle depress the pedal at the left rear corner of the vacuum cleaner Fig 10 Upright position Normally the handle is locked in this position for storage or when using the On Board Tools By pushing the handle forward until the handle is locked this vacuum cleaner will stand on its legs and wheels Fig 11 Pedal __ Legs Fig 10 Fig 11 i i Normal position This position is used...

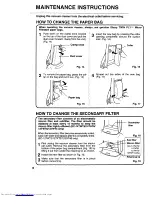
Page 8: ...ig 17 __1 L _ _ Fig 17 J HOW TO CHANGE THE SECONDARY FILTER i fThe secondary filter consists of an electrostatic micron filter and subfilter The filter should be replaced at least every 10 months to keep the micron filter highly efficient EC 14TWT6 14TAT6 12TWT6 12TWT4 only When the secondaryfilter becomes excessively soiled wash with water and replace after it is completely dried EC 12TWT2 12TXT2...

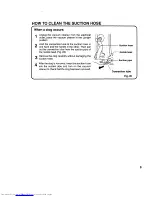
Page 9: ..._ one hand and the handle in the other Then pull out the connection tube from the suction pipe of the nozzle head Fig 20 3 Remove the clog carefully without damaging the suction hose 11 After the clog is removed insert the suction hose into the suction pipe and turn on the vacuum cleaner to check that the clog has been removed Suction hose Nozzle head Suction pipe Connection tube Fig 20 9 ...

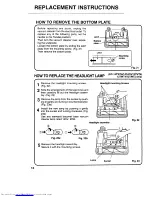
Page 10: ...E THE HEADLIGHT LAMP 1 2 3 EC 14TWT6 14TAT6 12TWT6 12TWT4 12TWT2 only i ii 4 Remove the headlight mounting screws Fig 22 Note the arrangement of the lead wires and then carefully lift out the headlight assem bly Fig 23 Remove the lamp from the socket by push mg in gently and turning it counterclockwise Fig 23a Install the new lamp by pushing it gently into the socket and turning clockwise Fig 23b ...

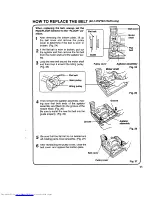
Page 11: ...op the new belt around the motor shaft and then loop it around the idling pulley Pulley cover Agitator assembly Fig 25 Fig 24 t _ _ _ _ Moter shaft _ _ _ _ Main pulley L__ __ Idling pulley Fig 25 4 Then reinsert the agitator assembly mak ing sure that both ends of the agitator assembly are fitted into the groove of the nozzle head Fig 26 Be sure to install the new flat belt into the guide properly...

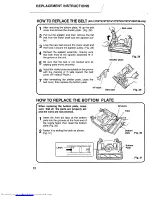
Page 12: ...the belt is not twisted and all rotating parts move smoothly Install the shelter plate completely in the groove with the marking of R side toward the belt cover R means Rear 7 After reinstalling the shelter plate close the belt cover then replace the bottom plate Belt cover Fig 28 Shelter plate R mark New belt Fig 29 HOW TO REPLACE THE BOTTOM PLATE v_ When replacing the bottom plate make sure that...

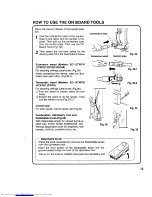
Page 13: ... wand Models EC 14TWT6 14TAT6 12TWT6 For reaching cellings curtai ns etc Fig 36 _Turn the wand to unlock wand will turn freely Extend the wand to its full length Then turn the wand to Iock Fig 33 2 Crevice tool For door tracks narrow spots etc Fig 34 Combination Upholstery tool and Detachable brush Fig 35 With detachable brush for cawed furniture table tops books lamps baseboards etc Without detac...

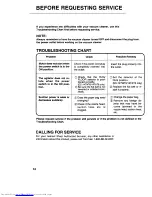
Page 14: ...eck that the RUG FLOOR selector is posi tioned correctly EC 14TWT6 14TAT6 only Be sure the flat belt is not severed or installed incor rectly Q Does the paper bag need changing _ Check if the nozzle head suction hose etc is clogged Possible Remedy Insert the plug properly into the outlet _Set the selector at the RUG position EC 14TWT6 14TAT6 only Replace the flat belt or in stall it properly O Cha...

Page 15: ... 14TWT6 14TAT6 only AGITATOR ASSEMBLY EC 12TWT6 12TWT4 12TWT2 12TXT2 12SXT4B only TWIN PLY_MICRO FITRATION PAPER BAG SECONDARY FILTER WITH MICRON EXTENSION VIAND Slender EXTENSION WAND Larger TELESCOPIC WAND EC 14TWT6 1 4TAT6 12TWT6 only CREVICE TOOL UPHOLSTERY TOOL without Detachable Brush DETACHABLE BRUSH DRTR A003VBK0 DRTR A004VBK0 EC 03PU2113PCS IN 1 PACK EC 10PU2 10PCS IN 1 PACK EC 01MU3 1 PC...

Page 16: ...purchaser Correction of defects in the manner and for the period of time described herein shall constitute complete fulfillment of all liabilities and responsibilities of Sharp to the purchaser with respect to the Product and shall constitute full satisfaction of all claims whether based on contract negligence striict liability or otherwise In no event shall Sharp be liabte or in any way responsib...

Reviews: