93
SD CARD Mode
You can exchange data through an SD memory card between your register and a PC when managing the
data in your register by using the SHARP’s PC software “PC-Link”.
For “PC-Link”, consult your dealer.
You can also save all necessary data in the register to an SD memory card for backup.
To use the SD memory card function, select the “7 SD CARD MODE” in the mode selection window and
perform the following operations.
This instruction manual describes only those operations needed on the register. For details, please refer to
the help section in the “PC-Link”.
■
Inserting and removing an SD memory card
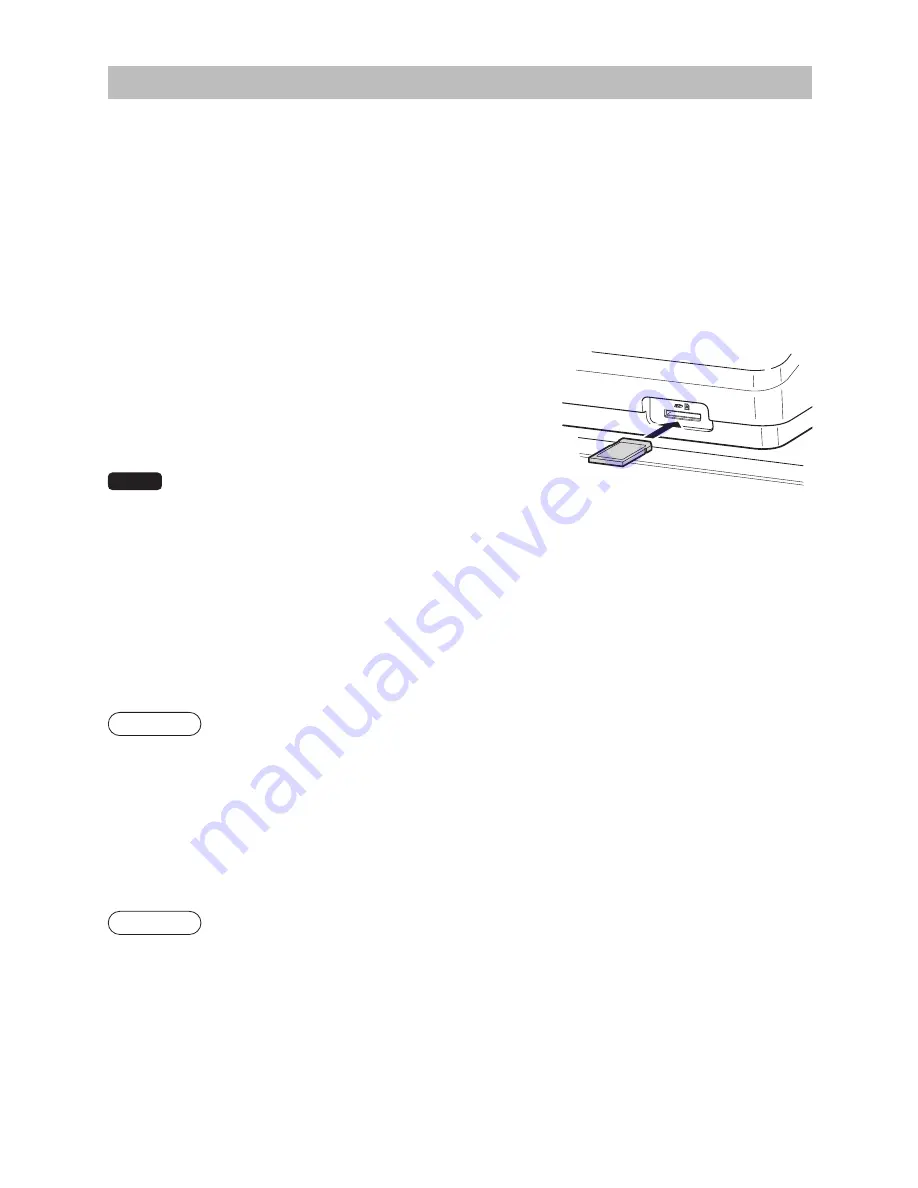
The SD card slot is located on the front side of your register.
Inserting an SD memory card
Insert an SD memory card into the SD card slot with the printed
SD logo facing upwards. Push the card in steady with a finger until
it clicks and release it slowly.
Removing the SD memory card
Push the card in gently with a finger and release it. The card will
come out.
NOTE
• This model supports SD cards only. Use of any other types of SD
cards such as mini SD, micro SD, etc. with an adapter is not supported.
• When inserting or removing the SD memory card, be sure to release it slowly. Otherwise, the card may pop
out and injure your finger.
• Never touch or remove the SD memory card while it is accessed, otherwise the data stored in it may be
damaged.
• Formatting the SD memory card erases all the data in it.
CAUTION: Never turn the power off, while the SD memory card is accessed.
■
SD card formatting
When the SD card is not formatted yet, take the formatting operation.
Procedure
(1) Select “4 FORMATTING” in the SD CARD mode and press the
A
key, the confirmation window
is displayed.
(2) To perform the format operation, select OK and press the
A
key.
To cancel the operation, select CANCEL and press the
A
key.
■
Folder creating
A user folder can be created in the following location:
SHARP/ECRER2X7/nnnnnnnn (nnnnnnnn: user folder name)
Procedure
(1) Select “3 FOLDER CONTROL” in the SD CARD mode and press the
A
key.
(2) Select “1 CREATE FOLDER” and press the
A
key, the folder name entry window is displayed.
(3) Enter the required folder name and press the
A
key.
To cancel the operation, press the
a
key.


