background image

Summary of Contents for FO-135

Page 1: ......

Page 2: ... rrlay not necessarily provide for the effective hand over of a call to or from a telephone connected to the same line NEW ZEALAND PTC211 The operation of this equipment on the same lines as telephones or other equipment with audible warning devices or automatic ring detectors will give rise to bell tinkle or noise and may cause false tripping of the ring detector Should such a problem occur the u...

Page 3: ...ost commonly used type of facsimile machine today Inaddition to the basic operations of sending and receiving documents it provides a variety of special features designed to increase the range and power of your communication These make it an ideal tool for the office no matter how big or small the scale of operation i ...

Page 4: ...MBERS FOR AUTOMATIC DIALLING 3 4 4 BASIC OPERATIONS 4 1 TRANSMISSION 4 1 RECEPTION 4 8 COPYING 4 Il VOICE COMMUNICATIONS 4 12 5 USING YOUR FAX WITH OTHER DEVICES 5 1 ANSWERING MACHINE 5 1 EXTENSION TELEPHONE 5 7 6 OPTIONAL SETTINGS 4 1 7 PRINTING OUT REPORTS AND LISTS 7 1 8 USER MAINTENANCE 8 1 RECORDING PAPER 8 1 CLEANING THE MACHINE m 8 2 9 TROUBLESHOOTING 9 1 PROBLEMS AND SOLUTIONS 9 1 MESSAGES...

Page 5: ... A Whentransmitting orcopyinga document settheseguidesto Use handset t O t d n d E t T e t T a i t A LOOK AT THE MACHINE 1 1 ...

Page 6: ...A LOOK AT THE MACHINE t c R a t a a o g f f I I J 0 L m m m 5 m m I t n a t c m a Up h A LOOK AT THE MACHINE ...

Page 7: ...nning The temperature should be between 5 and 35 C The humidity should be between 300 0 and 85 without condensation E l e c t r A 230 240 V 50 Hz earthed 3 prong AC outlet is required I e a i o a p p t s T e l e p j a A standard telephone jack must be located near the machine I t h m a c i m o f r a c o t a w p l If the machine is moved from a cold to a warm place it is possible that the reading g...

Page 8: ...Take the machine out of the box carefully and remove all packing material Make sure you have all the items listed below If any are missing contact your dealer o i a Z manual Q R N o t s s INSTALLATION ...

Page 9: ...ust the volume switches on the left side of the machine c RINGING VOLUME Set the switch at high H medium M or low L as desired SPEAKER VOLUME setting from high H to low L as desired Set the mode of dialing with the DIAL switch Select T if you are on a touch tone line or P if you are on a pulse dial rotary line Be sure to make the correct setting or you will not be able to make a call WARNING NOTIC...

Page 10: ...be placed so that the leading edge of the paper feeds from the top of the roll Make sure the hubs on each side of the c fit into the ends of the roll The hub on the left side is mounted on a spring to allow for inser tion 3 Pass the leading edge of the paper through the received document exit c Make sure there is no slack in the paper 4 S R Close the operation panel by gently pushing down on the c...

Page 11: ...machine performs In particular they are printed at the top of each page you transmit To give the machine your name and fax number press the panel keys as shown in the procedure below f o f Step Press these keys I Comments 1 O a i OWNPASSCODE SET I I I a a Example I o I d I S T n 7 I S I INITIAL PROGRAMMING 3 1 ...

Page 12: ...during a name storing procedure press the panel keys as shown a below a a r n I 1 1 I I I I 01 I I 0 i I I I 4 o o Cursor left o r s e S y m b l i To a below the key r symbol appears 1 I I 3 2 INITIAL PROGRAMMING ...

Page 13: ...ime by pressing the keys on the operation panel as shown below a a I I I 1 Day SUN MON TUE WED THU I FRI SAT I I I I Step I Press these keys 1 Comments 1 3 Select I I I I I I 1 4 I Example 2 I 5 Examp I 2 E Œ 6 À 2 I I I I 7 Example a I I I I 8 am I I E amPl I S I 1 I I 1 I D i 10 hec ockwi S I I Exit I INITIAL PROGRAMMING 3 3 ...

Page 14: ...Dialing allows you to combine two or more Automatic Dialing numbers or use an Automatic Dialing number followed by additional digits entered manually with the numeric keys to dial a single number In addition to being convenient for storing long numbers it allows you to store an area code or access code as an Automatic Dialing number For example to store a 26 digit numberfor Automatic Dialing youwo...

Page 15: ...STORING NUMBERS FOR AUTOMATIC DIALING a c a a t a a r II tep Press these keys I I 1 il D 03 Comments 1 1 I I 1 I 1 a I II c a I I I a O S 4 i a INITIAL PROGRAMMING 3 5 ...

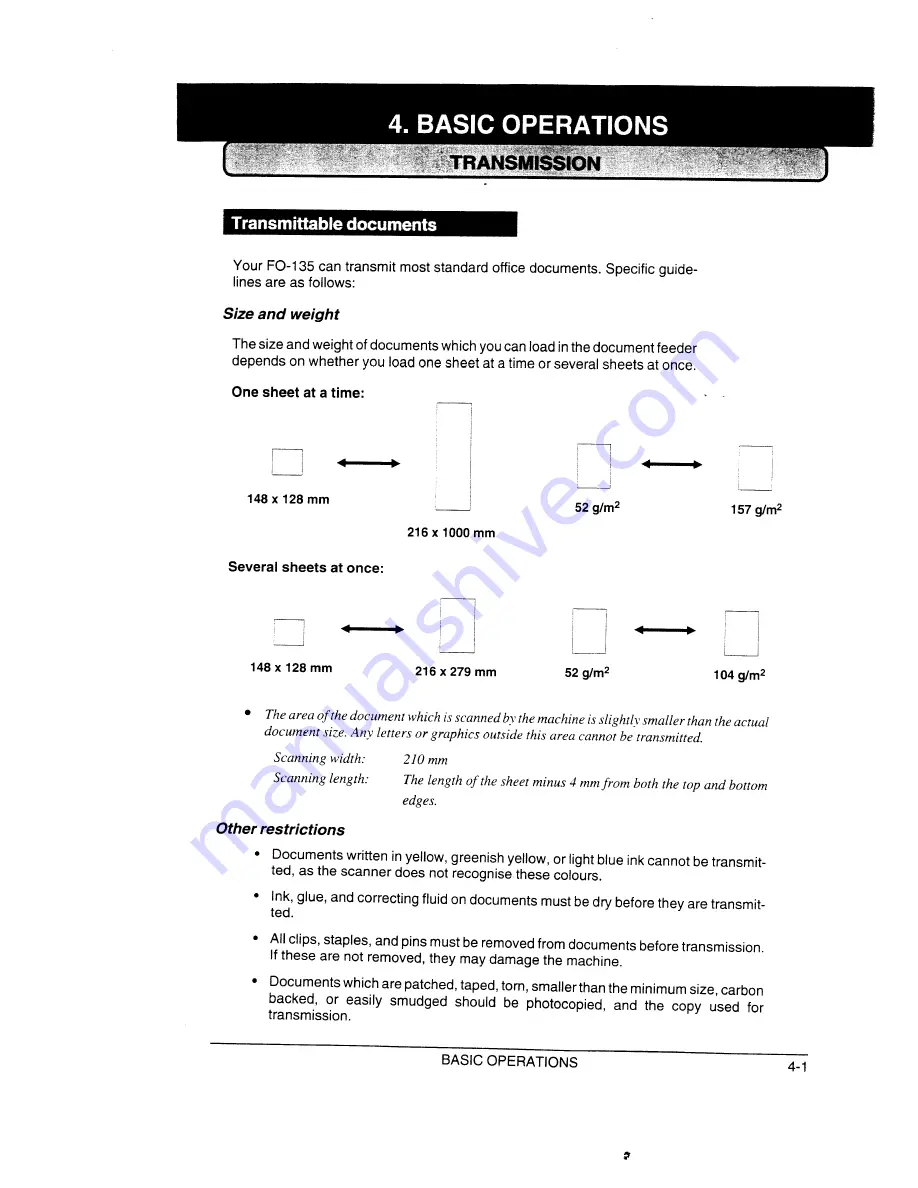
Page 16: ...I I 4 press to exit make changes in a number previously stored repeat the storing proce dure Select the code number for which you want to make changes in Step and then change the number and or name when they appear in the display Steps 5 and 7 respectively Numbersand letters are changed as described in Entering lettersfor names in this chapter A a p c 5 y 3 6 INITIAL PROGRAMMING ...

Page 17: ... the scanner does not recognise these colours Ink glue and correcting fluid on documents must be dry before they are transmit ted All clips staples and pins must be removedfrom documents before transmission If these are not removed they may damage the machine c Documents which are patched taped torn smallerthan the minimum size carbon backed or easily smudged should be photocopied and the copy use...

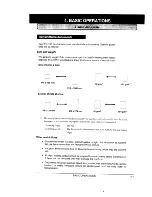
Page 18: ...ment guides to the width of your document 2 Place the document face down and push it gently into the document feeder The top edge of the document should enter the machine first The feeder will draw the leading edge of the document into the machine SEND READY will appear in the display 3 You can now either make resolution and or contrast settings as described in the following section or party as de...

Page 19: ...machine will automatically send the document in STANDARD The default setting can be changed to FINE by adjusting User Switch l see Chapter 6 Optional settings r r r a C o n t The contrast is normally set to AUTO which means that the machine automatically controls the contrast but for very light documents you can change the setting to DARK M a k t s e t t Pressthe RESOLUTION key one or more times u...

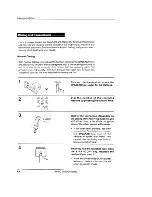
Page 20: ...ption you can talk with them before sending the fax W o p Pick up the handset or press the SPEAKER key Listen for the dial tone 2 Dial the number of the receiving machine by pressing the numeric keys h ma ma 3 4 Wait for the connection Depending on the setting of the receiving machine you will either hear a facsimile reception tone or the other person will answer i If the other party answers ask t...

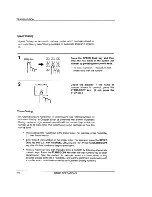
Page 21: ...al digits and then re enter the correct digits R a p K D i a If the number you want to dial has been stored for Automatic Dialing as a Speed Dial number from 01 to 20 see Storing numbers for Automatic Dialing in Chapter 3 you can dial it by pressing the corresponding Rapid Key Press the Rapid Key corresponding to the desired Speed Dial number 02 03 04 05 I I 1 oa o9 10 The name of the receiving pa...

Page 22: ...number or digits entered manually with the numeric keys to dial one number up to digits long The following are some examples of how this can be done Press appropriate Rapid Keys in the proper order For example press Rapid Key 01 then Rapid Key 02 c Enter Speed Dial numbers in the proper order For example press the SPEED DIAL key and 22 then the SPEED DIAL key and 23 Press the START COPY key after ...

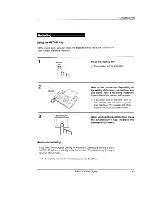
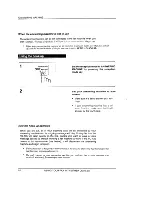
Page 23: ...eception tone or the other person will answer If the other person answers pick up the handset and ask them to press their Start key This causes the other machine to issue a reception tone 3 S When you hearthe reception tone press the START COPY key Replace the handset if you used it A u t o m r e d i If you use Direct Keypad Dialling or Automatic Dialing and the line is busy the FO 135 will automa...

Page 24: ...and facsimile transmissions on the same line Automatic reception is generally used for a dedicated fax line only fax transmis sions will be coming in J R E M A N M A M A C h o J R E M A N M A M A C h Q Setthe modeof reception with the recep tion mode key on the panel For manual reception set the switch to MANUAL For automatic reception set the switch to AUTO TheANSWERING MACHINE setting is used wh...

Page 25: ...send a document press the START COPY key after speaking 3 Hang up when RECEIVING appears in the display When reception is ted the buzzer will sound Note a a t 4 o p s In automatic reception mode the FO 135 automatically answers all calls and receives the incoming documents 2 s 1 4 o a a After receiving a document grasp the paper by the edge and pull upwards to tear it off BASIC OPERATIONS 4 9 ...

Page 26: ...ional settings A C H o t h f u n c t o p e r When a call comes in the machine answers it The number of rings the machine waits before answering depends on which reception mode is used and the User Switch setting made for that mode if the machine detects a fax tone it begins reception automatically If the machine doesn t detect a fax tone it will make a special ringing sound called pseudo ringing f...

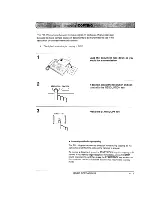
Page 27: ... be p t r needs adjustment r 1 Load the document face down as you would for a transmission 2 If desired adjust the resolution and con R no h trast with the RESOLUTION key o 3 S Press the START COPY key a a document i O ...

Page 28: ...ate Rapid Key c Speed Dialing Press the SPEED DIAL key and enter the 2 digit Speed Dial number with the numeric keys 3 R e d i Speak with the other party when they answer up the handset The last number called can be redialed by pressing the REDIAL key it is not necessary a H o You can put the other party on hold during a conversation by pressing the HOLD key this is done they cannot hear you You c...

Page 29: ... i d e Your answering machine must be set to answer on 1to4 rings preferably 1 or2 If it is set to ring on more than 4 rings you may not be able to receive faxes sent by automatic dialing If your answering machine has a remote retrieval function make sure the code used to activate remote retrieval is different from the code used to activate fax reception with an extension telephone see Extension t...

Page 30: ... answer Make sure it is set to answer on 1 to 4 rings s If your answering machine has a toll saver function make sure that it will answer by the fourth ring H o t h h o o k o p e r While you are out all of your incoming calls will be answered a on the line Callers who want to leave a voice message can do so without knowing a fax machine is there If the FO 135 detects a fax transmission see below i...

Page 31: ...o ways whether the fax is being sent automatically or manually A t a a t such depending on as Rapid t a a m a t t a a t 1 4 e c t t a t such as NormalDialing the transmittingmachinedoesnot a a r a H a t a f t d a a a a 6 c a t t FO 135 d a 6 N o t A f d r d t a d r a s USING FAX WITH OTHER DEVICES 5 3 ...

Page 32: ...eriod of silence are 1 to 10 seconds A setting close to 6 seconds will generally give the best performance but you can try other settings if desired For example some answering machines have fast dis connect times approximately 4 seconds and in this case you should try a setting of 3 seconds The factory setting is 6 seconds Important A p t r m r m s a c a a l s a m p Step Press these keys Comments ...

Page 33: ...ce callers can leave a message You can set Quiet Detect Time to start at any time from 1 to 15 seconds after the answering machine answers or enter 00 for no delay The factoty setting is 00 off Hint a Step Press these keys I I I S 4 m Comments I I t I Set a I I I A n s w e M a c F a i M o When this function is turned on the fax machine will answer the call after 6 rings if the answering machine fo...

Page 34: ...re having trouble receiving faxes in answering machine mode you can try various time settings to see if it helps You can select any time from 1 to 255 seconds Entering 000 turns the function off The factory setting is Important s a g m m a r a p I II Step Press these keys Comments F 1 1 0 e M 1 I I 3 I se the hold time 3 Example seconds withthenumerickeys I S 5 6 USING YOUR FAX WITH OTHER DEVICES ...

Page 35: ... reception by pressing 5 and A t e t a r e t d s t r C o n n e a e x t e t e l e or Plug the end of the extension telephone line either into the jack on the back side of the F080TP adaptor or into the jack marked TEL SET on the fax machine first remove the seal from the jack WITH OTHER DEVICES 5 7 ...

Page 36: ...r party will speak If you hear a fax tone go to Step 3 2 If the other party wants to send a fax after speaking ask them to press their Start key 3 w o Press 5 and on your telephone If connec ted to a wall jack you must press and during the interval 3 9 seconds after picking up the handset Reception will begin Hang Note a fmr S 5 8 USING FAX WITH OTHER DEVICES ...

Page 37: ...nal settings are available which you can use to fine tune the FO 135 to your needs The settings are called Step Press these keys I Comments I 2 m I I I 3 o 2 Example I S I 4 I Switch1 R r t a r 1 5 1 Switch a 4 OPTIONAL ...

Page 38: ... OPTIONAL F C l t a r T t s T c T a 1 f t r a t d A C a 1 1 l v d r a h v d t a t h OPTIONAL ...

Page 39: ...red in the machine a sample of what is printed at the top of every page you transmit HEADER PRINT and the current status of the optional settings for answering machine hook up U s S w i L i T 2 O f 1 F T N F N C 2 5 1 S x N E T 1 C D L 0 Q 1 i 4 0 S 3 S T 1 0 T 9 S 0 S S 2 a N S N 1 P L 2 O M 1 F T N S F X MC 2 5 1 S N E N E T F l I S T t 2 5 1 M P 2 R 1 T S F 2 S 1 P 9 I M 1N Q E D T I M e E O H ...

Page 40: ...transaction and error every transmission and error or not at all Change the setting by resetting User Switch 6 T R 2 O M 1 F T S F a R I 2 5 i 2 S D S R E E P T N 2 1 6 1 3 O o E x p l a n a o h e a d t R f c t r T r A o A r r A t t a t T d t a f Transmission errors 1 r h E O I 1 I r h E 1 r E 2 d t d l E 3 f d m I t I I I I r h E 6 r j I r r E 7 t I Reception errors I 1 E 1 d 1 Ii 2 t E 3 t I 1 t...

Page 41: ...scolored if c It is stored in a place with high humidity or high temperature G It is exposed to direct sunlight It comes in contact with glue thinner or a freshly copied blueprint G It is scratched causing heat due to friction A rubber eraser or adhesive tape is used on it Sharp paper has a black stripe on the last 1 5 m of the roll When the machine detects this stripe it finishes printing the cur...

Page 42: ...yl alcohol C a u t i l a c Clean the reading glass and rollers frequently to ensure the quality of transmitted images and Open the operation panel and clean them as shown below Wipe the reading glass white backplate and rollers with a cotton pad or soft Doc cloth roller Makesurethatall dirtandstains such as those of correcting fluid are removed as these will cause vertical lines on transmitted ima...

Page 43: ...e DIAL switch is correct tone T or pulse P Nothing is printed at the I Make sure that the document for transmission is receiving end placed face down in the feeder Make sure that the recording paper is properly loaded at the receiving machine The power is on but no Make sure that the receiving machine has recording I transmission takes place paper If the receiving machine is in manual mode with no...

Page 44: ...ay have a a copy to check it I I Noise on the telephone line may cause distortion Have the other party try sending the document again The recording head may be dirty see Cleaning the scanning and printing parts in Chapter 9 I Make a copy of another document If the copy is also distorted your machine may have a problem If the problem persists call for service I Make sure that the recommended record...

Page 45: ...I I t I 1 I D a d T s I F I 1 P 1 1ON HOOKD AL A t i I I I o C I i 3 5 1 I t I t or I I I TROUBLESHOOTING 9 3 ...

Page 46: ...xtend to the received docu ment exit 1 Open the operation panel and remove the paper roll 2 Cut off the wrinkled part of the paper 3 Reload the paper Jammed recording paper is often caused by improper loading Be sure to carefully follow the instructions for paper loading given in Loading the recording paper in Chapter 2 9 4 TROUBLESHOOTING ...

Page 47: ...r Halftone grey scale Contrast control Copy function Telephone function Power requirements Operating temperature Power consumption Dimensions Weight Public switched telephone network H t s H 8 F 7 x 5 1 A bps with automatic fallback to 7200 4800 or 2400 mode 210 mm Length 128 to 1000 mm 210 O A s be used if power fails V AC 50 Hz 5 to 35 C Stand by 13 W Maximum 110 W Width 340 mm Depth 255 mm Heig...

Page 48: ... document numerickeys Waitfor STHCWV receptiontone D f Hangup Load RESOLUTION document o Dial press numerickevs L d T 7 Load RESOLUmON PressRapid document O Key L Lift handset Normal Dialing Dial press Lifi handsetif numerickeys d press Rapid Key Dialing Lifthandset PressRapid Lifthandsetif Key you pressed press I Lift handset SPEEDDIAL S p e D i a l press o EnterSpeedDialnumber Lift handsetif pre...

Page 49: ...ation follow the instructions which appear A n s w e I t a Pressuntildesireditemappears machine settings I I Printing out lists H o Pressuntildesir ditemappears j Entering y o n a a n u m m I S e t t t d a a n t i m E n t e r i n I R a p K a F S p e D i n u m b SettingUser I FUNCTION S w i t I pres tildesireditemaPpears QUICK REFERENCE GUIDE Quick ii ...

Page 50: ...Loadingthe document 4 2 N o p Normal Dialing 4 4 Number of Rings to answer 6 1 Numeric keys 1 2 0 Off Hook Hold 5 6 Operation panel knob 1 1 P Paper Save 6 2 Paper used in fax machine 8 1 Passcode List 7 1 Power switch 1 1 Pause in Automatic Dialing 3 5 Q Quiet Detect TM time 5 4 Quiet Start Time 5 5 R Rapid Key Dialing 4 5 Rapid Keys 1 2 Reading glass cleaning 8 2 Reception 4 8 Automatic 4 9 Manu...

Page 51: ...SHARP CORPORATION OF AUSTRALIA PTY LTD A C N 003039405 1 tiuntingwood D r H u n t Blacktown N S W 2148 SHARP CORPORATION PRINTED IN THAILAND TINSE3360XHZZ ...

Reviews: